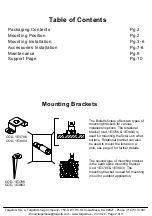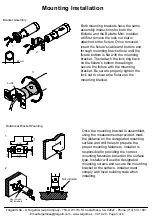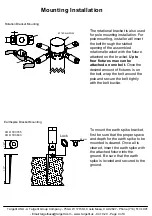
The Bulletto and the Bulletto mini fixture are powered by a 24VDC constant
voltage
power supply
that is
installed remotely.
This installation must be done by a qualified electrician that complies with NEC
and local building code. CAUTION: DO NOT CONNECT FIXTURE TO LIVE VOLTAGE! THIS WILL
DAMAGE THE FIXTURE AND VOID THE WARRANTY!
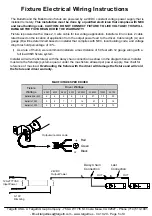
Fixture is powered with a class 2, 3 wire cable for low voltage application. Installer will run class 2 cable
rated based on the location of application from the output power feed to the driver. Cable length (A) and
gauge (B) will be determined based on installer that complies with NEC, local building code, and voltage
drop threshold percentage of <3%.
i) As a rule of thumb, we recommend installers a max distance of 50 feet with 12 gauge wiring with a
full load 96W fixture system.
Installer will wire the fixture(s) with the daisy chain connection as shown in the diagram below. Installer
must wire the fixture(s) system equal or under the max fixture allowed per power supply. See chart for
reference of max load.
Overloading the fixture with the driver will damage the fixture and will void
the fixture and driver warranty.
Fixture Electrical Wiring Instructions
Targetti USA - A Targetti Group Company - 750-A W 17th St. Costa Mesa, CA 92627 - Phone (714) 513-1991
-
Email:[email protected] - www.targetti.us -
04.10.20 - Page 5 of 9
R
ed
Green
Black
+
-
Output wire color code
IN
Daisy Chain
Connection
OUT
OUT
MAX FIXTURES PER DRIVER
Fixture
Wattage
Driver Wattage
40W
60W
96W
90W
2X90W
3X90W
100W
2X100
Bulletto Mini
8W
4
6
9
9
18
27
10
20
Bulletto
10W
3
4
7
7
14
21
8
16
Bulletto
12W
2
4
6
6
12
18
6
13
IN
120-2777VAC
Input Power
0-10V
Dimming
Last
Connection
24VD
C
Out
put Power


