background image

7

General Instructions

BATTERY REPLACEMENT:

When the battery is getting weak, the sensor LED will blink red.  When the power is too 
low to actuate the water fl ow, the sensor LED will stay lit red.  To replace the batteries:

1. Shut off  water supply and remove the fl at head VR star screw and cap from the top 

of the faucet body.

2. Remove the screw and cover from the battery holder.

3. Replace the weak batteries with four (4) new AA alkaline batteries in the battery

holder by matching the + or - markings in the bottom of the holder.

4. Reinstall the battery cover.  Make sure all wires are tucked in the faucet body 

when reinstalling the battery cover.

5. Reinstall the cap and fl at head VR star screw  and turn water supply back on.

INSTRUCTIONS FOR SETTING THE SENSOR RANGE:

The EC-3122 uses a digital infrared, distance adjustable sensor which has a default 
range set at the factory.  Should this range need to be changed, follow the steps 
below.  The sensing distance is adjustable from 3/4” (2cm) to 6 11/16” (17cm).

1. Shut off  the water at the hot and cold supply stops.

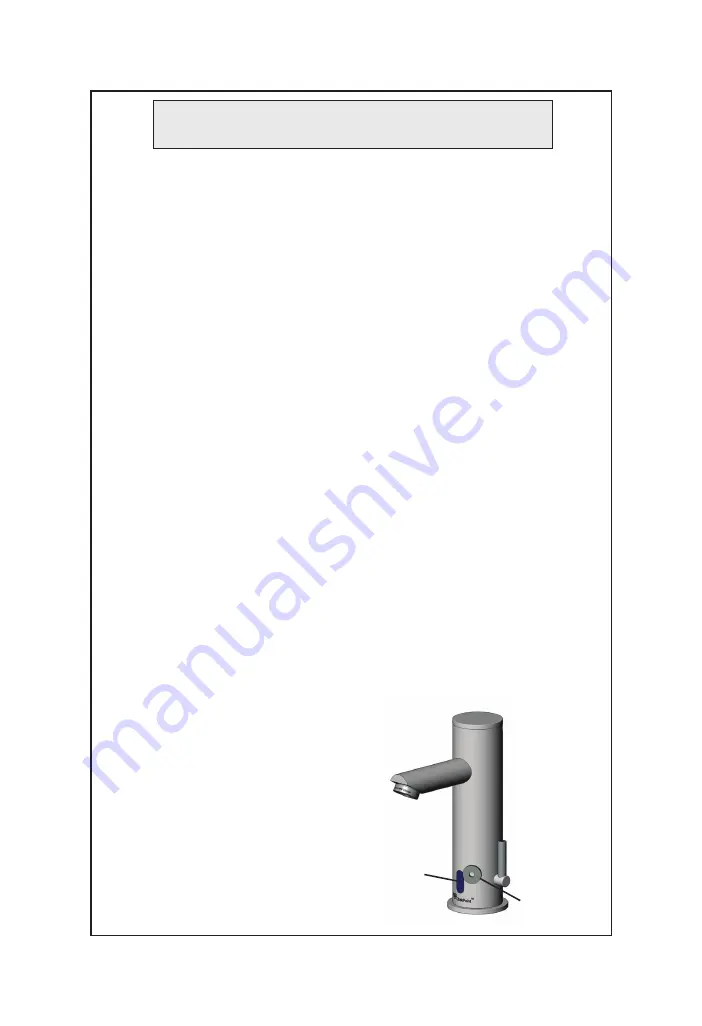
2. Place the magnet provided to the upper right side of the sensor lens and move it 
closer to the lens.  

3. Hold the magnet in place for 3 to 5 seconds.  The red sensor LED will come on for 
set-up mode.

4. Remove the magnet and the sensor LED will go out.

5. Place a hand to the desired sensor range, hold in place and the LED will light up. 
(The recommended sensor range is 3/8” [1 cm] in front of the spout)

6. Place the magnet to the right side of the sensor lens and move it closer to the lens 
until it starts blinking 5 times.

magnet

sensor lens

7. Remove your hand and magnet from 
the sensor area.

8. Turn on the water at the hot and cold 
supply stops.

9. Move a hand into the range set in 
step 5 which will activate the sensor 
(the LED will blink once) and water will 
begin to fl ow.

10. If after removing your hand from the 
sensor range, the water continues to 
fl ow for longer than 2 seconds, then the 
sensor range will need to be reset to a 
shorter distance.

Содержание ChekPoint EC-3122

Страница 1: ...ement shall be made within a reasonabletimeafterreceiptbyT Softhereturned product ThiswarrantydoesnotcoverItemswhich have received secondary finishing or have been altered or modified after purchase or for defects caused by physical abuse to or misuse of the product or shipment of the products Any express warranty not provided herein and any remedy for Breach of Contract which might arise is hereb...

Страница 2: ...Exploded View 2 FIGURE 1 EC 3122 7 3 4 1 2 8 5 6 ...

Страница 3: ...crew Wrench Kit 018160 40 2 Battery Holder 018227 45 3 2 2 GPM VR Aerator B 0199 09 4 Vandal Resistant Key 015425 45 5 Lever Handle w Screw 018230 45 6 Flex Hose w Check Valve Adapter Assembly 018232 45 7 Mounting Hardware Kit 018233 45 8 A C Transformer 5EF 0002 ...

Страница 4: ... receptacle within approximately 12 from sink for plug in transformer 120 VAC 2 amp service for each plug in transformer used Installation of EC 3122 ChekPoint Faucet Refer to Figures 1 and 2 The EC 3122 ChekPoint Faucet has above deck sensor electronics and temperature control Power is supplied by four AA batteries in the top of the faucet body Another power option is an AC transformer connected ...

Страница 5: ...g to the settings on SW 5 and SW 6 then the sensor range will need adjusting refer to INSTRUCTIONS FOR SETTING THE SENSOR RANGE TEMPERATURE ADJUSTMENT 1 Push the lever on the right side towards the back for hotter water 2 Pull the lever towards the front for colder water FEATURES AND SWITCH SETTINGS The EC 3122 ChekPoint controller offers settable water flow control adjustment selections These sel...

Страница 6: ... FLUSH SWITCH 4 The ChekPoint controller offers the option to select the Auto Flush mode in switch 4 position When enabled the controller will flush the Chek Point faucet every 12 hours for 25 30 seconds when the faucet is not used Default setting from the factory is in the off position General Instructions LOW BATTERY DETECTION A red flashing light in the electronic eye indicates low batteries A ...

Страница 7: ... be changed follow the steps below The sensing distance is adjustable from 3 4 2cm to 6 11 16 17cm 1 Shut off the water at the hot and cold supply stops 2 Place the magnet provided to the upper right side of the sensor lens and move it closer to the lens 3 Hold the magnet in place for 3 to 5 seconds The red sensor LED will come on for set up mode 4 Remove the magnet and the sensor LED will go out ...

Страница 8: ...op s open if closed 2 Debris in supply hose filter washers remove clean and reinstall 3 Debris in aerator or spray head remove clean and reinstall 1 Check surroundings for factors that can contribute to the range for example bright lights highly reflective surfaces sunlight etc 2 Range too long decrease sensor range 1 Debris in solenoid valve won t close properly Contact factory Very Low Flow or S...

Страница 9: ...4 Fax 864 834 3518 2441 CW Nieuwveen E mail tsbrass tsbrass com The Netherlands RELATED T S BRASS PRODUCT LINE EC 3122 4DP ChekPoint Electronic Faucet Single Hole Deck Mount with Deck Plate EC 3122 VF05 ChekPoint Electronic Faucet Single Hole Deck Mount 2 2 GPM Vandal Resistant Aerator Optional Vandal Resistant 0 5 GPM Spray Device EC 3122 HG ChekPoint Electronic Faucet Single Hole Deck Mount Hydr...

Отзывы: