background image

6.


Connect the Wi-Fi/RF control box to the fan 

a.


Insert the metal romex clamp (provided) into a hole in the junction box and fasten with the retaining nut. 

b.


Slip the fiberglass protective sleeving (provided) over the end of the wiring harness, sliding it back several 

inches 

c.


Slide the ends of the wires into the junction box through the hole containing the romex clamp 

d.


Secure the ground wire (green) to the junction box with the ground screw (See 1.B.b)  

e.


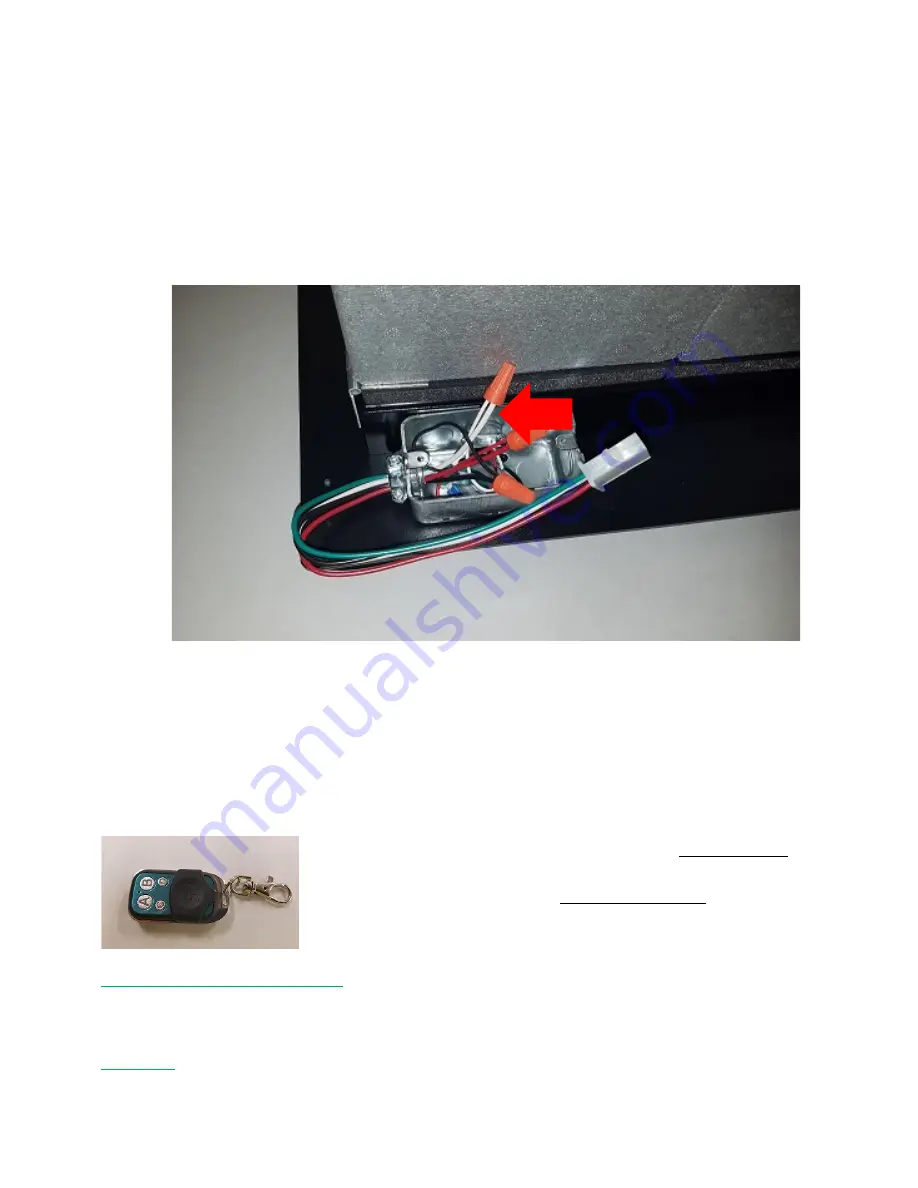
Attach each wire from the HV1600 fan to the matching colored wires of the wiring harness 


BLACK wire form the fan (switched hot) to the BLACK wire from the harness 


RED wire from the fan (constant hot) to the RED wire from the harness 


WHITE wire from the fan (neutral) to the WHITE wire from the harness 


f.


Adjust the length of wire into the junction box to accommodate the mounting location 

g.


Slide the sleeving under the romex clamp 

h.


Tighten romex clamp over the fiberglass protective sleeving  

i.


Replace the junction box lid to the hard mounted junction box 

j.


Plug the Wi-Fi/RF control box into wire harness connector (confirm they are solidly connected)  

k.


Plug the line cord into an available power outlet 


Hand Held Remote  

The Wi-Fi / RF models are provided with a 4 button pre-programed hand held 
(key fob) remote. The “A” button controls ON/OFF power to the fan. The “B” 
button controls LOW/HIGH speed. C & D are not in use. You may use a 
433MHz frequency remote as an alternate remote. To reprogram, if 
necessary, follow the instructions below.


ERASING STORED REMOTE CODES: 

Locate the receiver module you wish to clear from the remote (see 

diagram 3d). Quickly press the pairing button three times. A 

red

 LED will be lit for 3 seconds to confirm the 

codes have been erased


LEARNING: 

Locate the receiver module you wish to pair to the remote (see diagram 3d). Quickly press the 

pairing button twice in a row. Press the corresponding button on the remote for 1 to 2 seconds. Test with 
the remote to confirm the remote function. 

7e 

Содержание TTi-HV1600-RFwRR

Страница 1: ...erform these tasks before removing the RF control box from your fan To connect the Wi Fi receivers to the home network provide power to the control box ONLY Devices that must be present to control the Wi Fi fan An active 2 4GHz b g n wireless home network Not compatible with 5 0GHz A Smart Device You may also use Alexa or Google Home and a smart device to control the fan without the need to log in...

Страница 2: ...x to the home network with the EWelink app a Provide power to the control box without it being connected to the HV1600 b Remove the lid to the HV1600 control box to gain access to the EWelink Wi Fi devices Use a 1 sized Phillips head screw driver to remove the 6 black screws on the black box lid c Locate the ON OFF receiver module inside of the box d Press the Pairing button on the ON OFF module f...

Страница 3: ... control box from power outlet place the control box lid onto the box and tighten screws 5 Remove the RF Remote system from the HV1600 at the fans location a Terminate power to the HV1600 i Unplug the control box from the outlet or if hardwired shut off the circuit breaker providing power to the circuit Disconnect the line cord from the power supply in the junction box and cap the wires that were ...

Страница 4: ...lamp h Tighten romex clamp over the fiberglass protective sleeving i Replace the junction box lid to the hard mounted junction box j Plug the Wi Fi RF control box into wire harness connector confirm they are solidly connected k Plug the line cord into an available power outlet Hand Held Remote The Wi Fi RF models are provided with a 4 button pre programed hand held key fob remote The A button cont...

Страница 5: ...connectivity Failure to connect Perform a factory reset page 3 I lost broke the hand held remote Can I buy a new one Yes You will need access to the control box to pair it to your fan Optional Wiring manual switches to operate the fan bypassing the Wi Fi control There are three wires located in the junction box hard mounted to the HV1600 Wi Fi Box that will allow for the use of two SP ST single po...

Страница 6: ...This Page Intentionally Left Blank ...

Отзывы: