background image

Installation

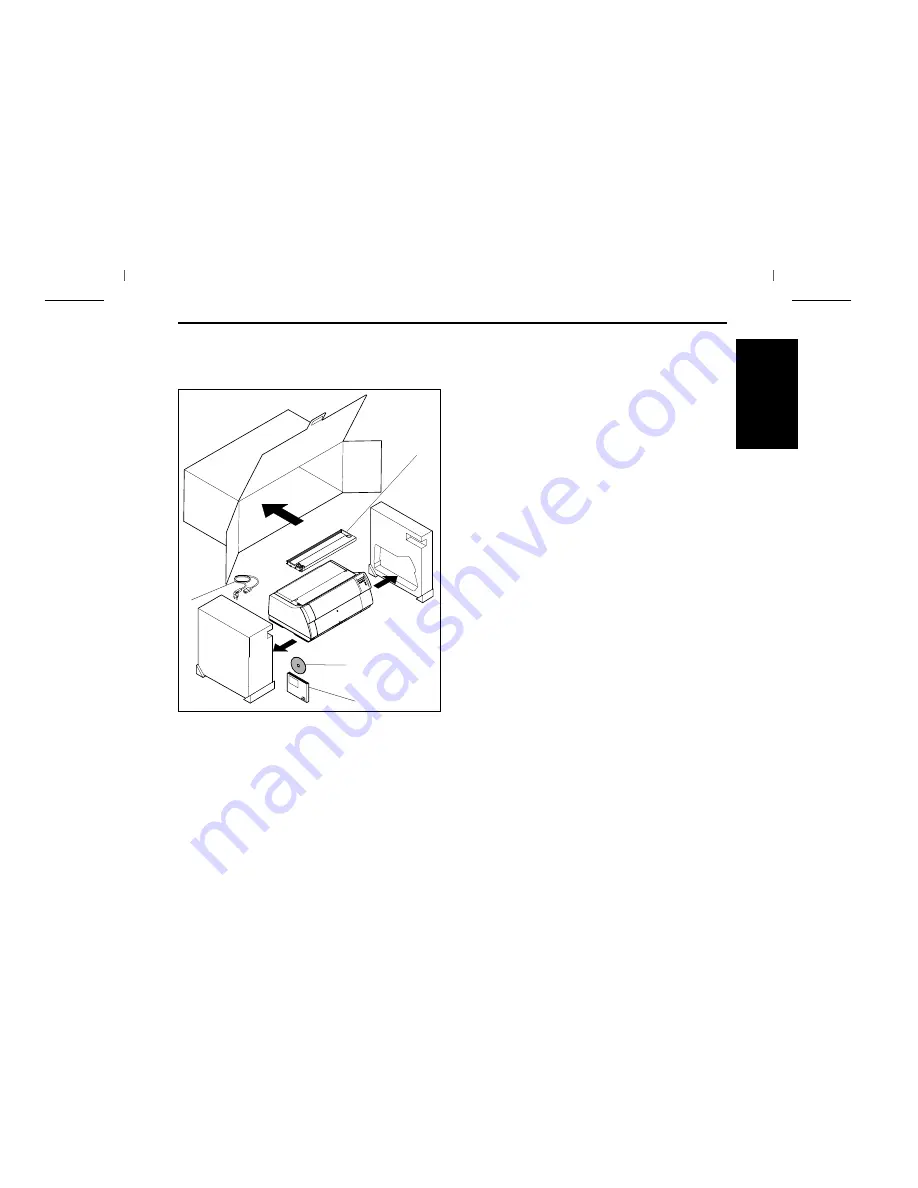
Unpacking the printer

Place your printer on a solid base.
Make sure that the “ Up”  symbols point in the correct direction.
Open the packaging, take out the accessory cassette and unpack
it. Pull the printer out of the cardboard box towards you and
remove the remaining packaging material.
Check the printer for any visible transport damage and missing
items. In addition to this Operator’s Manual (

) the CD-ROM

(

, at the back of this manual), the power cable (

) and the

ribbon (

) must be included.

If you find any transport damage or if any accessories are
missing, please contact your dealer.

ENGLISH

Quick start guide

Installation

5

Содержание 2265+

Страница 1: ...2265 SprintPro 2280 SprintPro Quick Start Guide Matrix Printer...

Страница 2: ...ipheral away from the receiver Plug the peripheral into a different outlet so that the pe ripheral and receiver are on different branch circuits If necessary the user should consult the dealer or an e...

Страница 3: ...the printer 7 Control panel 8 Online mode 8 Offline mode 8 Setup mode 8 Changing the ribbon cassette 9 Paper handling 15 Changing the paper type 15 Loading paper 16 Fanfold paper 16 Single sheets 19 P...

Страница 4: ...ons thoroughly before starting up your printer in order to prevent injuries and avoid damage to the device Keep this Operator s Manual in a place which is easily accessible at all times Place the prin...

Страница 5: ...res Drivers For Windows 98 ME Windows 2000 Windows XP 2003 Server Additional documentation Programming instructions and descriptions of the available options If your CD ROM is be defective or missing...

Страница 6: ...witch Front cover View from the front Printer in tractor mode Tractors Printer in single sheet mode View from the rear Power cord connector Interface connectors Bottom cover Paper support Rear cover S...

Страница 7: ...r out of the cardboard box towards you and remove the remaining packaging material Check the printer for any visible transport damage and missing items In addition to this Operator s Manual the CD ROM...

Страница 8: ...the vicinity of inflammable gas or explosive substances Do not expose the printer to direct sunlight If you cannot avoid placing the printer near a win dow protect it from the sunlight with a curtain...

Страница 9: ...the power cable to the power inlet of the printer Connect the power cable plug to a mains socket Switching on the printer The power switch for switching on the printer is located at the bottom left at...

Страница 10: ...Changing the paper type Key 2 Short keypress Microstep forward Long keypress Continuous paper feed Key 3 Short keypress Microstep reverse Long keypress Continuous paper reverse feed back to the park p...

Страница 11: ...bbon cassette is installed It also checks during the execution of a print job the operativeness of the ribbon cassette These functions mandatory require the use of the manufacturers original ribbon ca...

Страница 12: ...r front Move the coloured friction tab to the left direction of the arrow as shown in the figure and raise the friction mechanism The print head becomes hot during printing For this reason let it cool...

Страница 13: ...Remove the used cassette Raise the coloured insertion tongue A A ENGLISH Quick start guide Changing the ribbon cassette 11...

Страница 14: ...the arrow in order to take up the slack of the ribbon Tilt the ribbon cassette slightly forward and thread in the ribbon between the coloured insertion tongue and the ribbon support transparent plast...

Страница 15: ...of the two locations Turn the tension knob to take up slack in the ribbon until it is seated correctly at the bottom in the ribbon support Press down the coloured insertion tongue A A ENGLISH Quick st...

Страница 16: ...sistance Press the friction mechanism down until it clicks into place Close the front section of the top cover The ribbon should be transported during the travel from left to right If this is not the...

Страница 17: ...is loaded in the printer it is fed to the tear position The text tear paper off appears in the display Then press any key If a single sheet is loaded in the printer it is ejected Use one of the marke...

Страница 18: ...e message PW sensor defect appears in the display it is impossible to print If a printing line overrides the measured paper width the characters out of range will not be printed and the message Paperw...

Страница 19: ...and align it to the paper width Insert the fanfold paper into the right hand tractor Make sure that it is inserted by the same length as on the left hand tractor in order to avoid any paper jam Close...

Страница 20: ...e front cover Switch the printer on The active paper source Traktor1 appears in the display The paper is automatically loaded when the printer is in online mode and receives data from the computer Pre...

Страница 21: ...re that the printer is set to single sheet mode If necessary change the paper type see page 15 Changing the paper type Press the latch at the middle of the front cover The single sheet input tray open...

Страница 22: ...ingle sheets can be transported in the printer in several ways Make sure that the printer is in offline mode press the Online key if necessary Key 2 Short keypress Paper is transported upwards step by...

Страница 23: ...he fanfold paper to the tear edge of the top cover see below The display alternates between and After having torn off the paper press the Exit 4 key The printer returns the paper to the first printing...

Страница 24: ...mode Press the Adjust 2 key Press the Tear 4 key The printer performs a form feed Pressthe 2 or 3 key to move theperforationtothedesiredposition Confirm the input by pressing the Set 1 key Confirm the...

Страница 25: ...y The printer performs a form feed The paper is fed to the position where the bottom edge of the first printing line A is aligned with the tear edge of the top cover B The factory setting for the firs...

Страница 26: ...p key The printer changes to setup mode Press the Adjust 2 key Press the Head 1 key Use the 2 or 3 key to set the range within which the automatic gap adjustment is to be corrected You can select valu...

Страница 27: ...select the desired font Confirm the selection by pressing the Set key You can cancel the selection and leave the setting unchanged by pressing the Exit 4 key Press the Setup key The printer returns t...

Страница 28: ...0 pages min ECMA Character densities 10 cpi 12 cpi 15 cpi 17 1 cpi 20 cpi Max resolution horizontal 360 dpi vertical 360 dpi Emulations Standard MTPL Epson LQ2550 LQ2170 IBM XL 24 Noise level 55 dB A...

Страница 29: ...requires individual testing Paper weight No of copies Form thickness max 60 120 g m2 1 6 2265 1 5 2280 0 60 mm Single sheet feeder Single sheets Single set of forms requires individual testing Paper w...

Страница 30: ...ENGLISH...

Страница 31: ...accuracies of information herein TRADEMARK ACKNOWLEDGEMENTS Centronics is a trademark of Centronics Data Computer Corporation PCL and PCL6 are trademarks of Hewlett Packard Company IBM and IBM PC are...

Страница 32: ...http www tallygenicom de ITALY TallyGenicom S R L Via Borsini 6 I 20094 Corsico MI Italia Tel 39 02 48608 1 Fax 39 02 48601 141 http www tallygenicom it CANADA TallyGenicom 125 Traders Boulevard 9 Mis...

Отзывы: