2
could occur if the tool is tipped or if the cutting
tool is unintentionally contacted.
9. CHECK DAMAGED PARTS. Before
further use of the tool, a guard or other part
that is damaged should be carefully checked
to determine that it will operate properly and
perform its intended function - check for
alignment of moving parts, binding of moving
parts, breakage of parts, mounting, and any
other conditions that may affect its operation. A
guard or other part that is damaged should be
properly repaired or replaced.
20. DIRECTION OF FEED. Feed work into a
blade or cutter against the direction of rotation
of the blade or cutter only.
2 . N E V E R L E A V E T O O L R U N N I N G
UNATTENDED. TURN POWER OFF. Don't
leave tool until it comes to a complete stop.
22. When servicing use only identical
replacement parts.
23. POLARIZED PLUGS. To reduce the risk of
electric shock, this equipment has a polarized
plug (one blade is wider than the other). This
plug will fit in a polarized outlet only one way. If
the plug does not fit fully in the outlet, reverse
the plug. If it still does not fit, contact a qualified
electrician to install the proper outlet. Do not
change the plug in any way.
VOLTAGE WARNING:
Before connecting the
tool to a power source (receptacle, outlet, etc.)
be sure the voltage supplied is the same as
that specified on the nameplate of the tool. A
power source with voltage greater than that
specified for the tool can result in SERIOUS
INJURY to the user - as well as damage tothe
tool. If in doubt, DO NOT PLUG IN THE TOOL.
Using a power source with voltage less than
the nameplate rating is harmful to the motor.
EXTENSION CORDS.
Make sure your extension cord is in good condition. When using an
extension cord, be sure to use one heavy enough to carry the current your product will draw. An
undersized cord will cause a drop in line voltage resulting in loss of power and overheating. Table
1 shows the correct size to use depending on cord length and nameplate ampere rating. If in
doubt, use the next heavier gauge. The smaller the gauge number, the heavier the cord.
TABLE MINIMUM GAUGE FOR CORD SETS
Total Length of Cord in Feet
0-25
26-50
5-00
0-50
Ampere Rating
More Not More
Than Than
0 - 6
6 - 0
0 - 2
2 - 6
8
8
6
4
6
6
6
2
6
4
4
4
2
2
Not Recommended
Содержание TKBG-150
Страница 1: ......
Страница 5: ...FUNCTIONAL DESCRIPTION 1 2a 5 7 6 7 5 3 10 2b 3 10 2 2 8 1 8 6 9 4 3 3 2 2...
Страница 6: ...2c 3 4 5 6 7 3 2 6 3 10 10 3 2 10 max 2 mm 5 6 max 2 mm 5 7 6 7 7...
Страница 7: ...8 9 A D B C A A 5...
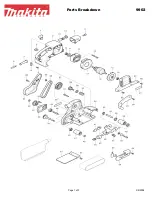
Страница 13: ...12 Mod TKBG 150 Parts Breakdown...
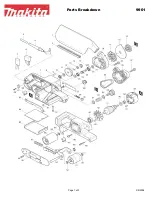
Страница 15: ...14 Mod TKBG 150 A TKBG 200 Parts Breakdown...


