background image

1. INTRODUCTION AND SAFETY

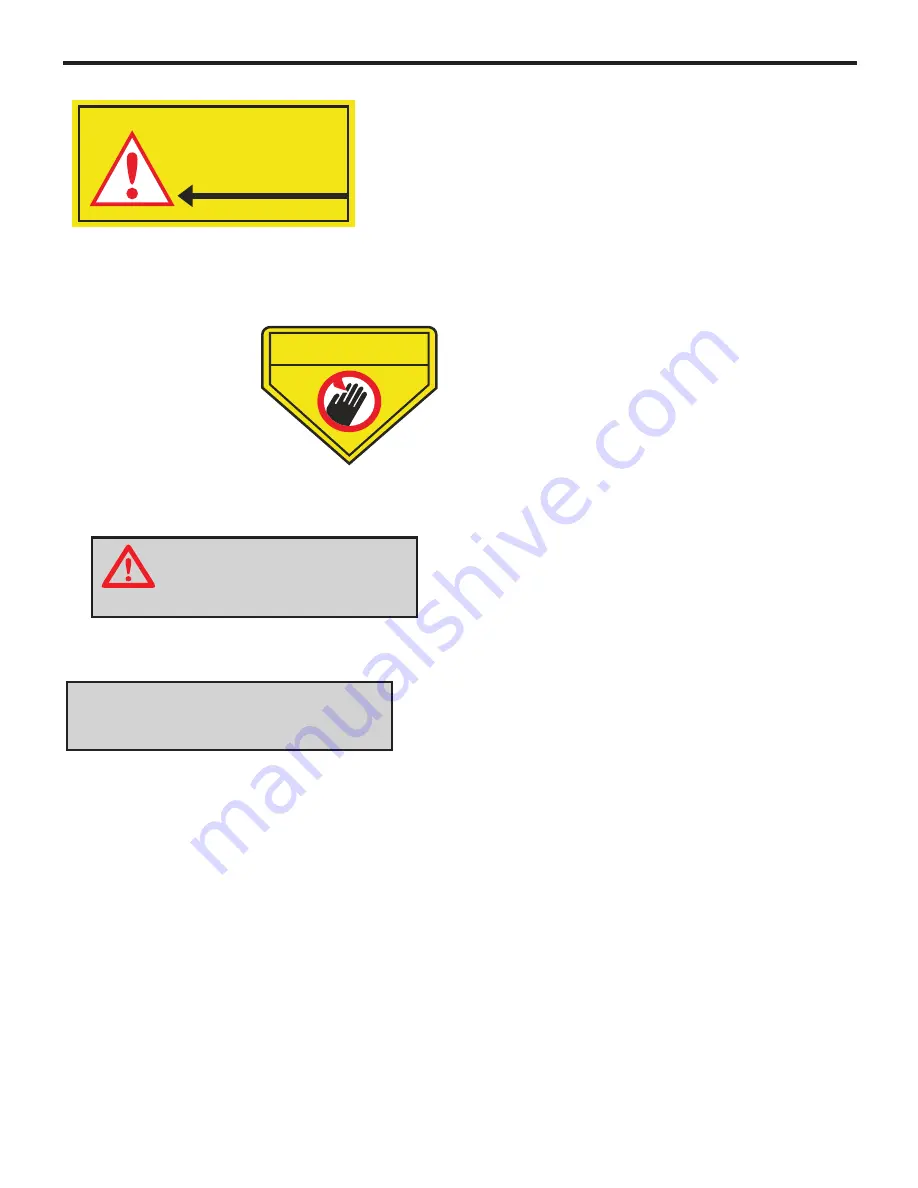
This label is pasted on charging station, please make 

sure to position this side towards lawn interior. Failure
to do may result in damage to property or persons.

DANGER! Sharp rotating

 blade. Keep hands and feet


injury can

 away. Serious 


4. Charging station symbol.

5. Warning symbol.

 occur.

1.3 Symbols in the User Manual

These symbols can be found in this user manual.

A warning box indicates a risk of personal injury exist. 

An information box indicates a risk of material damage
exist, especially when the stated instructions are not 
followed. The box is also used where there is a risk of 

WARNING

xxxxxxxxxxxxxxxxxxxxxxxxx.

IMPORTANT INFORMATION

xxxxxxxxxxxxxxxxxxxxxxxxxxxxxxx.

user error.

 1.4 Safety instructions

-  Read the owners/operation manual carefully and    


and warning instructions.

follow all the safety 

-  This machine has sharp rotation blades! Never allow 


operate unattended; keep bystanders, 

the mower to 


mower when in operation.

children and pets away from 

-  Never allow anyone to ride or sit on mower.

-  Never allow anyone or person who is not familiar with 


of the mower to operate the mower.

the safe operation 

-  Keep hands and feet away from the cutting blades
   and 

parts.

other moving 

-  Never attempt to service or adjust the mower while it 

- Inspect and clear the mowing area of all debris (toys, 


items of clothing, anything with a height 

tree branches, 


mower.

less than 6cm) before operating the 

- Never raise the mower or attempt to inspect the 


is operating.

blades while the mower 

- Always turn off the power before lifting the mower or 


adjustment.

attempting any 

- When operating the mower in manual mode, maintain  


wear proper foot apparel.

- Do not operate the mower on slopes greater than 30 


a firm footing is not possible.

   device is damaged or inoperable. 

- Do not attempt to disable or defeat any safety feature


is in operation.


from behind or around the mower and 

a safe distance 


manual operation on slopes where

degrees or use it in 

- Do not operate the mower if any safety feature or 

   or device.

- Use heavy gloves when inspecting or servicing the 

- Wear eye protection and use gloves when installing 


driving the wire stakes/pegs. Firmly 

the virtual wire and 


wire from becoming

drive all pegs in order to keep the 

- Do not use the charging station power supply with an

- Use only the original equipment power pack and power


with this mower.

 supply/charger 

- Do not use the power supply/charger if the cord has

- Do not place metal objects in the area of the charging


 charging station.

 sheets on the

- Do not place metal objects across the charging heads

- Do no spray water directly into the docking area of the 


or onto the control panel on charging 

charging station 

- The mower has sharp rotating blades! Please care the 


mowing, in case of serious injury occur.

mower when it is 

- Keep the lawn mower in perfect operating conditions 


maintenance procedures outlined 

by performing the 


maintenance


by the manufacturer. Good 

 guarantees

  better performance and longer service life.

- In order not to irreversibly damage electric and 


wash the robot with water jets

electronic parts, do not 


partially or 

 at a high pressure and do not plunge it 

- It is absolutely forbidden to use the robot in explosive


environments.

 and flammable 

- The operator or user is responsible for accidents or 


other people or their property.

hazards occurring to 

   blades.

    a tripping hazard.

   extension cord.

   become damaged.

   of the mower.

   station.

    thoroughly in water, as it is not watertight.

- Fill up all small holes and even all small mounds inside

working area. It’s to keep the robot with perfect operating.

CAUTION!

Position this side of the Charging Station

towards lawn interior.

DANGER

- 2 -

Содержание E1800

Страница 1: ...Please read this manual carefully before use Please keep this manual for future reference ROHS USER MANUAL ...

Страница 2: ...CONTENTS 1 INTRODUCTION AND SAFETY 1 2 PRESENTATION 3 3 INSTALLATION 6 4 CONTROL PANEL 10 6 APP USER MANUAL 12 5 USE 11 7 MAINTENANCE AND STORAGE 16 8 TROUBLE SHOOTING 17 9 EXPLODED VIEW 19 ...

Страница 3: ...n the mower Study them carefully so you understand their significance 1 The symbol is pasted on the top cover Please read the means carefully before use the appliance 1 WARNING this is a dangerous power tool Use care when operating and follow all safety instructions and warnings 2 Read the owners operating manual carefully and follow all safety instructions before operating the machine 3 Objects c...

Страница 4: ... is not possible device is damaged or inoperable Do not attempt to disable or defeat any safety feature is in operation from behind or around the mower and a safe distance manual operation on slopes where degrees or use it in Do not operate the mower if any safety feature or or device Use heavy gloves when inspecting or servicing the Wear eye protection and use gloves when installing driving the w...

Страница 5: ... 6 Rear running wheels 7 Front wheels 13 8 9 7 11 10 12 15 16 19 20 22 21 18 Colorless in good connecting Red Broken wire idle 10 11 Power terminal 12 Virtual wire terminal 13 Hole for stake 14 Charger 15 Virtual wire 100m Used to mark mowing area and create a virtual wall for the mower 16 Virtual wire connectors 10pcs Used to connect virtual wire 17 Pegs 100pcs Used to fix the virtual wire to the...

Страница 6: ... or it has be cut off long and it goes circle if the grass is dense or In manual mode the mower will go where you direct it use 100m 600m of virtual wire The wire we suggest to station the virtual mower will follow virtual wire to charging on the virtual wire wire acts as a virtual fence It will get wire and starts cutting inside Mower stops working if virtual wire is cut off or power off charging...

Страница 7: ...our than if the garden consists of several small lawns separated by 600m 0 5mm 100m 0 5mm Virtual wire maximum length Standard virtual wire length 44 48 2 15cm LWH Charging station size Charging station and virtual wire 2 4 Working route Follow virtual wire walking is optional Cutting height adjustment Rain sensor Auto recharge Intelligent spiraling Go straight Anti theft Lift sensor Tilt sensor W...

Страница 8: ...tant to keep the lawn free from branches small stones and other objects 3 INSTALLATION chapter 2 Presentation the installation carefully to plan may restrict the age of the operator of striking it off especially the objects less than 6cm height Please fill up small holes and even out small mounds to make sure lawn is flat How to adjust the cutting height Cutting height explanation take 3cm level f...

Страница 9: ...tacle is 2 meters least distance from corner to front of charging station is at 2 5 meters Make sure to lay a 2 5 meters minimum 90 10cm Pool Max 1cm Passage or a ground with same level of the lawn Min 40cm Min 40CM Min 40CM Straight line at least 2 5m House wall fence or other obstacle higher than the lawn If a high obstacle for example a house wall fence or other obstacle which is higher than th...

Страница 10: ...tion and virtual loop should be 2 meters at least Joining the virtual wire If the virtual wire is not long enough and needs to be spliced Use supplied wire connector It is waterproof and gives a reliable electrical connection To splice Insert both cable ends in the connector Now press down the button on top of the connector fully Use a pair of pliers or the like as the button on the connector is d...

Страница 11: ...n recharging charging light on station in red recharging 3 8 Recharge 1 2 IMPORTANT INFORMATION All the buttons except the emergency switch and power button are locked which can not be used during the robot is in recharging 9 Connect 1 from plug a to 1 from plug b and screw it it tightly 3 5 Charging head installation Please fasten the charging heads on the charging station in clockwise Pls take c...

Страница 12: ...lickering press confirm button indicator light off mower enter into the auto mode 4 CONTROL PANEL 4 1Control Panel view 4 CONTROL PANEL 10 Take mower close to charging station turn on the emergency switch press auto button and home button simultaneously the signal light starts flickering press the home button on the charging station the signal light turns bright press confirm button on the mower p...

Страница 13: ...it with charger to power threaded cap And then connect connection supply Ensure the charging station has a good 5 2 Starting the mower preserve balance IMPORTANT INFORMATION charging station is Green and the light on Periodically inspect the lawn is without any small hole or mound User can not start the mower if virtual wire or charging station is not in good connection There are two locations of ...

Страница 14: ... turn on the mower according to the user manual Then enter the smart phone setting interface WI FI to connect the device Pls note for first time it takes about 3 5minutes to connect device and the device can only connect with one phone at the same time the first time please connect the charging station and virtual wire The using of the App Click the APP you installed and enter it 6 APP USER MANUAL...

Страница 15: ...e are four range options user can choose the distance when mower hit virtual wire according the condition of different lawns 3 For the functions like rain sensor touch sensor audio alarm ON mower goes back to charging station when it is raining OFF mower goes on working when it is raining are optional Rain sensor After finish setting function pls press Send to save the settings 6 3 Date Week Time ...

Страница 16: ...e of passage is 1meter at least pls refer to below picture A minimum distance between the virtual wire which is to make passage is 50cm 2 2 choose the areas that you set accordingly 3 Area working time setting 3 1 The Area working time setting should be used together with Area location setting 3 2 Choose the mower working day per week 3 3Set the start time then set the working time for each area a...

Страница 17: ... set 4 digit 6 5 Password mower password 2 password Initial password 1234 Input old password then Input new password and Send 3 Password function is optional 6 6 Mower state Query 1 You can get the mower voltage info 2 Click Mower state Query to view alarm info ...

Страница 18: ...g on the blade the electric and the electronic components battery agent seek medical help if it comes water neutralising etc into contact with the eyes 15 Servicing of the mower should be according manufacturers instructions This product to must be disposed of at a include battery pack and designated collection pint for electrical city office or the shop where you your local electronic waste For m...

Страница 19: ...m mower and restart it Mower stops working and beeps 1 Running wheel strike 1 Cutting height is too low 2 Blade strikes hard objects 3 Mower is trapped in lawn 1 Adjust the cutting height to suitable height 2 Clean the lawn and make sure it is free from hard objects 3 Clean the lawn where mower is trapped or restart the mower in another place Mower stops working and beeps hard objects 2 The mower ...

Страница 20: ...e the charging station is leveled with the station if necessary fill area with dirt and level off Relocate the virtual wire 1 Replace a new blade 2 Stop the mower in safety use protection gloves to avoid the risk of cuts on hands remove the fold cause from blade 3 Start the robot in new place 1 Damaged cutting blade 2 Cutting blade flooded by residues tapes ropes plastic fragments etc 3 The start ...

Страница 21: ...8 EXPLODED VIEW Robot Exploded View 19 ...

Страница 22: ...0 41 42 43 44 45 46 Rain sensor Display PCB Recharging sheet Battery cover Battery Emergency switch Middle cover Blade M4 screw nut Blade shield Bump rubber Top cover Flat washer 2 Magnet 1 No Sparepart Name No Spareparts Name Robot spareparts list 47 48 49 50 51 57 52 53 54 55 56 Rocking bar rubber Pressure ring for rubber Support ring Rocking bar axle Reposition spring Centering block Touch sens...

Страница 23: ...USER MANUAL Robot lawn mower ...

Отзывы: