INSTALLATIONS
3-7
3.4 DT-2000F/NF Fractional E1 Quick installation
Basically, the configuration steps are the same as DT-2000F/NF (E1-C). (User can refer to
section 3.3 for configuring of clock source, Co-directional clock source does not support in
E1 fractional mode) There is a major different frame type for
DT-2000F/NF, user can select the Fractional E1 for Central or Remote sites. When select
the E1 frame format to FRAME mode, user may have a choice on different data speed with
N x 64kbps (N=1~31) as well as Full E1.
3.4.1 CO site Installation Steps
v
Power off all units.
v
Make sure the DIP SW1 on G.703 module is set correctly. (2 ON and 1,3,4 OFF)
v
Plug in the E1 (G.703) module into the data port slot on CF.
v
Connect the E1 cable to the E1 network equipment.
v
Connect the DTE cable to the data port unit.
v
Connect the copper wires between CF & RF.
v
Turn on the power on all units.
v
Configure the units using LCD panel or the Craft interface on the CF unit.
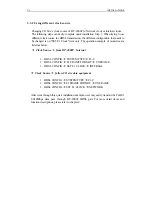
1. The CO site E1 Fractional mode setup
HDSL CONFIG
à
SYSTEM TYPE
à
E1-CF
HDSL CONFIG
à
E1 FRAME FORMAT
à
FRAME / FRAME + CRC
HDSL CONFIG
à
SET E1 CLOCK
à
CODIRECTIONAL
2.
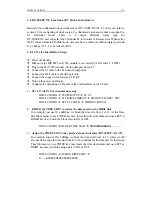
BLOCK the TIME SLOT to reduce the data speed on the HDSL link
For example, just use 20 x 64Kbps, we block the time slot from 1 to 11. At the Time
Slot Block menu, to use ENTER key may locate the time slot number and use LEFT or
RIGHT key may switch the block state to ON or OFF.
HDSL CONFIG
à
BLOCK TIME SLOT
à
SBBBBBBBBBBB………………..
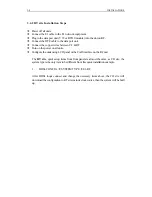
3. Assign the TIME SLOT to the specify data port interface (DT-2000F — E1-CF)
For example, just use 20 x 64Kbps, we block the time slot from 1 to 11, where we will
also needs to assign the time slot from 12 to 31 continues for the data port. At the Assign
Time Slot menu, to use ENTER key may locate the time slot number and use LEFT or
RIGHT key may switch the assign state to ON or OFF.
HDSL CONFIG
à
ASSIGN TIME SLOT
à
S………..EEEEEEEEEEEEEEEEEEEE
Содержание DT-2000 Series
Страница 6: ...CHAPTER 1 INTRODUCTION CONTENT 1 1 General Description 1 2 Specifications 1 3 Module List...
Страница 7: ......
Страница 14: ...CHAPTER2 Unit Description CONTENT 2 1 General Description 2 1 1 Desktop Units 2 1 2 Rack Mounted Units...
Страница 15: ......
Страница 26: ...UNIT DESCRIPTIONS 2 11 This page is intentionally left blank...
Страница 27: ......
Страница 29: ......
Страница 41: ...3 12 INSTALLATIONS This page is intentionally left blank...
Страница 42: ......
Страница 69: ...4 26 OPERATING MAINTENANCE This page is intentionally left blank...

