


4
Choose values
Choose a value by sliding the bar with the mouse or typing in the
number field by using a connected keyboard.
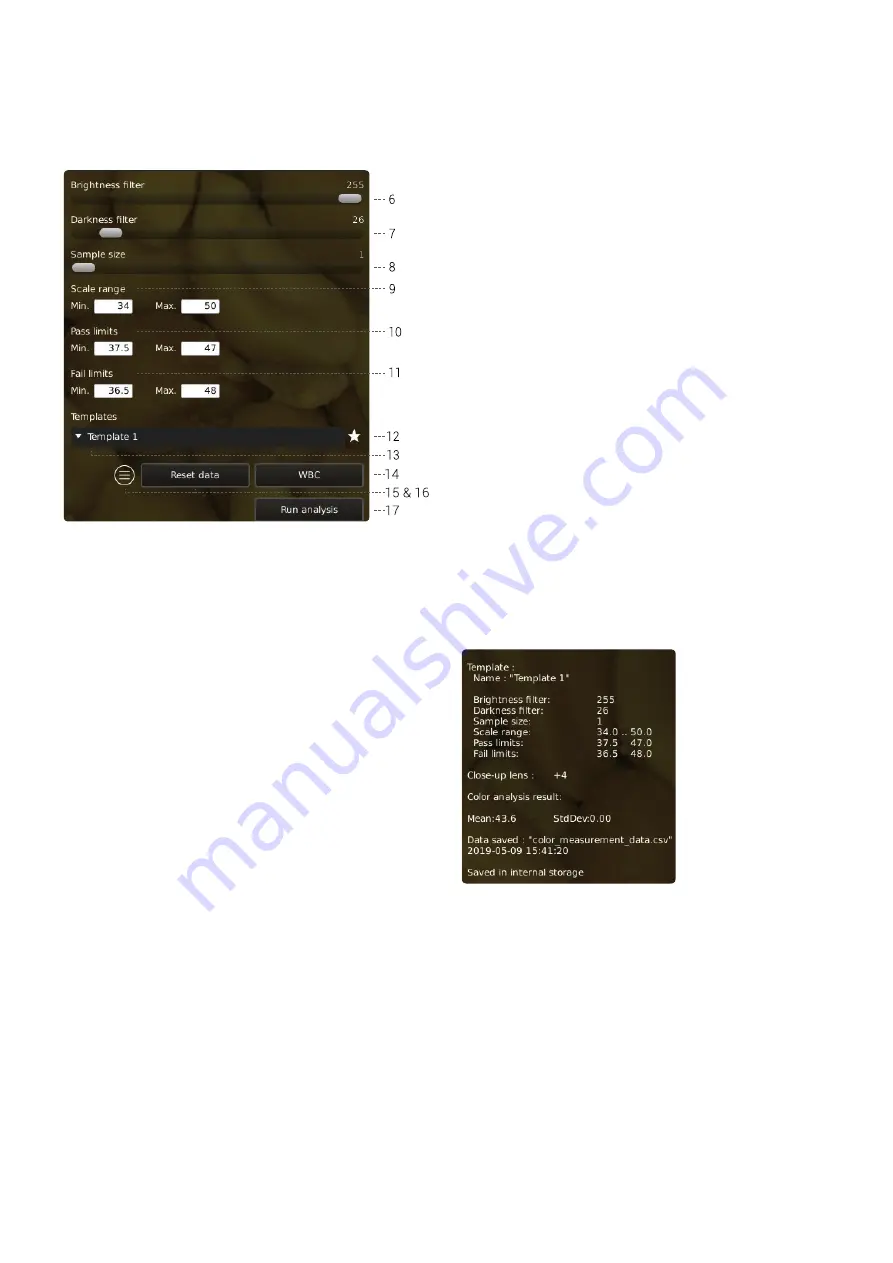
6. Brightness filter
Use this slider to eliminate brightness that should not be included
in the analysis. The more brightness that should be filtered out, the
further to the right the slider should go.
7. Darkness filter
Same principle applies to this slider. Dark areas in your sample (e.g.
shadows between the peanuts) can be filtered out by moving the
slider to the right.
8. Sample size
Define how many sample images the analysis must be based on.
9. Scale range
Define the scale range for the overall table. Insert a number in the
min. and max.
10. Pass limits
Define the min. and max. pass limits for the desired product. These
values must be within the defined scale range.
11.
Fail limits
Define the unacceptable scale range in the sample by typing in the
min. and max. color value. The min. value must be between the min.
scale value and the min. pass limit. The max. value must be between
the max. scale value and the max. pass limit.
12. Save template
•
Click once on the star symbol to save a template using the
current zoom level, slider positions and color values
•
State preferred name and press save
The template is now saved and available for later use.
13. Recall template
Recall a saved template by clicking on the list and choosing the
template of your choice.
Delete a template by pressing the X at the right of each saved
template.
14. White Balance Calibration
Perform a white balance calibration in order to get colors displayed
correctly on the screen.
Read more about white balance calibration in section 4.
15. Information panel
Activate this information panel to view all details of template, filter
settings, scale range, pass limits and fail limits, close up lens and
analysis results.
Disable the information panel by pressing the icon again.
16. Reset Data
Reset data to delete previous analyses from the result overview (see
next page).
17. Run analysis
Choose this option to run an analysis of the current image and get
indications of the actual color value of the sample.
The analysis will always be performed using a still image which is
automatically captured during the analysis process.
NB! You will not be able to run the analysis, if the button contains a
yellow exclamation point. Perform a white balance calibration before
trying again (see pt. 4).
3. OPERATION
OPERATION (1/2)


