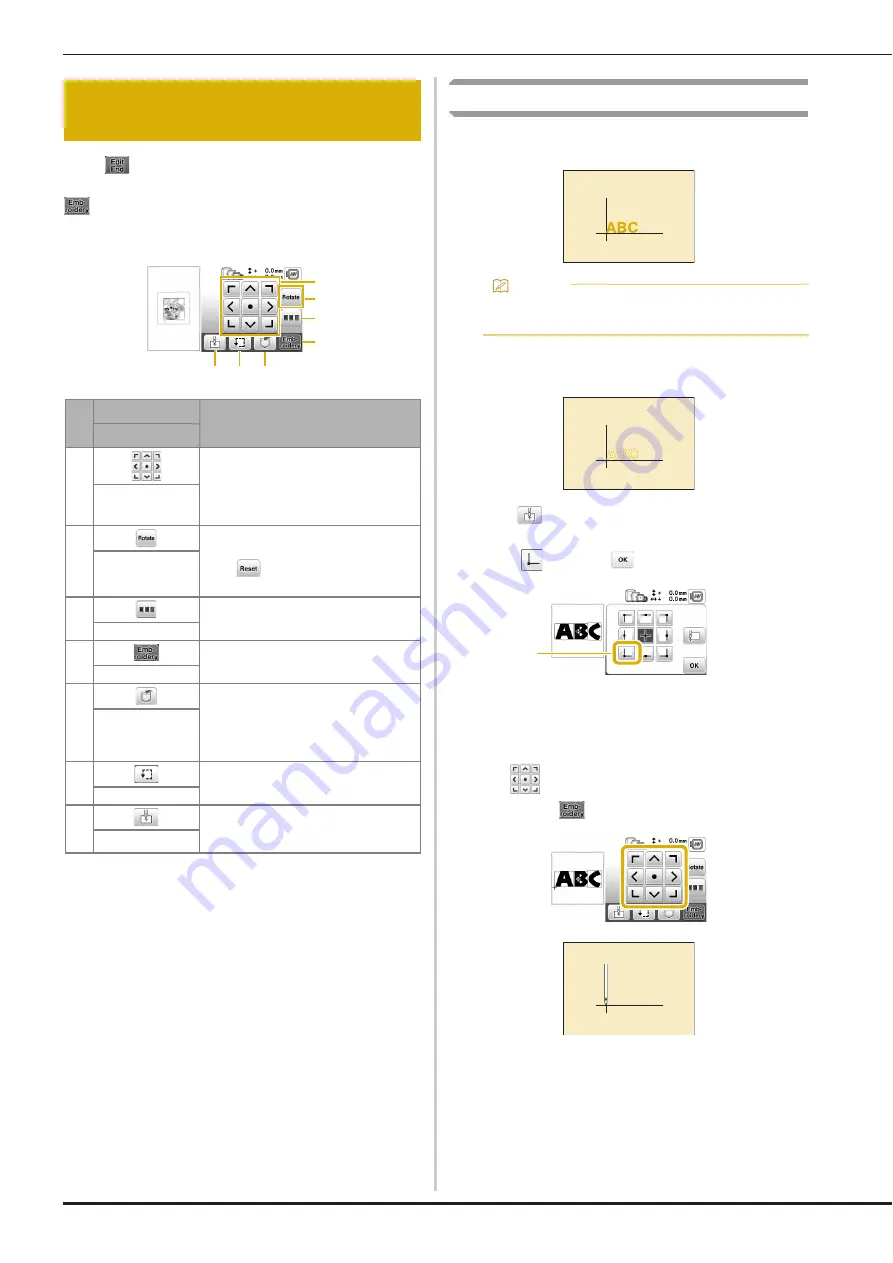
Editing Patterns (Embroidery Settings Screen)
46
When
is pressed in the editing screen, the embroidery
settings screen appears. After editing the pattern, press
to continue to the embroidering screen.
■
Embroidery settings screen
Aligning the pattern and the needle position
Example: Aligning the lower left side of a pattern and the
needle position
a
Mark the embroidery start position on the fabric, as
shown.
b
Press .
c
Press
and press
.
1
Start position
The needle position moves to the bottom left corner
of the pattern (the embroidery frame moves so that
the needle is positioned correctly).
d
Use
to align the needle and the mark on the
fabric, press
and begin embroidering the pattern.
Editing Patterns (Embroidery Settings
Screen)
No.
Display
Explanation
Key Name
1
Press these keys to move the pattern in
the direction shown by the arrow. (Press
the center key to return the pattern to
the center of the embroidery area.)
(page 46)
Move key
2
Press this key to rotate the entire
pattern.
Press
to return the pattern to its
original position.
Rotate key
3
Press this key to rearrange the stitching
sequence for combined patterns.
Color sorting key
4
Press this key to enter the embroidery
screen.
Embroidery key
5
Press this key to save patterns to the
machine's memory or USB flash drive.
Patterns can also be transferred to a
computer via wireless network
connection. (page 49)
Memory key
6
Press this key to check the position of
the pattern. (page 35)
Trial key
7
Press this key to move the needle start
position to align the needle with the
pattern position. (page 46)
Starting point key
2
7 6 5
4
1
3
Memo
• It is recommended to use the optional embroidery
foot with LED pointer “U+” for this procedure.
1


