11
8. Fill the system with the help of an external filling pump until the liquid flows out of the drain hose.
9. Close the filling valve X2.
10.Open the stopcock X0. The valve X0 is open when the handgrip is parallel to the pipe.
11.With the help of the water system's pressure, set the system under a primary pressure of 1,5 bar. Use the filling
hose on filling valve X2 for that.
12.Pump the mixture through the system for about 30 minutes to remove air bubbles through the air vent.
13.Check the system pressure again and fill if necessary to rise the pressure.
14.Close the filling valve X1 and remove the filling hose.
15.Adjust the brine pump to the correct step.
16.Put the front door back.
Note:
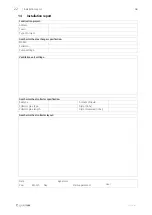
Make sure to fill installation report with the liquid used.
5
Electrical connection
5.1
To do before the electrical connection
• Make sure that the electrical connection agrees with the product specification on the motor name plate.
• Make sure that the environment for electrical connection is clean and dry.
• Make sure that the wiring diagram that is included with the supply of the product agrees with the terminals in the
connection box.
5.2
To connect the product to the power supply
• Install a circuit breaker in the permanent electrical installation, with a contact opening of a minimum 3 mm at each
pole.
• Complete the electrical connection for the product.
Black/brown wire: L1, 230 V 1~, 50Hz
Blue wire: N neutral
Yellow/green wire: ground
5.3
To connect the product to the ventilation unit
OAT
CB
DO
24V
230 V~
AI
GND
• Make sure that the outdoor temperature sensor (OAT)
is installed in the duct.
• Connect the temperature sensor wires (AI, GND) to
any free analog input and ground on the connection
board (CB) of the ventilation unit.
• Connect control signal wires (DO, 24V) to any free digi-
tal output and 24V on the connection board (CB) of the
ventilation unit.
• Install safety switches.
• Connect the power supply wires to 230 V~ output.
278349 | v01
Содержание GEO 300
Страница 1: ...Document translated from English 278349 v01 GEO 300 GEO 500 GB User Manual 2 DE Bedienungsanleitung 24...
Страница 4: ......
Страница 23: ...2783492 v01...
Страница 26: ......
Страница 46: ...GEO 300 GEO 500 278349 2021 10 20 v01 www systemair com...


