Rev. : 1.0
P.19
12. KVM Session
Installation Steps
Before installation, please make sure all computers are turned on and its
operating system are running properly with keyboard and mouse.
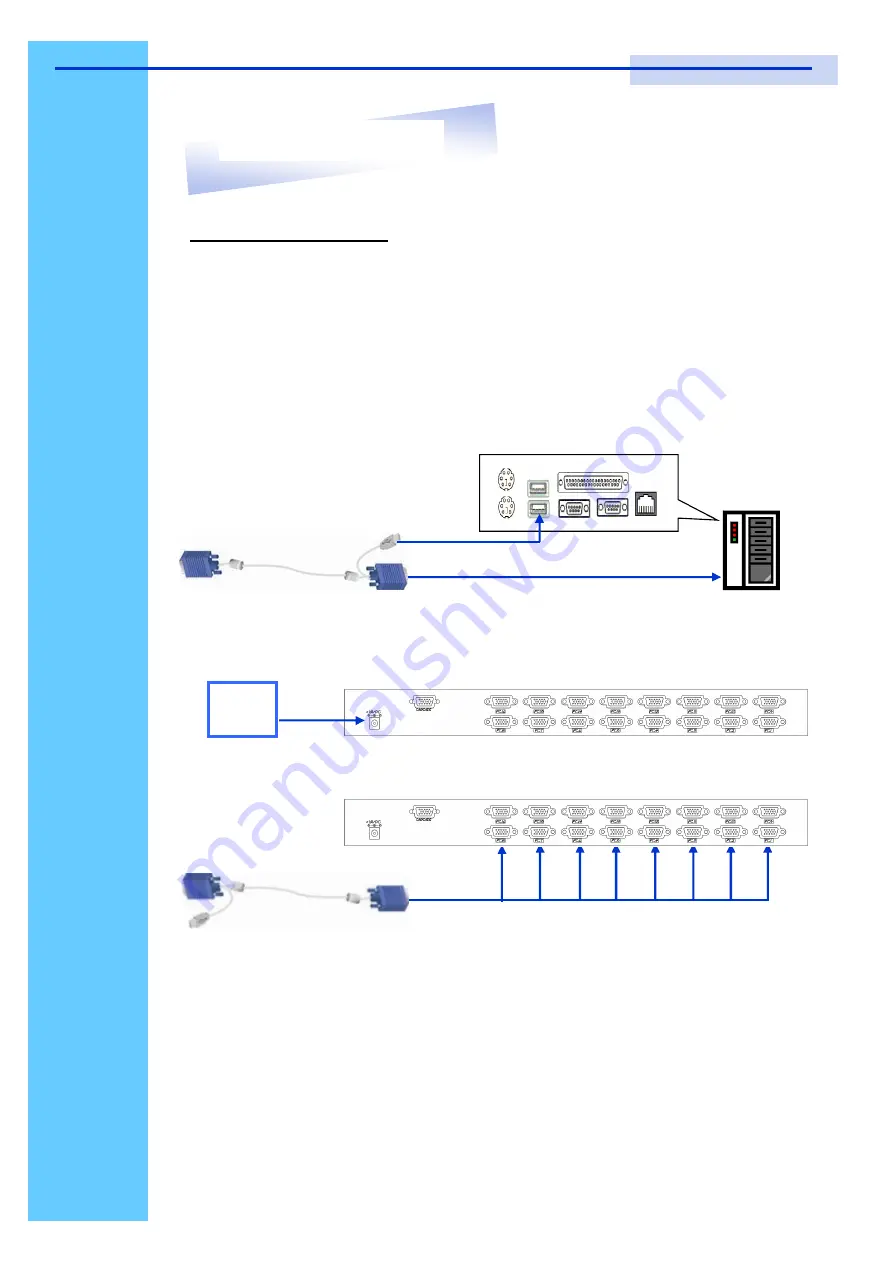
1. Connect the 2-in-1KVM cable to the one of your server.
●
USB Type A Male connector to the USB Port
●
HDDB 15-pin Male connector to the VGA Port
2. Plug the power adapter included to the switch.
3. Connect the another end of the 2-in-1 cable to the USB KVM switch
4. Reset USB KVM Switch by membrane
DC
Power
PC I/O windows diagram
To VGA port
User Manual
Содержание LCD1U-15-04
Страница 1: ...Toll Free 1 888 865 6888 Tel 510 226 8368 Fax 510 226 8968 Email Sales RackmountMart com...
Страница 2: ...User Manual LCD1U 15 04 17 01 19 01 1U 15 17 19 Rackmount LCD Keyboard Drawer with USB KVM Switch...
Страница 10: ...Rev 1 0 P 8 LCD1U15 04 8 16 KVM n u 1U15 LCD KB Drawer with USB KVM 10 Dimension Diagram User Manual 15 LCD...
Страница 11: ...Rev 1 0 P 9 LCD1U17 01 8 16 KVM n u 1U17 LCD Keyboard Drawer w USB KVM 10 Dimension Diagram User Manual 17 LCD...
Страница 12: ...Rev 1 0 P 10 LCD1U19 01 8 16 KVM n u 1U 19 LCD KB Drawer w USB KVM 10 Dimension Diagram User Manual 19 LCD...
Страница 13: ...Rev 1 0 P 11 LCD Session User Manual...
Страница 18: ...Rev 1 0 P 16 KVM Session User Manual...


