background image

5   |   Voyager


1

6

2

3

5

4

7

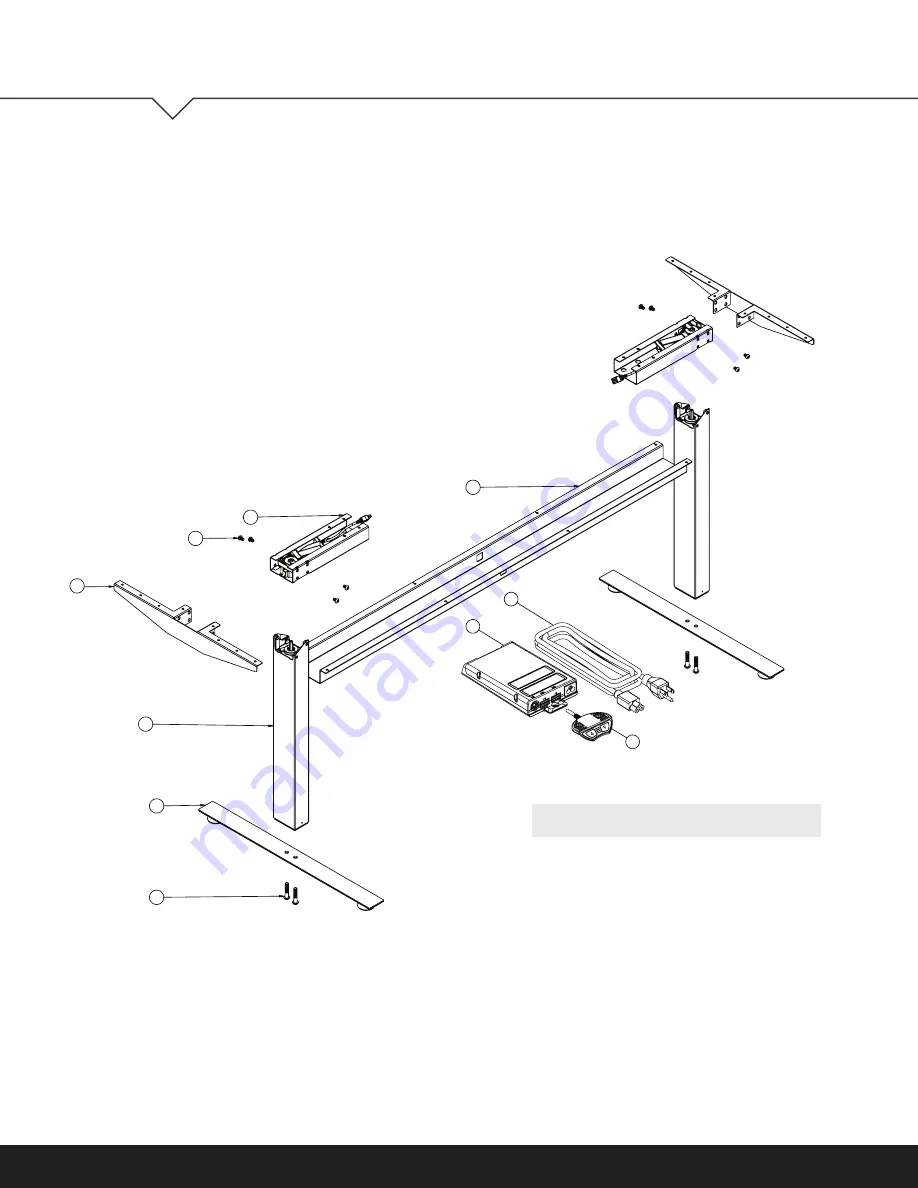
BOM

ITEM QTY

DESCRIPTION

1

2

BEAM

2

2

COLUMN

3

2

TOP SUPPORT

4

2

FOOT

5

1

HAT CHANNEL

6

8

M8x1.25 12mm SCREW

7

4

M10x1.5 50mm SCREW

10

9

8

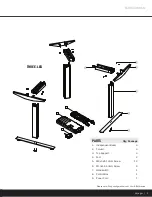
PARTS 

Qty/Package

1.  Independent Beam 

2

2. Column 

2

3.  Top Support  

2

4. Foot 

2

5.  HAT Channel 

1

6.  M8x1.25 12mm Screw 

8

7.  M10x1.5 50mm Screw 

4

8. Handswitch 

1

9.  Control Box 

1

10.  Power Cord 

1

PARTS DIAGRAM

INDEPENDENT WITH HAT CHANNEL

For tables up to 84”

Содержание Voyager

Страница 1: ...USER GUIDE Voyager HEIGHT ADJUSTABLE TABLE ...

Страница 2: ... to sit or stand throughout the day Our Voyager table is the industry standard in height adjustable products and your first step towards improving the efficiency and well being of your organization This kit supplies everything you need to assemble your height adjustable table base Just add your own work surface to personalize PRODUCT OVERVIEW Please note 3 Leg configuration is not UL or BIFMA test...

Страница 3: ... 13 Change the Height Unit 14 Adjust Height Display 14 Save Memory Position 14 Recall Memory Position 14 Troubleshooting 15 16 Unit Errors 15 Handswitch Errors 16 Technical Data 17 Customer Service 18 Standards Certifications 18 TABLE OF CONTENTS TABLE OF CONTENTS This manual explains how this sit stand desk is assembled used and maintained All sit stand tables are subjected to functional and qual...

Страница 4: ...ARTS Qty Package 1 Independent Beam 2 2 Column 2 3 Top Support 2 4 Foot 2 5 M8x1 25 12mm Screw 8 6 M10x1 5 50mm Screw 4 7 Handswitch 1 8 Control Box 1 9 Power Cord 1 INDEPENDENT For tables 60 or Less PARTS DIAGRAM Voyager PARTS DIAGRAM ...

Страница 5: ...ty Package 1 Independent Beam 2 2 Column 2 3 Top Support 2 4 Foot 2 5 HAT Channel 1 6 M8x1 25 12mm Screw 8 7 M10x1 5 50mm Screw 4 8 Handswitch 1 9 Control Box 1 10 Power Cord 1 PARTS DIAGRAM INDEPENDENT WITH HAT CHANNEL For tables up to 84 ...

Страница 6: ...Package 1 Independent Beam 3 2 Column 3 3 Top Support 3 4 Foot 2 5 M8x1 25 12mm Screw 12 6 M10x1 5 50mm Screw 4 7 Handswitch 1 8 Control Box 1 9 Power Cord 1 PARTS DIAGRAM THREE LEG Please note 3 Leg configuration is not UL or BIFMA tested ...

Страница 7: ...nce around desk and make sure nothing is in table s path for its entire range of motion Before raising or lowering Check surroundings on all sides of desk are clear Make sure corded objects will not be pulled off table or cause other objects to fall Make sure desk power cord moves freely as desk moves up and down To reduce the risk of death serious injury or property damage read and follow this sa...

Страница 8: ...EN MOVING DESK Clear objects and equipment from table before rolling to reduce the risk of tipping over Do not move a loaded desk Do not lift the desk by the work surface desktop Adjust the desk to its lowest height before moving DO NOT OPEN ELECTRICAL COMPONENTS Do not attempt to service table components There are no user serviceable parts inside the motor control units or table legs If your tabl...

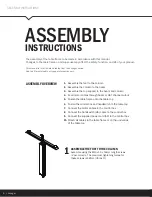
Страница 9: ...he table top 6 Fasten the control box and handswitch to the table top 7 Connect the motor cables to the control box 8 Connect the handswitch HS cable to the control box 9 Connect the supplied power cord AC to the control box 10 Attach all cables to the table frame or on the underside of the table top ASSEMBLY INSTRUCTIONS The assembly of the table frame to be made in accordance with this manual Ch...

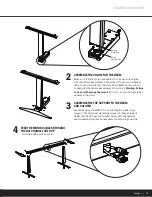
Страница 10: ... do so will damage the motor Do not try to turn the female hex adapter in the motor ASSEMBLE THE TOP SUPPORT TO THE BEAM AND COLUMN Assemble using the M8x1 25 x 12mm length screws 4 per column The maximum tightening torque for these screws is 24Nm 18 lbs ft Align top support holes with independent beam assembly Repeat as necessary for remaining columns FEED THE MOTOR CABLES THROUGH THE HAT CHANNEL...

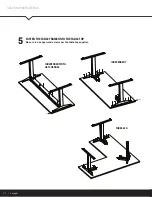
Страница 11: ...11 Voyager ASSEMBLY INSTRUCTIONS 1 5 in 1 5 in FASTEN THE TABLE FRAME ONTO THE TABLE TOP Be sure to use approved screws per the table top supplier 5 INDEPENDENT THREE LEG INDEPENDENT WITH HAT CHANNEL ...

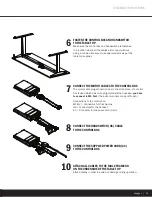
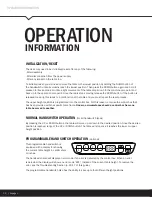
Страница 12: ...ra terminals can be left open Connections to the control box M1 M2 Connectors for the columns HS Connectors for the handset AC Connector for the power cord 3 pin ATTACH ALL CABLES TO THE TABLE FRAME OR ON THE UNDERSIDE OF THE TABLE TOP Attach cables in order to avoid any damage during operation FASTEN THE CONTROL BOX AND HANDSWITCH TO THE TABLE TOP Make sure the control box and handswitch are fast...

Страница 13: ...s reason only use the control box that has been provided with the specific table frame Under no circumstance should a control box from one table be moved to another NORMAL HANDSWITCH OPERATION for all handswitch types By pressing the UP or DOWN buttons the table will move up or down to the desired position Once the desired position is reached let go of the UP or DOWN button The table will stop onc...

Страница 14: ...conds until the display starts to flash 3 Measure the table height and enter the measured value depending on the setting in centimeters or inches with the UP or DOWN button Confirm the entry by pressing the S button To exit the menu without making a selection wait 10 seconds and the height display will appear again SAVE MEMORY POSITION Drive the table up or down to the desired height Press the S b...

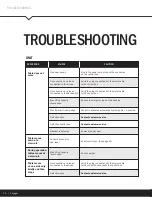
Страница 15: ...ight or load on the desktop Replace the handset Max time limit is exceeded Control is activated automatically after approx 9 minutes Defective drive Contact customer service Defective control box Contact customer service Handset is defective Contact customer service Defective drive Table moves down at a slow rate Control box expects new reset Reset control box See page 14 During operation tables m...

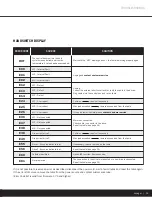
Страница 16: ...nt If the problem still exists please contact customer service If necessary reduce the load on the table Reset the table see page 14 Option ISP function Remove source M2 Overcurrent M3 Overcurrent Collision resolve if necessary Collision resolve if necessary E55 E56 E60 Drive 1 Synchronization is lost Drive 2 Synchronization is lost Collision identified E48 E49 Overcurrent drive 1 Overcurrent driv...

Страница 17: ...on primarily 0 3 W Operating temperature 0 35 C Protection class IP 20 Maximum duty cycle 10 2 min on 18 min off Maximum power consumption primarily 231 W TWO COLUMN FRAME WITH CONTROL BOX Maximum lift capacity 200 lb 90 kg 890N Adj range depending on version View illustration A stroke length 18 9 stroke length 23 6 ...

Страница 18: ... Issued 2014 11 07 Ed 4 Household and Commercial Furnishings CSA C22 2 68 Issued 2009 09 01 Ed 7 R2014 Motor Operated Appliances Household and Commercial Gen Inst No 1 2010 Gen Inst No 2 2010 Meets 2014 BIFMA standards CUSTOMER SERVICE CUSTOMERSERVICE If you have any problems with your table base please contact our service department PHONE 1 888 552 5699 FAX 1 480 393 4000 ...

Отзывы: