6000-100Ch2.fm Rev. D
TimeVault™ User’s Manual
2-29
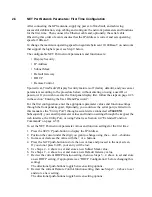
DHCP Configuration
Chapter 2: Installation and Start-Up
9. End the configuration sequence by pressing
SAVE
.
TimeVault automatically resets if you have saved any changes to any network
parameter (excluding Remote Control), and sets the operating speed at 10Base-T.
Go to the section “Verify Functionality” to verify the operation of the TimeVault.
2.6
DHCP Configuration
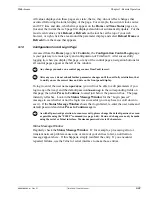
The easiest way to configure the network parameters is via Dynamic Host Configuration
Protocol (DHCP). If your network has a DHCP server installed (check with your system
administrator), you can use this service to set up your TimeVault. The TimeVault is
shipped with DHCP turned off. To enable DHCP, use the following procedure:
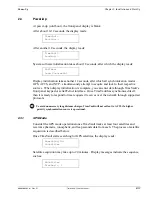
1. Press the
SETUP
button several times until the message
DHCP status OFF
is displayed.
2. Use the
↑
and
↓
buttons to turn DHCP on.
3. Press the
SAVE
button to store the new setting.
4. Press
SAVE
again to scroll through the remaining messages.
5. The TimeVault will then reset itself. During the boot process, it will request network
settings from the DHCP server, and then will be available on the network.
6. Press the
SETUP
button to find the assigned IP address. Then go to the section
“Verify Functionality” to verify the operation of the TimeVault.
2.7
Verify Functionality
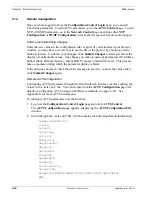
To verify that the unit is running:
1. Ping the NET Port IP Address.
2. If this action fails, check the configuration values assigned to the NET Port. Correct
parameters as necessary using the front panel keypad, described above, or the
serial/Telnet Function F100 IC command, described on page 4-64.
3. If ping fails again, verify with your system administrator that the values used are
correct. Then re-enter parameters as necessary.
2.8
Wrap-Up & Advanced Operation
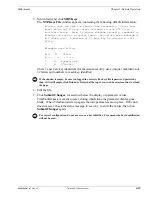
When the LAN interfaces are operational and time is being reported, the unit has achieved
its basic level of functionality. For “quick start” information, see the Quick Start card that
came packaged with this manual. For remote operation, see Chapter 3. For details on
serial/Telnet commands, see Chapter 4.
If you wish to configure NTP client mode, or to use SNMP (TimeVault supports a SNMP
version 1 agent with the MIB II and Enterprise MIB databases), you must first edit the
ntp.conf and snmp.conf files (see Section 4.4.12 “F100 CONFIG – FTP Configuration of
NTP, SNMP & ACTS Parameters” on page 4-67 for details).
Содержание Time Server
Страница 1: ...6000 100 Revision D January 2 2003 TimeVault Trusted Time Server User s Manual TM ...
Страница 7: ...6000 100Front fm Rev D TimeVault User s Manual v ...
Страница 10: ...viii TimeVault User s Manual 6000 100Front fm Rev D ...
Страница 24: ......
Страница 118: ......
Страница 138: ......
Страница 142: ......
Страница 148: ......

