


5
The Wireless Siren
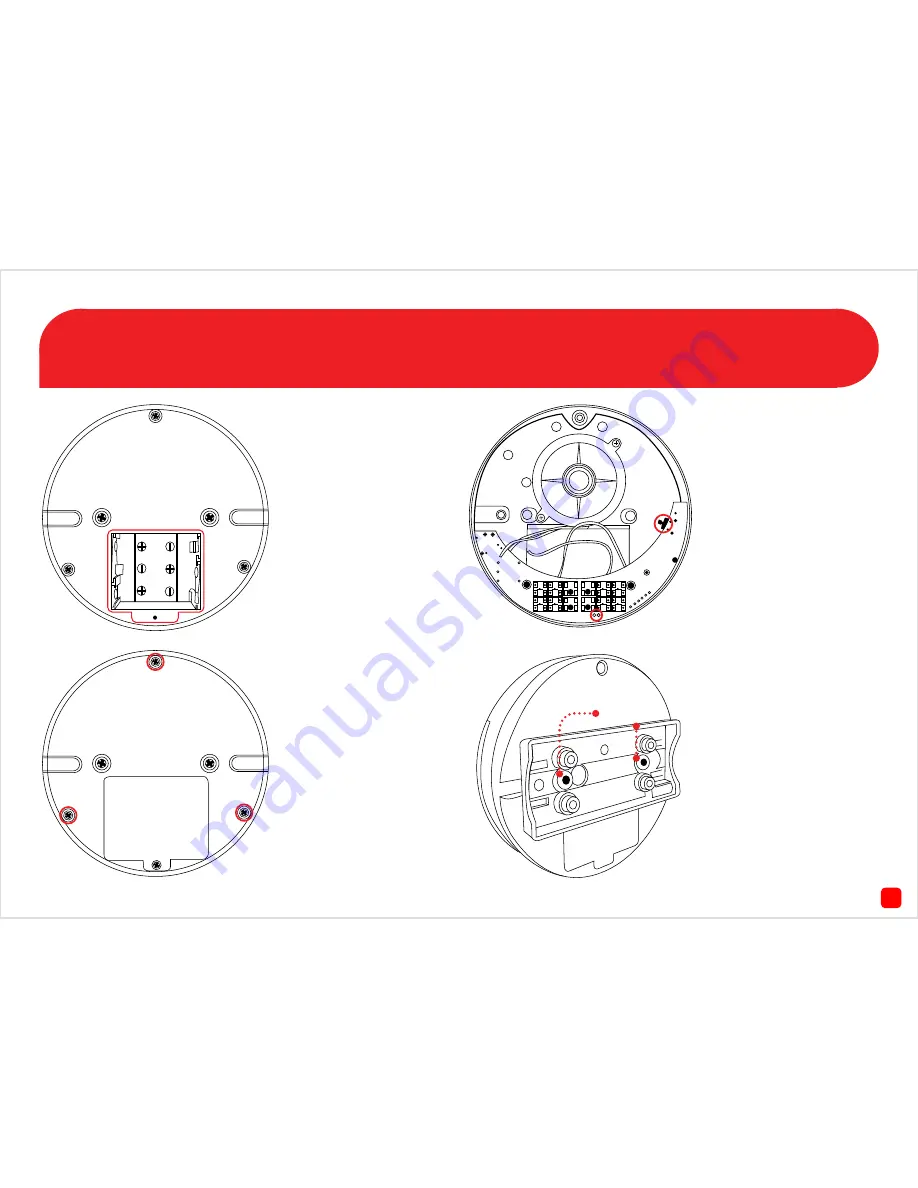
Fig. 1
- Use a Phillips head
screwdriver to remove the
battery cover. Install 3 x AA
batteries provided. Put the
cover back on when you
have finished and fasten the
screw.
Fig. 2
- To access the pair
button, use a Phillips head
screwdriver to remove three
screws as illustrated on the
left. Carefully remove the
cover and try to minimise
any contact with the internal
components.
Fig. 3
- The pair button is
located on the right and the
green and blue LEDs are lo-
cated at the bottom. Follow
the pairing instructions on
page 8. Put the cover back on
after pairing and fasten all
three screws.
Fig. 4
- Use the mounting
bracket to install the wire-
less siren to a wall or ceiling.
Please note, there is a tab on
the back of the siren which
locks in with the groove on
the mounting bracket. Slide
the siren to the right to lock
it in place.
Bracket Mount


