8
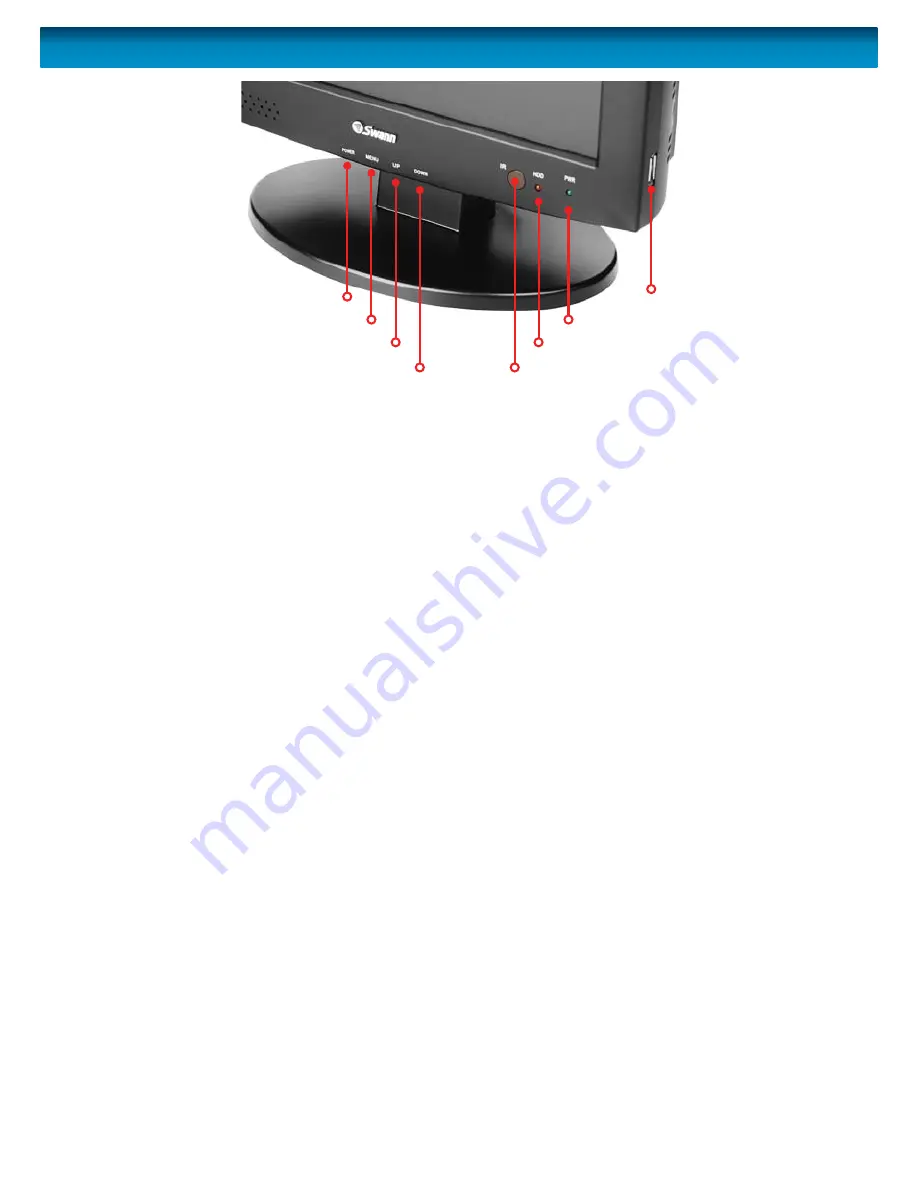
Layout of the DVR4-5100
Front panel - screen controls
1.
POWER button:
This turns off
power to the screen (but not the
DVR). This is useful if you want to
turn off the screen (a good way to
save power) but leave the DVR on
to record.
2.
MENU button:
Cycles through the
On-Screen Display (OSD) options
where you can adjust screen
settings like brightness, contrast
and color. Note that these will only
aff ect the screen display, not how
the DVR records or displays the
footage. Press the UP or DOWN
button to adjust the setting.
3.
UP button:
Press to raise the
volume output from the DVR or to
increase a value when viewing an
on-screen display options.
4.
DOWN button:
Press to lower the
volume output from the DVR or
to decrease a value when viewing
an on-screen display options.
5.
IR sensor:
This is the Infra-
Red sensor which receives the
commands from your Remote
Control. When using the remote,
make sure you are pointing it at
the unit and that the IR receiver is
visible and not obstructed in any
way.
6.
HDD activity light:
This is the Hard
Disk Drive activity light. It fl ashes
red when there is disk activity such
as footage being written to the hard
drive or footage being played back
from the hard drive.
7.
PWR (power) light:
This light glows
green to indicate when the unit is
ON. This is useful to indicate that the
unit might still be on, even though
you have turned off the monitor
using the POWER button.
8.
USB Backup port (side of unit):
This port is for connecting a USB
storage device which can be used
to back up footage from the DVR.
This port is NOT for use by the USB
mouse.
2. MENU button
1. Power Button
7. PWR (power) light
6. HDD activity light
5. IR Sensor
4. DOWN button
3. UP button
8. USB port (Storage)


