


16
Setting up Email Alerts via Web Browser
4. When you have completed the email configuration, click the
Setup
button to save your
settings.
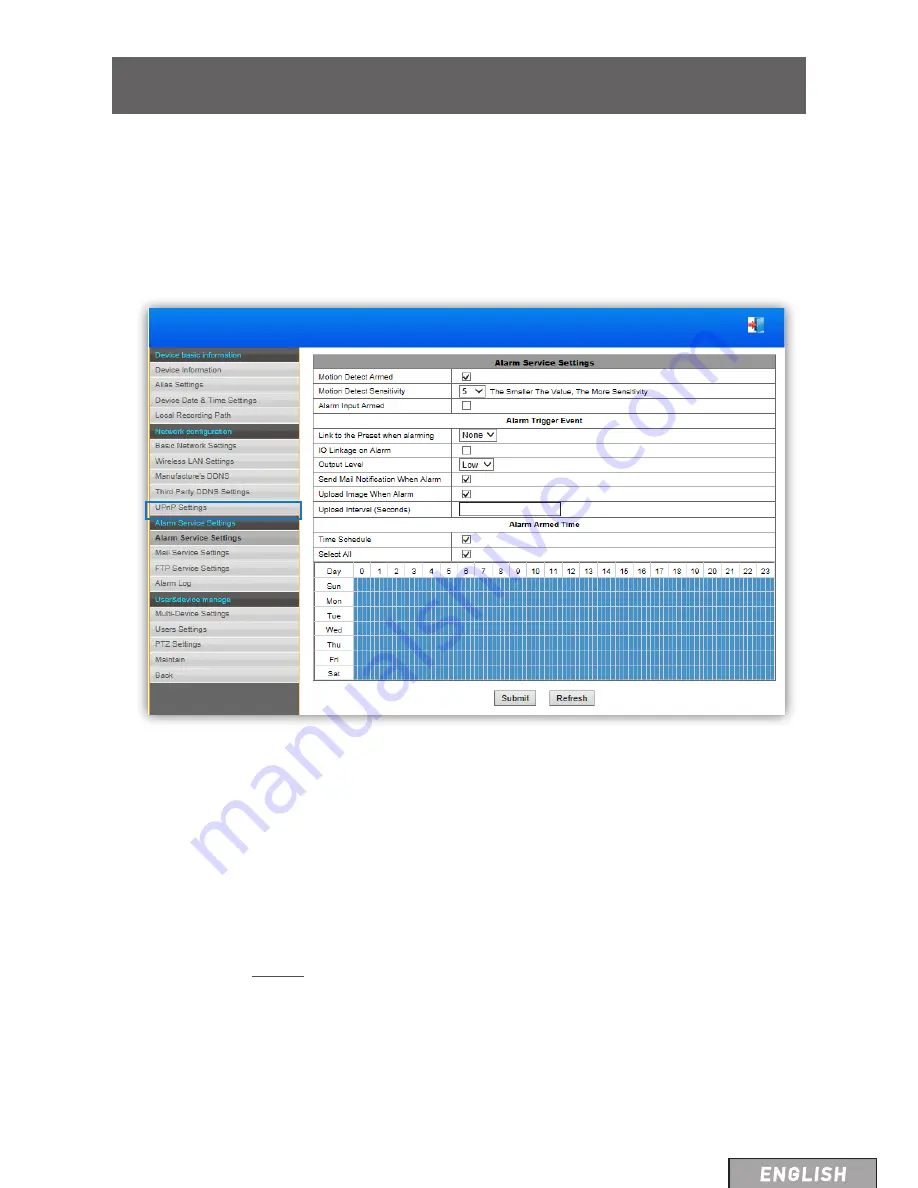
Enable Motion Detection, Email Notifications and Schedules
5. Now that your email account has been set up, it’s time to configure the motion
detection settings of your camera. Click
Alarm Service Settings
on the left navigation
bar.
6. Tick the
Motion Detect Armed
box to enable the motion detection function and then
adjust the sensitivity of the motion detection. The lower the value, the more sensitive
the motion detection will be.
7. Tick the
Send Mail Notification When Alarm
box. If you want a small snapshot to be
included with each email alert, tick the
Upload Image When Alarm
box. You can also
specify how frequently email alerts with snapshots are sent to you during a motion
detection event via the
Upload Interval
(in seconds) field.
8. Tick the
Time Schedule
box to display a timetable showing a 24-hour timeline for each
day of the week. Each box in the timeline represents 15 minutes in the 24-hour period.
The timetable allows you to choose the specific times and days to receive email alerts.
If you want to always receive email alerts, tick the
Select All
box.
9. To save the motion detection settings, click the
Submit
button.


