Upgrading The Computer
6 - 14 Changing the Optional Top Covers
6
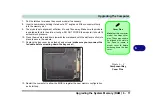
5.
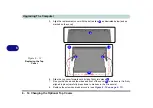
Align the replacement cover with the dotted line
as illustrated below (and as
marked on the cover).
6.
Slide the top cover forward until it clicks firmly into place
.
7.
Run your hands around the sides and front of the cover
to make sure it is firmly
aligned in place (carefully press down to make sure the fit is secure).
8.
Replace the screws and rubber covers (see
Figure 6 - 10 on page 6 - 12
).
Figure 6 - 13
Replacing the Top
Cover
8
8
9
9
10
10
10
9
10
Содержание C4805
Страница 1: ...V10 1 30...
Страница 2: ......
Страница 22: ...XX Preface...
Страница 44: ...Quick Start Guide 1 22 1...
Страница 68: ...Power Management 3 6 Power Plans 3 Figure 3 3 Power Plan Advanced Settings Win Vista...
Страница 102: ...BIOS Utilities 5 14 5...
Страница 129: ...Modules Options PC Camera Module 7 13 7 Figure 7 10 Audio Setup for PC Camera Right click...
Страница 162: ...Modules Options 7 46 7...
Страница 182: ...Interface Ports Jacks A 4 A...
Страница 196: ...SIS Video Driver Controls B 14 B...


