


Appendix C: Software Installation for the X5DPA-TGM
C-17
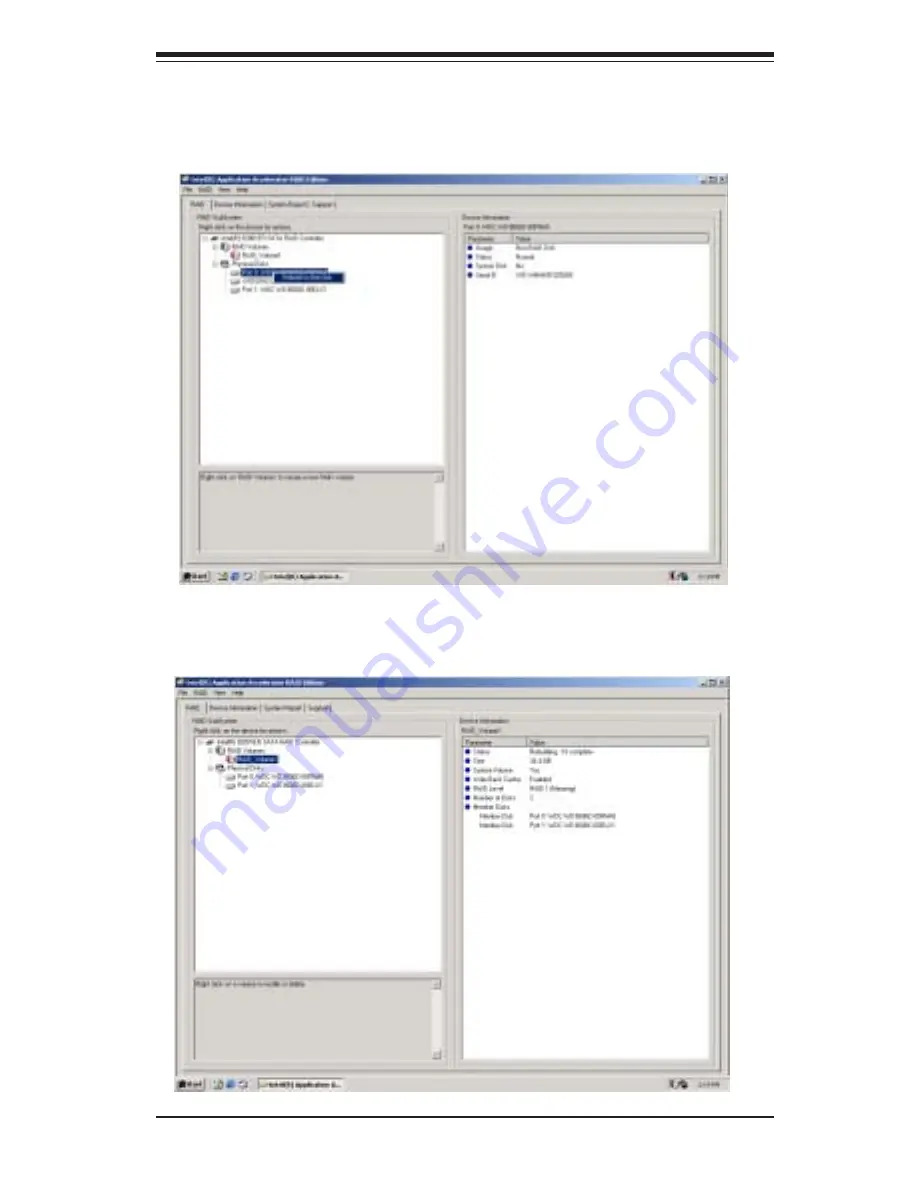
9. This time it should detect that you have a new disk available.
10. Right click on the new disk and select “Rebuild to disk” and the following
screen will appear:
11. Once you've made your selection, you can go up to the setting of
“RAID Volume” to see the process of rebuilding RAID1 in progress. The
following screen will appear: