6-8
S
UPER
S
ERVER 1015B-3 Manual
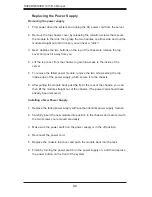
Replacing the Power Supply
Removing the power supply
First power down the system and unplug the AC power cord from the server.
1.
Remove the top chassis cover by releasing the retention screws that secure
2.
the module to the rack, then grasp the two handles on either side and pull the
module straight out until it locks (you will hear a "click").
Next, depress the two buttons on the top of the chassis to release the top
3.
cover and push it away from you.
Lift the top cover from the chassis to gain full access to the inside of the
4.
server.
To remove the failed power module, remove the two screws along the top
5.
inside edge of the power supply, which secure it to the chassis.
After pulling the module back past the lip at the rear of the chassis, you can
6.
then lift the module straight out of the chassis. (The power cord should have
already been removed.)
Installing a New Power Supply
Replace the failed power supply with another identical power supply module.
1.
Carefully insert the new module into position in the chassis and secure it with
2.
the two screws you removed previously.
Make sure the power switch on the power supply is in the off position.
3.
Reconnect the power cord.
4.
Replace the chassis top cover and push the module back into the rack.
5.
Finish by turning the power switch on the power supply on, and then depress
6.
the power button on the front of the system.
Содержание SUPERSERVER 1015B-3
Страница 1: ...SUPER USER S MANUAL Revision 1 0 SUPERSERVER 1015B 3...
Страница 5: ...v Preface Notes...
Страница 10: ...Notes SUPERSERVER 1015B 3 User s Manual x...
Страница 16: ...1 6 SUPERSERVER 1015B 3 User s Manual Notes...
Страница 23: ...Chapter 2 Server Installation 2 7 Figure 2 4 Installing the Outer Rails to the Rack 2 3 3...
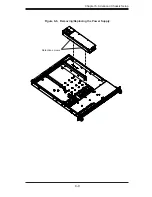
Страница 71: ...Chapter 6 Advanced Chassis Setup 6 9 Figure 6 6 Removing Replacing the Power Supply Retention screws...
Страница 72: ...6 10 SUPERSERVER 1015B 3 Manual Notes...
Страница 94: ...A 2 SUPERSERVER 1015B 3 User s Manual Notes...

