5-9
Chapter 5: Chassis Setup and Maintenance
Installing the Motherboard:
Review the documentation that came with your motherboard. Become famil-
iar with component placement, requirements, and precautions.
Disconnect the power supply and lay the chassis on a flat surface.
Open the chassis cover.
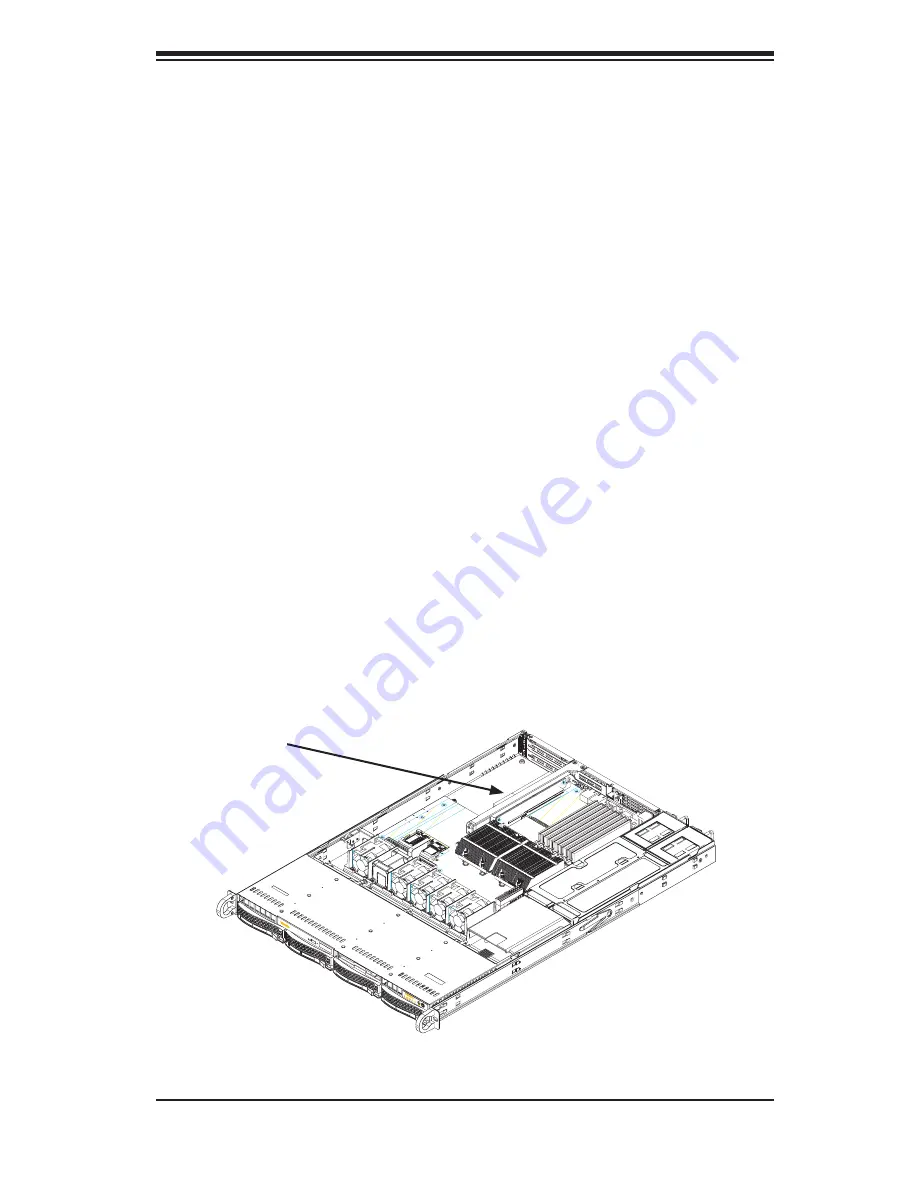
If necessary, remove the riser card. To do this, remove the two screws hold-
ing the card in place and lift the card from the chassis.
As required by your motherboard, install standoffs in any areas that do not
have a permanent standoff. To do this:
A. Place a hexagonal standoff screw through the bottom the chassis.
B. Secure the screw with the hexagon nut (rounded side up).
Lay the motherboard on the chassis aligning the permanent and optional
standoffs
Secure the motherboard to the chassis using the rounded, Phillips head
screws.
Secure the CPU(s), heatsinks, and other components to the motherboard,
chassis, and/or backplane as needed.
1.
2.
3.
4.
5.
6.
7.
8.
Figure 5-9: Chassis with a Riser Card ("U" Models Only)
Riser Card
Содержание SC815S-560B
Страница 8: ...SC815 Chassis Manual viii Notes ...
Страница 14: ...SC815 Chassis Manual 1 6 Notes ...
Страница 28: ...SC815 Chassis Manual 4 8 Notes ...
Страница 46: ...SC815 Chassis Manual 5 18 Notes ...
Страница 53: ...6 7 Chapter 6 Rack Installation SCALE 0 380 Figure 6 4 Installing the Outer Rails to the Server Rack 2 3 3 ...
Страница 56: ...SC815 Chassis Manual 6 10 Notes ...
Страница 62: ...SC815 Chassis Manual A 6 Notes ...
Страница 64: ...SC815 Chassis Manual B 2 Notes ...


