SC815 Chassis Manual
5-6
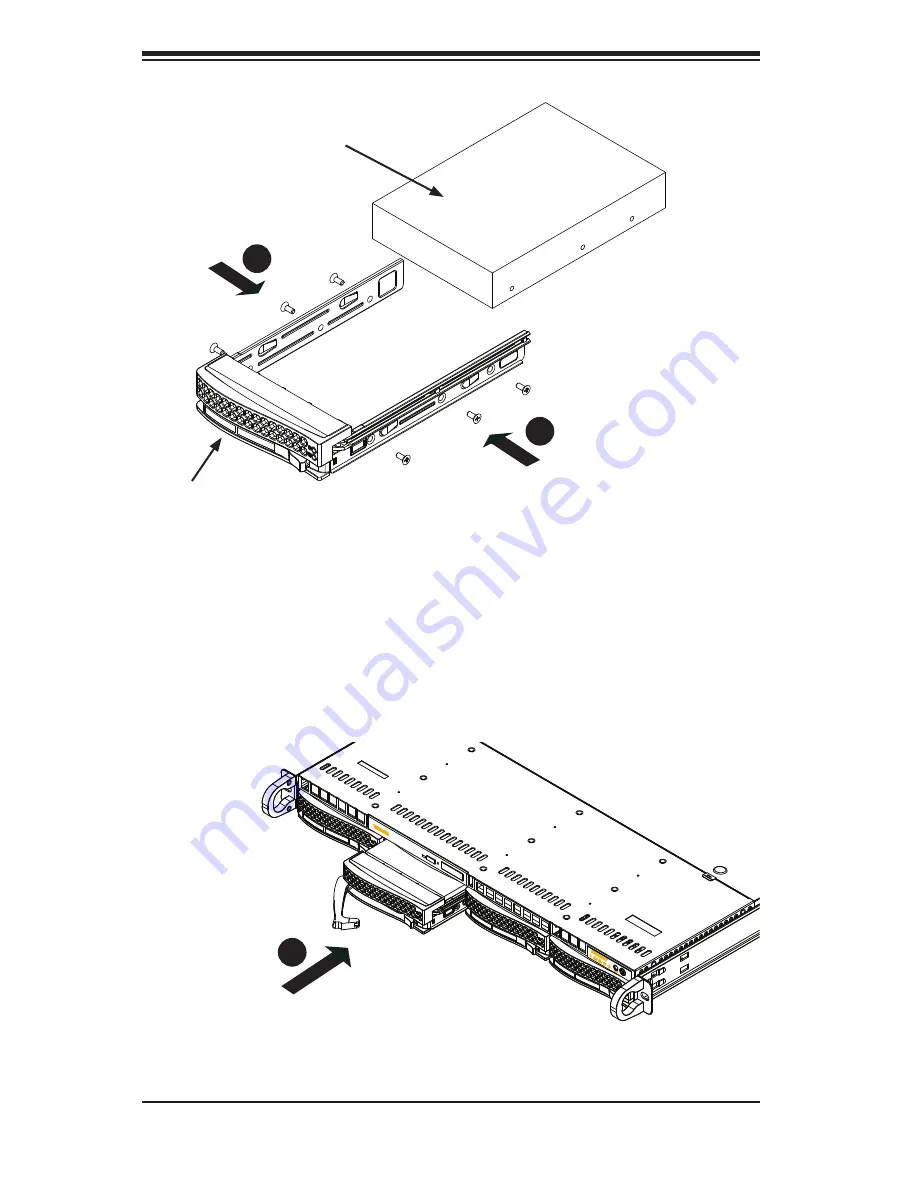
Install a new drive into the carrier with the printed circuit board side facing
down so that the mounting holes align with those in the carrier.
Secure the hard drive by tightening all six (6) screws.
Replace the drive tray into the chassis. Make sure the close the drive tray
handle.
3.
4.
5.
Drive Tray
SAS/SATA or SCSI
Hard Drive
Figure 5-6: Removing Hard Drive
Figure 5-7: Removing Hard Drive
4
4
5
Содержание SC815S-560B
Страница 8: ...SC815 Chassis Manual viii Notes ...
Страница 14: ...SC815 Chassis Manual 1 6 Notes ...
Страница 28: ...SC815 Chassis Manual 4 8 Notes ...
Страница 46: ...SC815 Chassis Manual 5 18 Notes ...
Страница 53: ...6 7 Chapter 6 Rack Installation SCALE 0 380 Figure 6 4 Installing the Outer Rails to the Server Rack 2 3 3 ...
Страница 56: ...SC815 Chassis Manual 6 10 Notes ...
Страница 62: ...SC815 Chassis Manual A 6 Notes ...
Страница 64: ...SC815 Chassis Manual B 2 Notes ...


