background image

51

Appendix B: Standardized Warning Statements

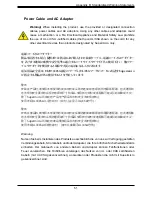
Power Cable and AC Adapter 

Warnung 
Nutzen Sie beim Installieren des Produkts ausschließlich die von uns zur Verfügung gestellten 
Verbindungskabeln, Stromkabeln und/oder Adapater, die Ihre örtlichen Sicherheitsstandards 

einhalten.  Der  Gebrauch  von  anderen  Kabeln  und  Adapter  können  Fehlfunktionen  oder 
Feuer verursachen. Die Richtlinien untersagen das Nutzen von UL oder CAS zertifizierten 
Kabeln (mit UL/CSA gekennzeichnet), an Geräten oder Produkten die nicht mit Supermicro 

gekennzeichnet sind.

電源コードとACアダプター
製品を設置する場合、提供または指定および購入された接続ケーブル、電源コードとACアダプター

を 該当する地域の条例や安全基準に適合するコードサイズやプラグと共に使用下さい。 他のケー

ブルやアダプタを使用すると故障や火災の原因になることがあります。

電気用品安全法は、ULまたはCSA認定のケーブル(UL/CSAマークがコードに表記)を Supermicro
が指定する製品以外に使用することを禁止しています。

警告
安装此产品时,请使用本身提供的或指定的或采购的连接线,电源线和电源适配器,包含遵照当
地法规和安全要求的合规的电源线尺寸和插头.使用其它线材或适配器可能会引起故障或火灾。
除了Supermicro所指定的产品,电气用品和材料安全法律规定禁止 
使用未经UL或CSA认证的线材。(线材上会显示UL/CSA符号)。

警告
安裝此產品時,請使用本身提供的或指定的或採購的連接線,電源線和電源適配器,包含遵照當
地法規和安全要求的合規的電源線尺寸和插頭.使用其它線材或適配器可能會引起故障或火災。
除了Supermicro所指定的產品,電氣用品和材料安全法律規定禁止
使用未經UL或CSA認證的線材。 (線材上會顯示UL/CSA符號)。

Warning!

 When installing the product, use the provided or designated connection 

cables, power cables and AC adaptors. Using any other cables and adaptors could 

cause a malfunction or a fire. Electrical Appliance and Material Safety Law prohibits 
the use of UL or CSA -certified cables (that have UL/CSA shown on the cord) for any 

other electrical devices than products designated by Supermicro only.

Содержание CSE-LB13-AW Series

Страница 1: ...USER S MANUAL Revision 1 0 CSE LB13 AW Cloud DC Chassis Series...

Страница 2: ...Class A device or in residential environment for Class B device This equipment generates uses and can radiate radio frequency energy and if not installed and used in accordance with the manufacturer s...

Страница 3: ...and the user s manual for your server Supermicro product manuals http www supermicro com support manuals Product drivers and utilities https www supermicro com wdl Product safety info http www superm...

Страница 4: ...placement Components 13 1 5 Returning Merchandise for Service 13 Chapter 2 Chassis Installation 2 1 Overview 14 2 2 Preparing for Setup 14 Choosing a Setup Location 14 Rack Precautions 14 System Chass...

Страница 5: ...t Installation 3 1 Removing Power 22 3 2 Accessing the System 23 3 3 Chassis Components 24 Installing Drives 24 System Cooling 26 Fans 26 Air Shrouds 27 AIOM Cards 28 PCIe Expansion Cards 29 Power Sup...

Страница 6: ...ro com Europe Address Super Micro Computer B V Het Sterrenbeeld 28 5215 ML s Hertogenbosch The Netherlands Tel 31 0 73 6400390 Fax 31 0 73 6416525 Email sales supermicro nl General Information support...

Страница 7: ...s shipped in and note if it was damaged in any way If any equipment appears damaged please file a damage claim with the carrier who delivered it Decide on a suitable location for the rack unit that wi...

Страница 8: ...t the BMC and will disable the rear VGA port to enable the front VGA port if available Reset button Reboots the system Power button Applies or removes primary power from the power supply to the server...

Страница 9: ...solid with Power LED blinking green Fault detected Blue and red blinking at 10 Hz Recovery mode Blue solid UID has been activated locally to locate the server in a rack environment Blue blinking at 1H...

Страница 10: ...the meaning of the status indicator is described in the table below For OS RAID or non RAID configurations some LED indications are not supported such as hot spare Drive Carrier LED Indicators Color B...

Страница 11: ...ort Video port When the UID LED is on the rear VGA may be disabled to enable the front VGA port if available USB Ports Two USB 3 0 ports COM Port Serial port UID LED Unit identifier indicator light BM...

Страница 12: ...pply is on Blinking Green Indicates that the power supply is plugged in and turned off by the system Blinking Amber Indicates that the power supply has a warning condition and continues to operate Sol...

Страница 13: ...be prominently displayed on the outside of the shipping carton and mailed prepaid or hand carried Shipping and handling charges will be applied for all orders that must be mailed when service is compl...

Страница 14: ...o the rack Please read this section in its entirety before you begin the installation Choosing a Setup Location The chassis should be situated in a clean dust free area that is well ventilated Avoid a...

Страница 15: ...ver from power surges and voltage spikes and to keep your system operating in case of a power failure Allow any drives and power supply modules to cool before touching them When not servicing always k...

Страница 16: ...ular attention should be given to power supply connections other than the direct connections to the branch circuit i e the use of power strips etc To prevent bodily injury when mounting or servicing t...

Страница 17: ...the rack mounting hardware provided You should also refer to the installation instructions that came with the specific rack you are using If you are installing into a two post telco rack skip to that...

Страница 18: ...re the rail to the rack Outer Rail Installation 1 Align the square pegs on the front end of the rail with the square holes on the front of the rack C Push the rail into the rack until the quick releas...

Страница 19: ...he rack you can install the server 1 Align the rear of the chassis rails with the rack rails and then push evenly on both sides of the chassis until it clicks into the fully extended position 2 Depres...

Страница 20: ...assistance Be sure to have sufficient assistance supporting the chassis when removing it from the rack Use a lift 1 If necessary loosen the thumb screws on the front of the chassis that hold it in th...

Страница 21: ...chassis should be positioned so that the weight is balanced between front and back 2 Attach the two front brackets to each side of the chassis then the two rear brackets positioned with just enough sp...

Страница 22: ...Please follow the procedures given in each section 3 1 Removing Power Use the following procedure to ensure that power has been removed from the system This step is necessary when removing or install...

Страница 23: ...the Top Cover 1 Unscrew the thumbscrew at the rear of the cover and slide the cover toward the rear 2 Lift the top cover up Check that all ventilation openings on the top cover and the top of the cha...

Страница 24: ...removal from the chassis These carriers also help promote proper airflow Each carrier has a small space on the front to receive a label orange or purple to help distinguish SAS SATA from other protoco...

Страница 25: ...the PCB side facing down and the connector end toward the rear of the carrier 3 Tilt the drive to insert it onto the two posts on the right inside of the carrier 4 Pull out the two spring locking cla...

Страница 26: ...d works to dampen vibration levels Make sure the chassis top cover makes a good seal so air circulates properly through the chassis Figure 3 5 Fan Positions 1 6 5 4 3 2 Changing a System Fan 1 Determi...

Страница 27: ...e Standard Air Shrouds Position the air shrouds as illustrated in the figure below sliding the front over the edge of the fan tray Shrouds 5 Place the replacement fan into the vacant space in the hous...

Страница 28: ...work port cards PCIe 4 0 AIOM Configurations Slot Mechanical Electrical 1 Small Form Factor OCP 3 0 x16 CPU1 2 Small Form Factor OCP 3 0 x16 CPU2 Figure 3 8 Installing AIOMs 2 1 Installing AIOM 1 Remo...

Страница 29: ...Card 1 Power down the system as described in section 3 1 and remove the cover 2 Pull the riser bracket up and out using the pull tabs Figure 3 10 Riser Card Bracket and Expansion Slots Expansion Card...

Страница 30: ...open slot in the rear of the chassis Flip the small plastic lever to secure the backplate 4 Insert the riser card into the motherboard expansion slot while aligning the riser card bracket with the re...

Страница 31: ...he status Solid Green When illuminated indicates that the power supply is on Blinking Green When blinking indicates that the power supply is plugged in and turned off by the system Blinking Amber When...

Страница 32: ...Supermicro CSE LB13 AW Chassis Series User s Manual 32 Figure 3 12 Replacing the Power Supply Release Tab PWS1 PWS2...

Страница 33: ...s the power supply specifications for your chassis 800 860W MFR Part PWS 860P 1R2 Total Output Power 800W with Input 100 127Vac 860W with Input 200 240Vac 860W with Input 200 240Vdc Rated AC Voltage 1...

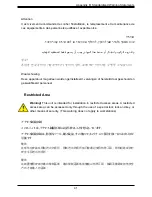
Страница 34: ...ment for assistance Only certified technicians should attempt to install or configure components Read this appendix in its entirety before installing or configuring components in the Supermicro chassi...

Страница 35: ...o considere los riesgos de la corriente el ctrica y familiar cese con los procedimientos est ndar de prevenci n de accidentes Al final de cada advertencia encontrar el n mero que le ayudar a encontrar...

Страница 36: ...at werken dient u zich bewust te zijn van de bij een elektrische installatie betrokken risico s en dient u op de hoogte te zijn van de standaard procedures om ongelukken te voorkomen Gebruik de nummer...

Страница 37: ...mentaci n Attention Avant de brancher le syst me sur la source d alimentation consulter les directives d installation Circuit Breaker Waarschuwing Raadpleeg de installatie instructies voordat u het sy...

Страница 38: ...corrientes del edificio Aseg rese de que el dispositivo de protecci n no sea superior a 250 V 20 A Attention Pour ce qui est de la protection contre les courts circuits surtension ce produit d pend de...

Страница 39: ...e energ a y del cable el ctrico quitado de los m dulos de fuente de alimentaci n antes de tener acceso el interior del chasis para instalar o para quitar componentes de sistema Attention Le syst me do...

Страница 40: ...troomkabels aangesloten op de voeding en van de behuizing te verwijderen Equipment Installation Warning Only trained and qualified personnel should be allowed to install replace or service this equipm...

Страница 41: ...tention Il est vivement recommand de confier l installation le remplacement et la maintenance de ces quipements des personnels qualifi s et exp riment s Warning This unit is intended for installation...

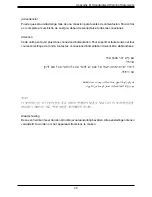
Страница 42: ...acceso a una de estas reas mediante la utilizaci n de una herramienta especial cerradura con llave u otro medio de seguridad Attention Cet appareil doit tre install e dans des zones d acc s r serv s L...

Страница 43: ...mblable ou quivalent recommand e par le fabricant Jeter les piles usag es conform ment aux instructions du fabricant Advertencia Existe peligro de explosi n si la bater a se reemplaza de manera incorr...

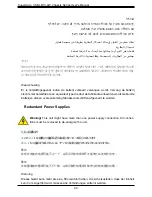
Страница 44: ...rikant aanbevolen wordt Gebruikte batterijen dienen overeenkomstig fabrieksvoorschriften afgevoerd te worden Redundant Power Supplies Warning This unit might have more than one power supply connection...

Страница 45: ...mloos te maken Advertencia Puede que esta unidad tenga m s de una conexi n para fuentes de alimentaci n Para cortar por completo el suministro de energ a deben desconectarse todas las conexiones Atten...

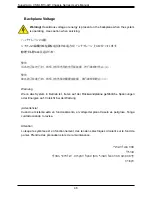
Страница 46: ...tung Advertencia Cuando el sistema est en funcionamiento el voltaje del plano trasero es peligroso Tenga cuidado cuando lo revise Attention Lorsque le syst me est en fonctionnement des tensions lectri...

Страница 47: ...umplir con las normas de electricidad locales y nacionales Backplane Waarschuwing Een gevaarlijke spanning of energie is aanwezig op de backplane wanneer het systeem in gebruik is Voorzichtigheid is g...

Страница 48: ...nationale elektriciteitsvoorschriften Warnung Die Entsorgung dieses Produkts sollte gem allen Bestimmungen und Gesetzen des Landes erfolgen Warning Ultimate disposal of this product should be handled...

Страница 49: ...recyclage de ce produit sont g n ralement soumis des lois et ou directives de respect de l environnement Renseignez vous aupr s de l organisme comp tent Hot Swap Fan Warning Warning Hazardous moving...

Страница 50: ...los destornilladores y todos los objetos lejos de las aberturas del ventilador Attention Pieces mobiles dangereuses Se tenir a l ecart des lames du ventilateur Il est possible que les ventilateurs so...

Страница 51: ...UL oder CAS zertifizierten Kabeln mit UL CSA gekennzeichnet an Ger ten oder Produkten die nicht mit Supermicro gekennzeichnet sind AC AC UL CSA UL CSA Supermicro Supermicro UL CSA UL CSA Supermicro UL...

Страница 52: ...iqu sur le code pour tous les autres appareils lectriques sauf les produits d sign s par Supermicro seulement AC AC UL CSA UL CSA Supermicro UL CSA UL CSA Supermicro Advertencia Cuando instale el prod...

Страница 53: ...Aansluitmethode deze moet altijd voldoen aan de lokale voorschriften en veiligheidsnormen inclusief de juiste kabeldikte en stekker Het gebruik van niet geschikte Kabels en of Adapters kan een storin...

Отзывы: