


37
Chapter 3: Maintenance and Component Installation
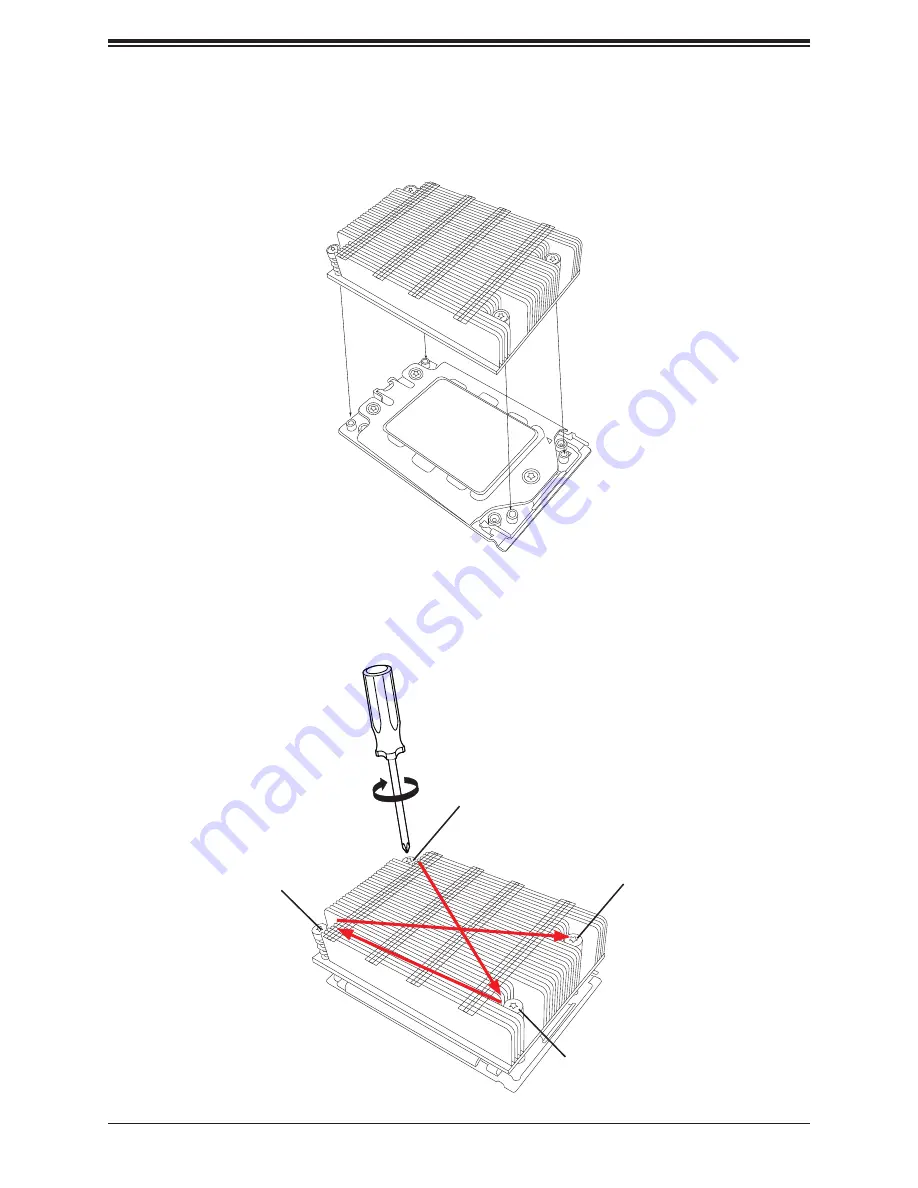
3. After the Force Frame is secured and the CPU package is in place, now you must install
the heatsink to the frame. Lower the heatsink down till it rests securely over the four
screw holes on CPU Package on the socket frame.
4. Using a diagonal pattern, tighten the four screws down on the heatsink in a clockwise
fashion till it is secure. The heatsink will now be secured and you have finished installing
the processor and heatsink onto the motherboard. Repeat this procedure for any
remaining CPU sockets on the Motherboard.
#1 Screw
#2 Screw
#3 Screw
#4 Screw
Содержание A+
Страница 1: ...USER S MANUAL Revision 1 0b A Server AS 4124GO NART AS 4124GO NART ...
Страница 13: ...13 Chapter 1 Introduction 1 5 System Architecture Block Diagrams Figure 1 5 System Block Diagram ...
Страница 14: ...14 A Server AS 4124GO NART AS 4124GO NART User s Manual Figure 1 6 Motherboard Block Diagram ...
Страница 95: ...Chapter 4 UEFI BIOS 95 Save Changes and Exit Use this item to save the changes above and exit ...