15
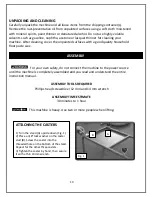
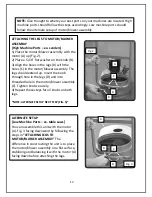
ATTACHING THE STAND TO THE MOTOR/BLOWER
ASSEMBLY
NOTE: Two (2) people may be needed for this step.
Place all four stand posts (A) Fig. 4 into the four legs (B) on the
motor/blower assembly. Make sure that the metal base plate (D) is
over the large dust collection hole (C).
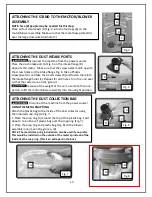
ATTACHING THE DUST INTAKE PORTS
Disconnect the machine from the power source!
Place the dust intake port (A) Fig. 5 on the intake flange (B)
opposite the motor. Make sure that the screw holes match up with
the screw holes on the intake flange Fig. 6. Take a Philips
screwdriver (A) and take the small screws (B) and fasten them into
the intake flange holes (C). Repeat for all 4 holes. Turn the unit over
so that the casters are on the ground.
Because of the weight of the unit, use more than one
person to lift the motor/blower assembly into the upright position.
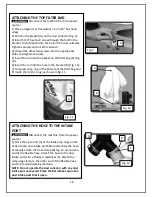
ATTACHING THE DUST COLLECTION BAG
Disconnect the machine from the power source!
USING THE METAL SNAP RING
Attach the plastic bag to the inside of the dust collector using
the included snap ring (A) Fig. 7.
1. Place the snap ring (A) around the top of the plastic bag. Fold
about 4 to 6 inches of plastic bag over the snap ring (Fig. 7).
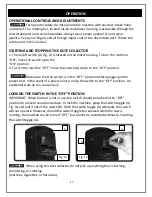
2. Place the snap ring and plastic bag (Fig. 8) on the blower
assembly inner mounting groove. (B).
NOTE: The metal clamp ring included can also be used if you prefer.
This would be installed on the outside of the metal lip instead of the
inside like the snap ring. (This is an extra part in the box).
Fig. 5
Fig. 4
Fig. 6
A
B
A
B
C
D
C
A
B
Fig. 7
A
Fig. 8
A
B


