


13
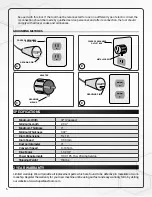
POWER AND ELECTRICAL SAFETY
The SuperMax Tools 16-32 drum sander requires 110 V, single-phase 20 amp service. After the dust collection sys-
tem is in place and the drum alignment is checked your machine should be ready to be powered up and operated.
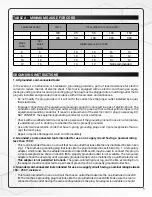
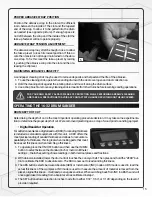
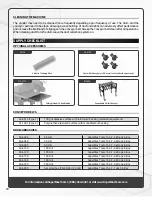
ABRASIVE SELECTION GUIDE
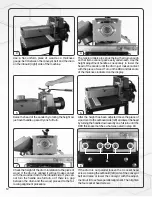
To attach a strip to the drum, follow the procedure below.
GRIT COMMON APPLICATION
36 GRIT
Abrasive planing, surfacing rough-sawn boards, maximum stock or glue removal
60 GRIT
Surfacing and dimensioning boards, trueing warped boards
80 GRIT
Light dimensioning, removal of planer ripples
100 GRIT
Light surfacing, removal of planer ripples
120 GRIT
Light surfacing, minimal stock removal
150 GRIT
Finish sanding, minimal stock removal
180 GRIT
Finish sanding only, not for stock removal
220 GRIT
Finish sanding only, not for stock removal
Note: See page #20 for complete list of pre-cut abrasives offered by SuperMax Tools for this specific unit.
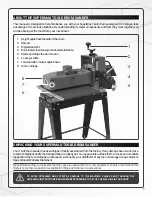
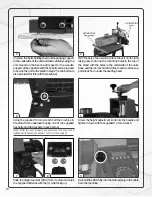
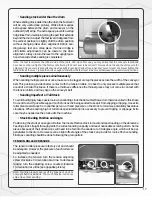
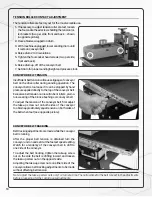
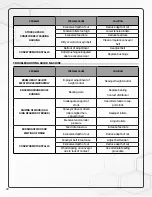
CONNECTING DUST COLLECTORS
Dust collection is necessary for the SuperMax Tools 16-32 drum sander. The sander comes equipped with a 4”
diameter dust exhaust port at the top of the cover. Check to make sure that the minimum dust requirements are
sufficient. To attach to your collection system, install 4” hose from your collector. The minimum recommended
dust collector capacities is 600 cfm. For best results, follow the recommendations of the manufacturer of your
dust collection equipment. When connecting dust collectors straight pipe is preferred because it is the least
restrictive for airflow. If straight pipe is not possible Y’s and elbows are preferred because they are less restrictive
to airflow than T’s.
Note: Some applications will require more dust collection than the recommended minimum.
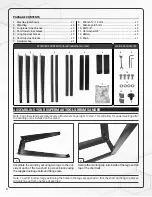
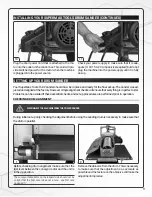
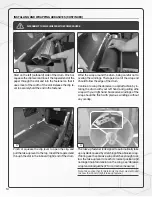
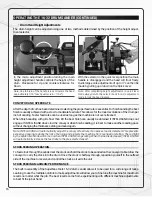
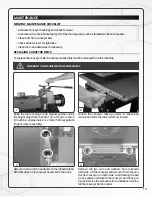
INSTALLING AND WRAPPING ABRASIVES
Accurate attachment of the abrasive strip to the drum is critical to achieving the top performance from your
SuperMax Tools 16-32 drum sander. Abrasive strips do not have to be pre-measured. The end of the roll is first
tapered and attached to the outboard (left) side of the drum. Then the strip is wrapped around the drum, and the
second taper is made for attachment to the inboard (right) side of the drum.
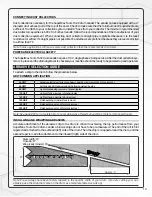
Note: Pre-cut wraps have been factory tapered to the specific width of your drum. If you are cutting your own
abrasive, use the wrap that came on the drum as a template (abrasive side up).
Approx. 3’’
Bande abrasive (côté abrasif vers le haut)
3’’
15-3/4
"
TAPERED END OF THE ABRASIVE
Drum width: 16"
Tip-to-tip: 97"
Wrap ready to install: 91"
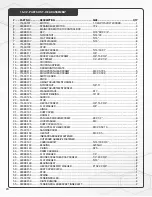
Содержание 16-32
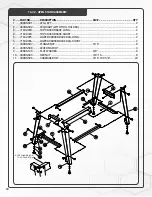
Страница 23: ...23 16 32 WIRING DIAGRAM...
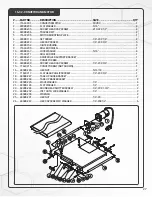
Страница 26: ...16 32 HEAD ASSEMBLY 26...
Страница 29: ...NOTES 29...
Страница 30: ...P 1 888 454 3401 F 1 651 454 3465 SuperMaxTools com sales SuperMaxTools com...


