background image

FRANÇAIS

ENGLISH

ESP

AÑOL

OPERATING PROCEDURES

=

  Replace oil fill plug before starting compressor.

DRAINING THE OIL

1.  Remove the oil drain plug (oil level sight glass). Allow oil to drain completely.

2.  Replace the oil drain plug (we recommend the use of a sealing compound or 

teflon tape to avoid leakage).  Do not over-tighten.

3.  Refill with the recommended oil to the red dot in the oil level sight glass.

BEFORE OPERATING:

=

  Check to that nuts and bolts are all snug.

=

  Check to the quantity and quality of oil (see compressor lubrication, above).

INITIAL BREAK-IN

1.  Open 

Drain cock


to permit air to escape, so no air pressure builds up in the air 

tank.

2.  Plug power supply cord into correct power source.

3.  Run the compressor in this no-load condition for 20 to 30 minutes to lubricate 

the bearings and pistons.

4.  Close the air tank drain cock. 

5.  Your compressor is now ready for use.

6.  After 2 weeks, tighten all nuts and bolts, including head bolts.

MAINTENANCE

WARNING:

 BEFORE ANY MAINTENANCE OR ADJUSTMENTS TO YOUR AIR 

COMPRESSOR, ALWAYS TAKE THE FOLLOWING SAFETY PRECAU-

TIONS:

1.  Disconnect electrical power.

2.  Open the drain cock to drain air tank of pressure.

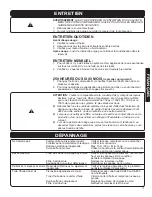
DAILY MAINTENANCE

Before each use:

1.  Check the oil level

2.  Be sure all nuts and bolts are tight 

3.  Check for any unusual noise or vibration 

After use:

 open the air tank drain cock to drain condensation from tank

MONTHLY MAINTENANCE:

1.  Inspect air system for leaks by applying soapy water to all joints. Tighten those 

joints if leakage is observed.

2.  Check that all nuts and bolts stay tight.

250 HOURS OR SIX (6) MONTHS 

(whichever comes first)

1.  Change compressor oil (see compressor lubrication, above)

2.  Paint spraying operations or dusty environments may require you replace oil 

more often

CAUTION:

  All air line components (including hoses, pipe, connectors, filters, & 

regulators, etc.) must be rated for a minimum working pressure of 150 psi / 

1034 kPa / 10.3 bar or 150% of the maximum system pressure, whichever is 

greater. 

=


Disconnect any tools from the air supply before performing maintenance, 

clearing a jammed fastener, leaving the work area, moving the tool to another 

location, or handing it to another person.

=


When cleaning air filter, or any parts in direct contact with the air production, 

do not use any flammable or toxic cleaner or solvent

=


During the break in period, nuts and bolts have a tendency to loosen up. After 

two weeks, tighten all nuts and bolts including head bolts.

!

!

Содержание SPT290

Страница 1: ...al sales invoice in a safe dry place for future reference CONSERVEZ CE GUIDE Vous aurez besoin de ce guide pour les instructions de s curit les proc dures d utilisation et la garantie Conservez le dan...

Страница 2: ...sistance path to carry electricity to ground away from the operator should the tool malfunction electrically Do not remove the grounding prong from the plug or alter the plug in any way If in doubt as...

Страница 3: ...ARTS When servicing use only identical Superior replace ment parts and fasteners recommended by us 10 EMPLOYERS must enforce compliance with the safety warnings and all other instructions in this manu...

Страница 4: ...e air receiver A check valve prevents it from going back into the pump Working air is not immediately available The pump continues to add air until the air receiver pressure builds to above that requi...

Страница 5: ...ain cock to drain air tank of pressure DAILY MAINTENANCE Before each use 1 Check the oil level 2 Be sure all nuts and bolts are tight 3 Check for any unusual noise or vibration After use open the air...

Страница 6: ...T290 12 Compression ring 1 SPT290 13 Cylinder 1 SPT290 14 Washer 4 SPT290 15 Bolt 4 SPT290 16 Gasket 1 SPT290 17 Valve assembly 2 SPT290 18 Valve plate 2 SPT290 19 Valve plate spacer 1 SPT290 20 Gaske...

Страница 7: ...t mise la terre qui convient de voltage indiqu et avec une protection par fusible Les outils mis la terre doivent tre branch s dans une prise de courant install e et mise la terre ad quatement La mise...

Страница 8: ...Ne pas utiliser avec d autres gaz 3 MASQUE DE PROTECTION Toujours utiliser un masque filtrant ou anti vapeurs lorsque vous vaporisez de la peinture ou autres produits chimiques 4 MAINTENEZ L OUTIL EN...

Страница 9: ...glez la pres sion d sir e de la conduite d air peut exiger un branchement au compresseur l Bouchon reniflard pour l huile peut exiger un branchement au compresseur l 115 volt 60 Hz 10 amp l 3400 tr m...

Страница 10: ...eur fonctionne Utilisez l huile contenant les propri t s requises l Puisque le compresseur est plac sur une surface nivel e le niveau d huile sera situ au point rouge sur l indicateur de niveau d huil...

Страница 11: ...l entretien de d gager une attache coinc e de quitter l aire de travail de d placer l outil dans un autre endroit ou de la remettre une autre personne l Lorsque vous nettoyez le filtre ou toute autre...

Страница 12: ...1 SPT290 31 Palier 1 SPT290 32 Rotor 1 SPT290 33 Stator 1 SPT290 34 Palier 1 No de pi ce D scription Qty SPT290 35 Couvercle arri re 1 SPT290 36 Condensateur 1 SPT290 37 Condensateur 1 SPT290 38 crou...

Страница 13: ...de remplacement ou donn es techniques contactez votre fournisseur autoris WARNING Repairs should be made by an authorized repair centre Opening this tool could invalidate your warranty AVERTISSEMENT...

Отзывы: