background image

930487 Rev. B

V I .       W a r n i n g s :   F a l l s   &   T i p - O v e r s

17

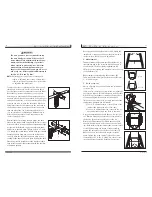
H. TRANSFER

It is dangerous to transfer on your own. It requires good balance and agility.  Be
aware that there is a point during every transfer when the wheelchair seat is not
below you. To Avoid A Fall:

1. Work with your health care advisor to learn safe methods.

a. Learn how to position your body and how to support yourself during a transfer. 
b. Have someone help you until you know how to do a safe transfer on your own.

2. Lock the rear wheels before you transfer. This keeps the rear wheels from rolling. 

NOTE–

This will NOT keep your chair from sliding away from you or tipping.

3. Make sure to keep pneumatic tires properly inflated. Low tire pressure may allow

the rear wheel locks to slip.

4. Move your chair as close as you can to the seat you are transferring to. 

If possible, use a transfer board.

5. Rotate the front casters until they are as far forward as possible. 
6. If you can, remove or swing footrests out of the way.

a. Make sure your feet do not catch in the space between the footrests.
b. Avoid putting weight on the footrests as this may cause the chair to tip.

7. Make sure armrests are out of the way and do not interfere.
8. Transfer as far back onto the seat surface as you can. This will reduce the risk

that the chair will tip or move away from you.

If you fail to heed these warnings damage to your chair, a fall, tip-over or loss of control
may occur and cause severe injury to the rider or others.

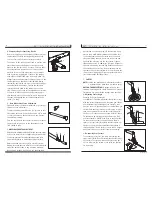
I. CURBS & STEPS

1. Each person who helps you should read and follow the warnings “For Safe Use”

(Section VII).

2. Do not try to climb or descend a curb or step alone UNLESS you are a skilled

rider of this chair and:
a. You can safely do a “wheelie”; and
b. You are sure you have the strength and balance to do so.

3. Unlock and rotate anti-tip tubes up, out of the way, so they do not interfere.
4. Do not try to climb a high curb or step (more than 4 inches high) UNLESS you

have help. Doing so may cause your chair to exceed its balance point and tip over.

5. Go straight up and straight down a curb or step. If you climb or descend at an

angle, a fall or tip-over is likely.

6. Be aware that the impact of dropping down from a curb or step can 

damage

your chair or loosen fasteners.

If you fail to heed these warnings damage to your chair, a fall, tip-over or loss of control
may occur and cause severe injury to the rider or others.
V I .       W a r n i n g s :   F a l l s   &   T i p - O v e r s

930487 Rev. B

16

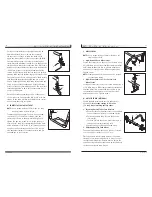
G. RAMPS, SLOPES & SIDEHILLS

Riding on a slope, which includes a ramp or side hill, will change the center of 
balance of your chair. Your chair is less stable when it is at an angle. Anti-tip tubes
may not prevent a fall or tip-over. 

1. Do not use your chair on a slope steeper than 10%. (A 10% slope means: one

foot in elevation for every ten feet of slope length.)

2. Always go as straight up and as straight down as you can. (Do not “cut the cor-

ner” on a slope or ramp.) 

3. Do not turn or change direction on a slope. 
4. Always stay in the CENTER of the ramp. Make sure ramp is wide enough that you

are not at risk that a wheel may fall over the edge.

5. Do not stop on a steep slope. If you stop, you may lose control of your chair. 
6. NEVER use rear wheel locks to try to slow or stop your chair. This is likely 

to cause your chair to veer out of control.

7. Beware Of:

a. Wet or slippery surfaces.
b. A change in grade on a slope (or a lip, bump or depression). These may

cause a fall or tip-over.

c. A drop-off at the bottom of a slope.  A drop-off of as small as 3/4 inch can

stop a front caster and cause the chair to tip forward.

8. To Reduce The Risk Of A Fall Or Tip-Over:

a. Lean or press your body UPHILL. This will help adjust for the change in the

center of balance caused by the slope or side hill. 

b. Keep pressure on the handrims to control your speed on a down slope. 

If you go too fast you may lose control. 

c. Ask for help any time you are in doubt.

9. Ramps At Home & Work - For your safety, ramps at home and work must meet all

legal requirements for your area. We recommend:
a. Width. At least four feet wide.
b. Guardrails. To reduce the risk of a fall, sides of ramp must have guardrails (or

raised borders at least three inches high).

c. Slope. Not more than a 10% grade. 
d. Surface. Flat and even, with a thin carpet or other non-skid material. 

(Make sure there is no lip, bump or depression.)

e. Bracing. Ramp must be STURDY. You may need bracing so ramp does not

“bow” when you ride on it.

f. Avoid A Drop Off. You may need a section at the top or bottom to smooth

out the transition.

If you fail to heed these warnings damage to your chair, a fall, tip-over or loss of control
may occur and cause severe injury to the rider or others.
Содержание Quickie Ti Titanium

Страница 1: ...kie Ti Titanium User Instruction Manual Warranty SUPPLIER THIS MANUAL MUST BE GIVEN TO THE RIDER OF THIS WHEELCHAIR RIDER BEFORE USING THIS WHEELCHAIR READ THIS ENTIRE MANUAL AND SAVE FOR FUTURE REFER...

Страница 2: ...fety new products and options to increase your use and enjoyment of this wheelchair FOR ANSWERS TO YOUR QUESTIONS Your authorized supplier knows your wheelchair best and can answer most of your questi...

Страница 3: ...39 D Cleaning 39 E Storage Tips 39 XII SUNRISE LIMITED WARRANTY 40 I I T a b l e o f C o n t e n t s 930487 Rev B 4 I INTRODUCTION 3 A Sunrise Listens 3 II TABLE OF CONTENTS 4 III YOUR CHAIR AND ITS...

Страница 4: ...td stainless steel Opt titanium quad release axle nuts Anti tip Tubes Opt Rear anti tip tubes Standard Rear Wheels Std spoke Quickie Performance Wheels Opt heat treated Opt Spinergy Tire Size Std 24 O...

Страница 5: ...severe injury to the rider or others I V N o t i c e R e a d B e f o r e U s e 930487 Rev B 8 A CHOOSE THE RIGHT CHAIR SAFETY OPTIONS Sunrise provides a choice of many wheelchair styles to meet the ne...

Страница 6: ...Of Your Chair 1 Make sure the chair rolls easily and that all parts work smoothly Check for noise vibration or a change in ease of use They may indicate low tire pressure loose fasteners or damage to...

Страница 7: ...makes the chair more stable 2 Lock anti tip tubes in place If your chair does not have anti tip tubes back it up against a wall and lock both rear wheels If you fail to heed these warnings damage to y...

Страница 8: ...rear wheels hits an object and stops rolling 1 Propel your chair slowly and smoothly 2 If your chair has anti tip tubes make sure to lock them in place 3 Stop often and check to be sure your path is...

Страница 9: ...loosen fasteners If you fail to heed these warnings damage to your chair a fall tip over or loss of control may occur and cause severe injury to the rider or others V I W a r n i n g s F a l l s T i p...

Страница 10: ...he curb or step turn the chair around and pull it backward 3 While looking over your shoulder carefully step back until you are off the curb or stair and standing on the lower level 4 Pull the chair t...

Страница 11: ...der or others For additional maintenance information see Section XII Maintenance V I I W a r n i n g s F o r S a f e U s e 930487 Rev B 20 C CLIMBING A CURB OR SINGLE STEP Follow these steps to help t...

Страница 12: ...nflated tires may burst If you fail to heed these warnings damage to your chair a fall tip over or loss of control may occur and cause severe injury to the rider or others V I I I W a r n i n g s C o...

Страница 13: ...may occur and cause severe injury to the rider or others V I I I W a r n i n g s C o m p o n e n t s O p t i o n s 930487 Rev B 24 G POSITIONING BELTS OPTIONAL Use positioning belts ONLY to help suppo...

Страница 14: ...system not approved by Sunrise may alter the center of balance of this chair This may cause the chair to tip over 1 Do not change the seat system of your chair UNLESS you consult your authorized supp...

Страница 15: ...uareness of the casters Letter I If you change your center of gravity position re adjust these if necessary Before adjusting your wheelchair s center of gravity locate the additional saddles supplied...

Страница 16: ...X S e t U p A d j u s t m e n t 930487 Rev B 30 The more you move your rear wheels forward the more likely your chair will tip over back wards Always make adjustment in small incre ments and check the...

Страница 17: ...r at this time Loosen and remove the axle using two T 25 Torx wrenches Be certain to set aside the spacers for reassembly 4 Compensating for Seat Sling Tension Before loosening any of the hardware tha...

Страница 18: ...t the second anti tip tube wheel the same way Both wheels should be exactly the same height Loosen the stem bolt A on the right fork using an 8mm Allen wrench Do not remove the stem bolt Simply loosen...

Страница 19: ...should also perform smoothly If you have any problems fol low these procedures a Review assembly and adjustment sections to make sure chair was properly prepared b Review trouble shooting guide c If y...

Страница 20: ...n proper working order Inspect and service all items on the Maintenance Chart Letter B 3 If stored for more than three months have your chair inspected by an authorized supplier before use A INTRODUCT...

Страница 21: ...is removed or altered 3 This warranty applies in the USA only Check with your supplier to find out if international warranties apply D WHAT WE WILL DO Our sole liability is to repair or replace cover...

Страница 22: ...10 03 930487 Rev B Sunrise Medical 7477 East Dry Creek Parkway Longmont Colorado 80503 USA 303 218 4600 800 333 4000 In Canada 800 263 3390 This product is manufactured to comply with the Medical Devi...

Отзывы: