Sungale cpf1909 Скачать руководство пользователя страница 8

11

Manage Signage

If you have more digital signage devices, please click the 

"

Add More Digital Signage

"


button on the upper right corner, and you will be able to input more digital signage 
serial numbers.

10

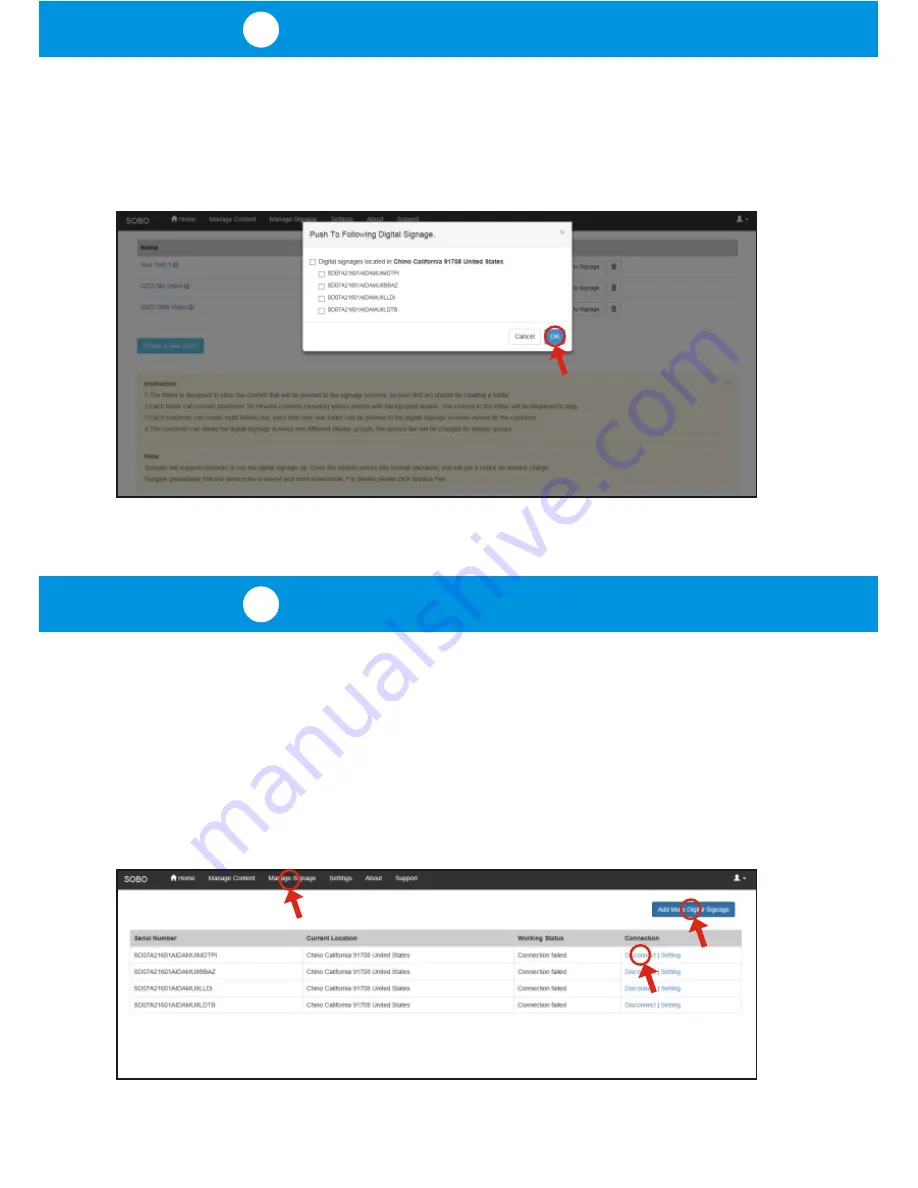
Choose Digital Signage

After clicking the 

"

Push to Signage

"

 button, a list of all digital signage units under 

your account will be displayed. You can choose a specific group or all of the digital 
signage units to display your folder's content. After making the selection, click the 

"

OK

"


button, and the folder's content will be pushed to the individual digital signage 

units you've selected. 

Note: Digital Signage units will be displayed with location information for easier 
selection by region. 

Click the 

"

Manage Signage

"

 tab in the top navigation area to view the page that 

displays all digital signage units associated with your account. Here, you can see 
the physical location of each unit, and their working status. If any of the units are no 
longer in use, you can 

"

Disconnect

"

 it, and that unit will no longer be listed on this 

page or your account.

Содержание cpf1909

Страница 1: ...Digital Signage Quick Start Guide...

Страница 2: ...e and the right side is the login form Underneath the login form you ll find a Sign Up link First time users need to complete the initial sign up in order to proceed Please click the Sign Up link and...

Страница 3: ...on you will need to input the serial numbers of your digital signage devices The serial number is displayed on each device when powering up for the first time Please refer to Step 14 for details Input...

Страница 4: ...ructions click on Manage Content As shown below the first thing is to create a content folder as follows Click on Add New Folder and follow screen prompt instructions to create a new folder After gett...

Страница 5: ...your manage content page will display like below where you will then click the button labeled Manage Content You will now come to the folder detail page where you can upload content to a folder Click...

Страница 6: ...splay for and then click Submit Repeat this step if you have multiple content to upload Note 1 Only one content can be uploaded at a time These can be music files video clips or image files 2 Audio an...

Страница 7: ...opup preview will display and show what was uploaded into the cloud storage Once you have finished uploading content to your folder click the Manage Content tab in the top navigation bar to go back to...

Страница 8: ...y your folder s content After making the selection click the OK button and the folder s content will be pushed to the individual digital signage units you ve selected Note Digital Signage units will b...

Страница 9: ...the top navigation bar to go to the account settings page where you can update your password and business name Plug the Power Adapter into the Digital Signage and also into a power outlet Once connect...

Страница 10: ...screen Please carefully record the complete serial number shown in the dialog box for the use of online account setup When ready click the Settings button and follow the steps below to select your Wi...

Отзывы: