P.12
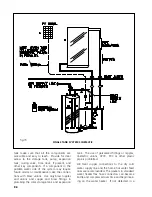
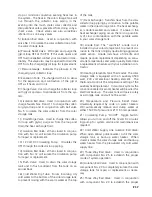
upper charge valve and the water is running,
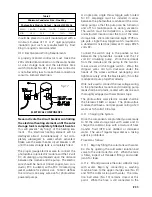
open the lower purge/drain valve (No. 11) and let
the water run out until it is free of impurities or
debris that might have entered the piping as the
components were plumbed. Run the water long
enough to eliminate any air bubbles that may be
trapped in the system.
Close the lower purge/drain valve. The collector
loop now has been subjected to city pressure and
the pressure gauge should read somewhere in
the range of 50 - 75 PSI in most cases (No. 7).
Make a final inspection of the collector plumbing
connections to ensure that there are no leaks
anywhere in the collector loop piping.
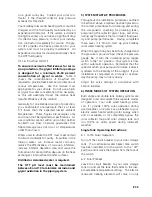
4.11.3 After you have determined the integrity
of the entire piping system turn on the circulat-
ing pump. Flip the toggle switch to the "on"
position. If there is insufficient sun to run the
pump, contact the pump wires directly to the
positive and negative poles of a 12 volt battery or
power source. Run the pump for a full five min-
utes and carefully check to ensure there is prop-
er fluid flow and that all the air has been purged
from the solar collector glycol loop. An inexpen-
sive flow meter such as manufactured by Blue
White Industries or Letro is recommended as an
optional system component. A flow meter
allows you to monitor and adjust the flow rate
through the piping and also to visually inspect
the HTF fluid quality.
Flip the toggle switch to the "off" position and
proceed to the next step.
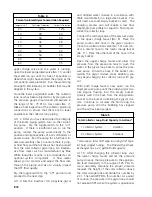
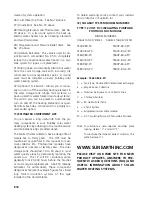
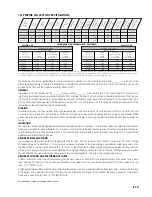
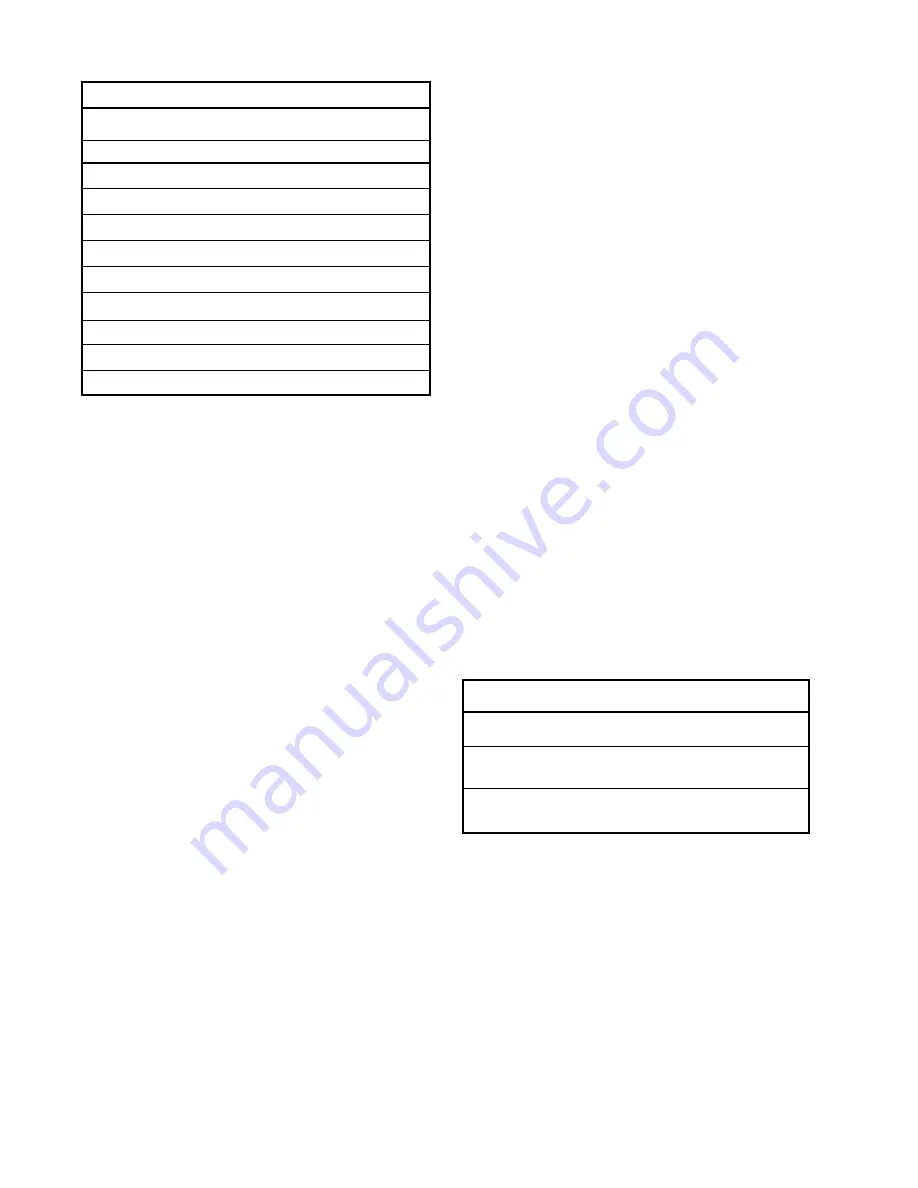
4.11.4 Mix the Dowfrost HD propylene glycol
and distilled water mixture in accordance with
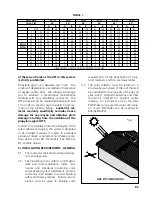
Table 4 and Table 5 in a large clean bucket. You
will need a second empty bucket as well. The
charging process also will require a low flow
diaphragm pump (Flojet or equal) to fill and pres-
surize the collector loop.
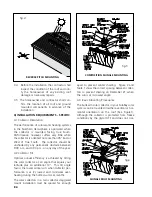
Connect the discharge side of the pressure pump
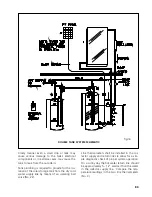
to the upper charge faucet (No. 9) Place the
pump suction side hose in the glycol solution.
Close the isolation ball valve (No. 10) and con-
nect a second hose to the lower charge faucet
(No. 11). Place the other end of the hose in the
empty bucket.
Open the upper charge faucet and allow the
pressure from the expansion tank to push the
water in the glycol loop back to prime the pres-
sure pump. When the hose in the bucket con-
taining the glycol mixture stops bubbling you
may begin charging the collector loop with gly-
col.
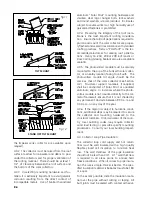
With both charge faucets now open, run the
Flojet pressure pump until the pinkish glycol mix-
ture begins flowing into the empty bucket.
Quickly switch the hose from the empty/return
bucket to the bucket containing the glycol mix-
ture. Continue to circulate the fluid using the
pressure pump until the bubbling has stopped
and the air has been purged.
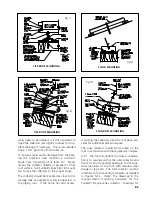
4.11.5 After charging the collector loop, shut
the lower charge faucet and let the pressure
pump drive up the loop pressure to the appropri-
ate level (Generally in the range of 25 PSI). To
more accurately calculate the proper pressure
measure the height of the solar collector above
the solar storage tank and divide this number by
2.31. Then add 20 PSI to this number. As a word
of caution, the pressure in the glycol loop should
not exceed 45 PSI when the system is operational
Table 5
Total Collector Loop Fluid Capacity In Gallons*
1 Collector System
4 Gallon
2 Collector System
5 Gallons
Table 4
Percent (volume) Glycol Concentration Required
Temperature F
For Freeze Protection
For Burst Protection
20
18%
12%
10
29
20
0
36
24
-10
42
28
-20
46
30
-30
50
33
-40
54
35
-50
57
35
-60
60
35
* Assumes a total 100’ pipe run using 3/4" Type
M hard copper tubing. The Rheem/Ruud heat
exchanger has a 2.2 gallon fluid capacity.


