Sun Microsystems Ultra 30 Скачать руководство пользователя страница 1

Sun

Ultra

30

Installation Guide

Part No.: 802-7716-11
Revision A, November 1997

The Network Is the Computer

Sun Microsystems Computer Company

2550 Garcia Avenue
Mountain View, CA 94043 USA
415 960-1300

fax 415 969-9131

Содержание Ultra 30

Страница 1: ...ra 30 InstallationGuide Part No 802 7716 11 Revision A November 1997 The Network Is the Computer Sun Microsystems Computer Company 2550 Garcia Avenue Mountain View CA 94043 USA 415 960 1300 fax 415 96...

Страница 2: ...tered trademarks of Sun Microsystems Inc in the U S and certain other countries UNIX is a registered trademark in the United States and other countries exclusively licensed through X Open Company Ltd...

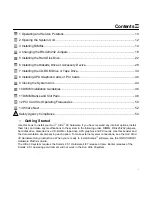
Страница 3: ...ting Started Use this book to install your Sun Ultra 30 hardware If you have received any internal options install them first and make any modifications to the system in the following order DIMMs RS 4...

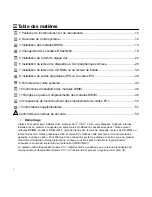
Страница 4: ...aux normes de s curit 55 D marrage Utilisez ce manuel pour installer votre mat riel Sun Ultra 30 Si vous disposez d options internes installez les en premier et apportez au syst me les modifications...

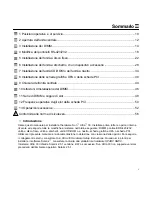
Страница 5: ...nformit alle norme di sicurezza 56 Introduzione Usare questo manuale per installare l hardware Sun Ultra 30 Installare prima tutte le opzioni interne ricevute ed eseguire tutte le modifiche al sistema...

Страница 6: ...eguridad 57 Primeros pasos Utilice este manual para instalar el hardware Sun Ultra 30 Si ha recibido alguna opci n interna inst lela primero y luego realice las modificaciones del sistema necesarias e...

Страница 7: ...to an FCC Class B workstation the system becomes FCC Class A Modifications If the end user adds single in line memory modules SIMMs or internal drives to the workstation the FCC Class of the machine c...

Страница 8: ...rkstation does not have any indication of the DOC Class consult the manufacturer of the product If a PCI board is added to the workstation by the end user the DOC Class of the machine could be affecte...

Страница 9: ...sse d finie par le DOC n est pr sente sur un p riph rique ou un poste de travail contactez le fabricant du produit Si l utilisateur ajoute une carte de type PCI au poste de travail cela risque d affec...

Страница 10: ...01 4 1988 1 0 kV Power Lines 0 5 kV Signal Lines EN61000 3 2 IEC1000 3 2 1994 Pass class D Safety This equipment complies with the following requirements of the Low Voltage Directive 73 23 EEC EN60950...

Страница 11: ...9...

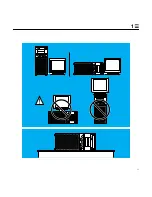
Страница 12: ...me en position horizontale de manutention sur une surface dure afin de proc der son entretien Posizioni operative e di servizio Posizione operativa Il sistema Sun Ultra 30 funziona tanto in posizione...

Страница 13: ...11 1...

Страница 14: ...le 2 Saisissez le panneau lat ral et soulevez le vers l arri re du syst me puis retirez le Apertura dell unit centrale Nota Se stato installato l antifurto rimuoverlo prima di aprire l unit 1 Premere...

Страница 15: ...13 2...

Страница 16: ...eliant l unit d alimentation au ch ssis D tachez la prise l arri re de l unit d alimentation Retirez l unit du ch ssis Installazione dei DIMM Nota Utilizzare solo moduli di memoria in linea doppia DIM...

Страница 17: ...15 3...

Страница 18: ...nt l unit d alimentation au ch ssis 7 D tachez le bracelet de mise la terre et refermez l unit syst me 9 Installazione dei DIMM 4 Scartare il DIMM e estrarlo tenendolo dalle estremit 5 Fare coincidere...

Страница 19: ...17 3...

Страница 20: ...eau lectrique de l arri re de l unit d alimentation puis sortez celle ci du ch ssis Remarque Le cordon d alimentation doit rester reli l unit d alimentation Modifica dei ponticelli RS 423 232 Nota Se...

Страница 21: ...19 4...

Страница 22: ...RS 232 5 Replacez l unit d alimentation 6 D tachez le bracelet et refermez l unit syst me 9 Modifica dei ponticelli RS 423 232 4 Individuare i ponticelli sulla scheda madre e porre i ponticelli J2605...

Страница 23: ...21 4 J 2 7 0 2 J 2 7 0 3 J 2 6 0 5 J 2 6 0 4 J 2 8 0 1 J 0 1 0 3 J 3 0 0 1 J 2 8 0 4 RS 232 J 2 6 0 5 RS 232 J 2 6 0 4...

Страница 24: ...mit autour de votre poignet la partie adh sive de la bande c t peau 3 Rep rez l emplacement de l unit de disque dur Installazione dell unit a disco fisso Nota Usare solo le unit a disco fisso specifi...

Страница 25: ...23 5...

Страница 26: ...sent pas les m mes adresses 0 1 et 6 4 ou 5 que les p riph riques SCSI internes Installazione dell unit a disco fisso 4 Estrarre l unit dalla confezione antistatica e leggere le istruzioni riportate n...

Страница 27: ...25 5...

Страница 28: ...scatta in posizione 7 Togliere il cinturino antistatico e chiudere l unit centrale 9 Installazione dell unit a disco fisso 5 Aprire il vano del disco fisso e inserirlo completamente nel telaio Premer...

Страница 29: ...27 5...

Страница 30: ...5 D tachez le c ble d alimentation du support puis tirez le support hors du syst me Installazione dell unit a dischetti o di un dispositivo accessorio 1 Spegnere il sistema e aprire l unit centrale 2...

Страница 31: ...29 6...

Страница 32: ...e support l aide des quatre vis fournies cet effet Installazione dell unit a dischetti o di un dispositivo accessorio 6 Rimuovere il pannello di riempimento metallico dal supporto 7 Estrarre l unit a...

Страница 33: ...31 6...

Страница 34: ...l avant du syst me 13 D tachez le bracelet de mise la terre et refermez l unit syst me 9 Installazione dell unit a dischetti o di un dispositivo accessorio Nota I punti 9 e 10 sono validi solo per l...

Страница 35: ...33 6...

Страница 36: ...unit syst me 4 A l aide d un tournevis cruciforme desserrez les deux vis fixant le support au syst me Installazione dell unit CD ROM o dell unit a nastro 1 Spegnere il sistema e aprire l unit central...

Страница 37: ...35 7...

Страница 38: ...ses que les p riph riques SCSI internes Installazione dell unit CD ROM o dell unit a nastro 5 Estrarre il cavo di alimentazione dal supporto dell unit e sollevare il supporto per estrarlo 6 Rimuovere...

Страница 39: ...37 7...

Страница 40: ...nt du syst me 12 D tachez le bracelet de mise la terre et refermez l unit syst me 9 Installazione dell unit CD ROM o dell unit a nastro 8 Con un cacciavite a croce collegare l unit al supporto utilizz...

Страница 41: ...39 7...

Страница 42: ...onnecteur de carte dans l emplacement qui lui est associ sur la carte syst me Installazione delle schede grafiche UPA o delle schede PCI Nota Se si installa una scheda PCI consultare prima 12 1 Spegne...

Страница 43: ...41 8...

Страница 44: ...e au ch ssis du syst me 7 Retirez le bracelet de mise la terre et fermez l unit syst me 9 Installazione delle schede grafiche UPA o delle schede PCI 5 Spingere la scheda nello slot tenendola dagli ang...

Страница 45: ...43 8...

Страница 46: ...s alignent sur les rainures du ch ssis de l unit syst me 2 R installez si n cessaire le syst me de verrouillage Chiusura dell unit centrale 1 Tenendo il pannello laterale da entrambi i lati guidarlo i...

Страница 47: ...45 9...

Страница 48: ...2 64 et 128 m ga octets Remarque reportez vous la proc dure 11 pour plus d informations sur l installation des modules DIMM Instruzioni d installazione del DIMM I moduli di memoria in linea doppi DIMM...

Страница 49: ...47 10...

Страница 50: ...702 U0802 1 U0902 U1002 Rang e Paires d emplacements 2 U0703 U0803 2 U0903 U1003 3 U0704 U0804 3 U0904 U1004 Serie di DIMM e coppie di slot Serie Coppie di slot 0 U0701 U0801 0 U0901 U1001 1 U0702 U08...

Страница 51: ...49 11 U1004 U0904 U0804 U0704 U1003 U0903 U0803 U0703 U1002 U0902 U0802 U0702 U1001 U0901 U0801 U0701 3 2 1 0...

Страница 52: ...33 MHz 5 0 volts Slot 3 J1501 33 MHz 5 0 volts Slot 4 J1601 33 MHz 5 0 volts Frequenze operative degli slot della scheda PCI Tutti gli slot delle schede PCI per i sistemi Sun Ultra 30 operano ad ampie...

Страница 53: ...51 12 J1301 J1401 J1501 J1601...

Страница 54: ...ook Installation Guide de la plate forme mat rielle SPARC SMCC Solaris Handbook for SMCC Peripherals Operazioni successive Dopo avere installato tutte le opzioni interne ed effettuato tutte le modific...

Страница 55: ...53 13...

Страница 56: ...und is required SELV Compliance Safety status of I O connections comply with SELV requirements Power Cord Connection Warning Sun products are designed to work with single phase power systems having a...

Страница 57: ...e des caract res noirs sur fond blanc est n cessaire Conformit SELV S curit les raccordements E S sont conformes aux normes SELV Connexion du cordon d alimentation Danger les produits Sun sont con us...

Страница 58: ...Le condizioni di sicurezza delle connessioni I O devono essere conformi ai requisiti SELV Collegamento del cavo di alimentazione Avvertenza I prodotti Sun sono progettati per sistemi di alimentazione...

Страница 59: ...nto de la normativa SELV El estado de la seguridad de las conexiones de entrada salida cumple los requisitos de la normativa SELV Conexi n del cable de alimentaci n el ctrica Aviso Los productos Sun e...

Страница 60: ...e clase 1 CD ROM Caution Use of controls adjustments or the peformance of procedures other than those specified herein may result in hazardous radiation exposure Attention Les contr les r glages ou va...

Страница 61: ...59...
Страница 62: ...ROIT DE MODIFIER ET OU D AMELIORER LE S PRODUIT S ET OU PROGRAMME S DECRITS DANS CETTE PUBLICATION 1997 Sun Microsystems Inc 2550 Garcia Avenue Mountain View California 94043 1100 U S A Sun Microsyste...

Страница 63: ...ros pa ses UNIX es una marca comercial registrada en los Estados Unidos y en otros pa ses licenciada exclusivamente a trav s de X Open Company Ltd OPEN LOOK es una marca comercial registrada de Novell...

Отзывы: