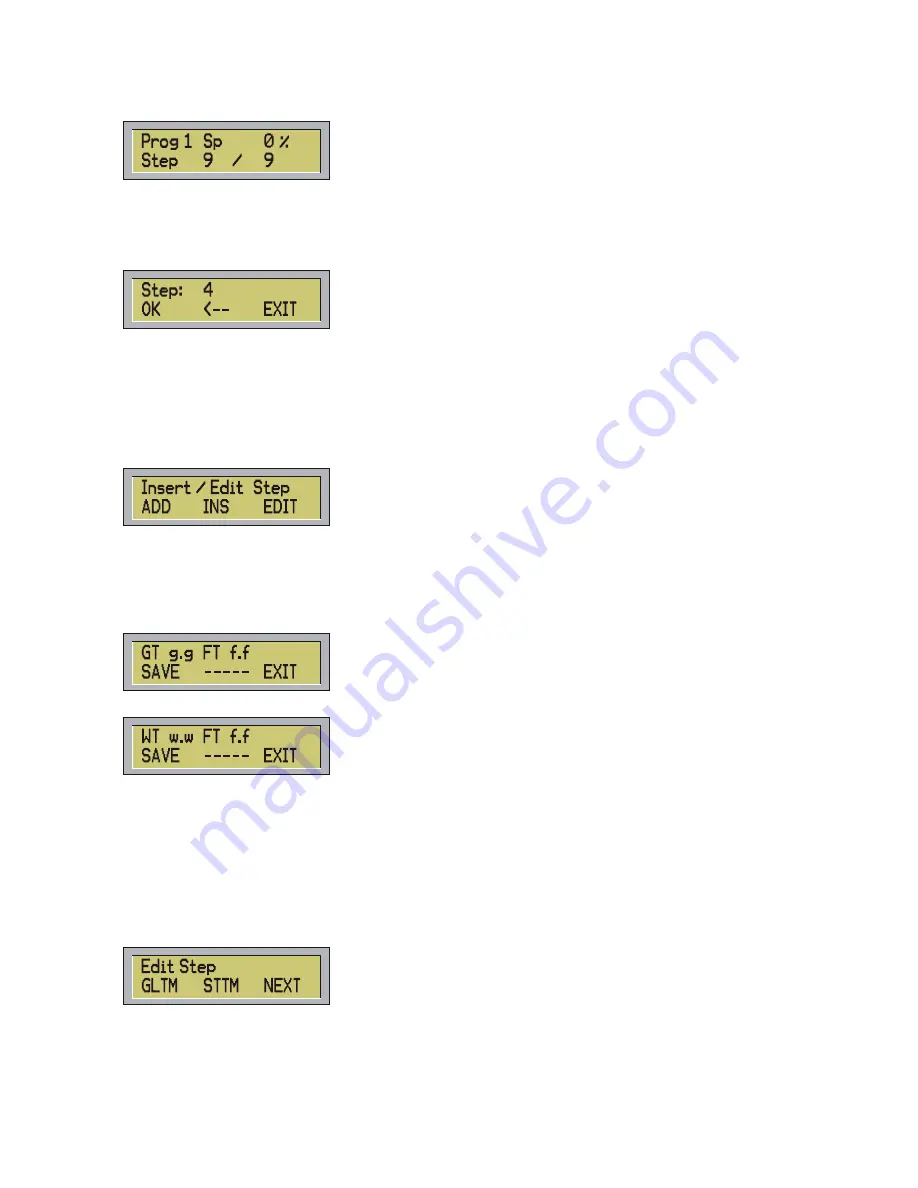
At this point, for instance the display will show:
(it means that you will have made 9 scenes totally, and you are in the number 9 of the program number 1).
To change the current scene you can use -,+ buttons (in manual mode) or use STEP/.. button if you want to
jump some steps.
- Pressing the STEP/. Key and then the 4 button, the display will show for instance:
- To confirm press OK (F1), to leave the function press EXIT (F3) or ESC.
If you input the number 0 or a number greater than the number of the scenes in memory the controller will
shows: ‘WARNING Out of Range’.
Pressing OK or ENTER without input the number of the scene the error message ‘WARNING Missing Value’
will be shown.
-
Pressing the INS STEP button you can input a new scene in the current program, or you can edit the
current scene, the display will show:
At this point you can decide to add a new scene at the end of the current program, or input the new scene at
the same position of the current scene, moving the others scenes forward, or to edit the current scene.
1) Pressing
ADD
(F1) the new step will be added at the end of existing steps and the controller will show one
of these menus:
if current program is in Global Time:
If current program is in Step Time:
In Global Time the field g.g holds the global time value of the current program, the fields w.w and f.f hold the
stand-by time and the fading time respectively, and without any change these ones will be copied in the new
scene.
To add the new scene to the program press SAVE (F1), to leave the function press EXIT (F3) or ESC.
2) Pressing
INS
(F2) from menu Insert/Edit Step the function is similar, except that the new scene will be
inserted in the actual position shifting all the remaining steps of one position.
3) If you whish to modify one of the existing step, from the menu insert/Edit Step press EDIT (F3) and the
controller will show:
You can choose to re-set the current program in Global Time, or Step Time or you can edit time using the
current mode. To leave the function press ESC.
10
Содержание Control Five
Страница 1: ......
Страница 2: ...This page is intentionally left blank...
Страница 5: ...DMX signal connection EXAMPLE of connection DMX controller spot 3...
Страница 6: ...4...


