background image

TegraPol-11/ -15 
TegraForce-1 
Mode d’emploi 


21

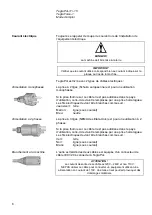
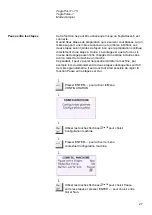
Il y a un seul branchement électrique entre TegraPol et TegraForce. 

Ceci offre un courant d’alimentation de 24V à TegraForce ainsi qu’un 

bus de données permettant à TegraPol et TegraForce de 

communiquer ensemble. 

 Eteindre  TegraPol. 

  Utiliser le câble unique attaché à TegraForce et le brancher au 

connecteur du porte-échantillons motorisé au dos de TegraPol. 

Pour localiser ce connecteur, se référer au diagramme de l’arrière 

de TegraPol à la section Se familiariser avec TegraPol. 


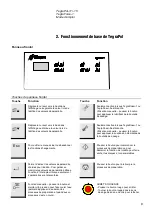
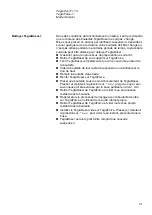
La qualité de l’air dans le système d’air comprimé utilisé avec cette 

machine doit répondre aux standards stipulés dans ISO 8573-1. 

Pour connecter au TegraSystem : 

  Monter un tuyau de pression sur l’accouplement rapide fourni et le 

fixer à l’aide du collier de serrage prévu à cet effet. 

  Brancher le tuyau d’air à l’accouplement rapide et connecter 

l’autre extrémité à l’arrivée d’air comprimée sur TegraForce-1. 


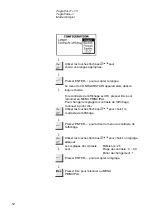
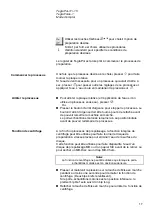
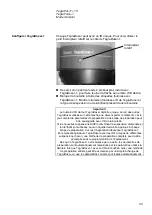
TegraForce est pourvu d’un filtre d’eau / huile éliminant les quantités 

excessives de ces substances de l’alimentation en air comprimé. Par 

conséquent, il est nécessaire de vider le filtre régulièrement : 

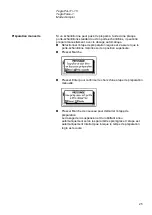
  Retirer le disque de préparation de la zone de travail. En cas 

d’oubli, le disque de préparation serait pollué par les particules 

d’eau et d’huile qui s’y déposeraient. 

  Localiser la soupape de décharge au fond du verre du filtre. 

  Tenir un récipient sous le filtre pour retenir l’eau qui peut couler et 

presser la soupape de décharge. 

  Remettre en place le disque de préparation. 


Branchements électriques 

Branchements à l’air comprimé 

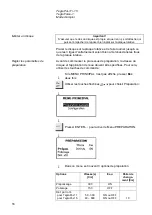
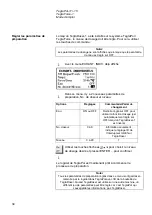
IMPORTANT 

La pression d’air doit se trouver entre 5 bar (72 psi) et 10 bar (145 psi) et 

être d’une qualité spécifiée dans ISO 8573-1. 

Vider le filtre d’eau / huile 

Soupape de décharge

Содержание TegraDoser-1

Страница 1: ...TegraPol 11 15 TegraForce 1 Manual No 15517001 Date of Release 0 201 TegraDoser 1 Instruction Manual ...

Страница 2: ...dering spare parts You will find the Serial No and Voltage on the type plate of the machine itself We may also need the Date and Article No of the manual This information is found on the front cover The following restrictions should be observed as violation of the restrictions may cause cancellation of Struers legal obligations Instruction Manuals Struers Instruction Manuals may only be used in co...

Страница 3: ...safety rules for handling mixing filling emptying and disposal of the alcohol based liquids 7 Make sure that the grinding or polishing discs are correctly mounted the driving pins engaged with the holes in the turntable 8 Keep clear of the rotating disc and the specimen mover during operation While grinding manually be careful not to touch the grinding disc Do not attempt to collect a specimen fro...

Страница 4: ...nical service 6 Alcohol based consumables follow the current safety rules for handling mixing filling emptying and disposal of the alcohol based liquids 7 If the TegraPol with TegraForce has to be moved to a new location the TegraForce has to be detached from the TegraPol See section Installing TegraForce The equipment should only be used for its intended purpose and as detailed in the Instruction...

Страница 5: ...l Equipment marked with a WEEE symbol contain electrical and electronic components and must not be disposed of as general waste Please contact your local authorities for information on the correct method of disposal in accordance with national legislation ...

Страница 6: ......

Страница 7: ...the Machine 8 2 Basic Operation of TegraPol Front Panel 9 Front Panel Controls 9 Reading the Display 10 Acoustic signals 10 Software Settings 11 Changing the Language and Display Contrast 11 Editing Numeric Values 13 Editing Alphanumeric Values 14 Preparation Process Set up 15 Mounting a Disc 16 Setting the Preparation Parameters 16 Starting the Process 17 Stopping the Process 17 3 Installing Tegr...

Страница 8: ...ration with TegraForce 28 Recommendations for Grinding 29 5 Operating TegraPol with TegraForce and TegraDoser 1 Checking the Packing Contents 30 Getting Acquainted with TegraDoser 1 30 Filling TegraDoser 1 30 Cleaning TegraDoser 1 31 TegraDoser 1 Mounting 32 Fitting TegraDoser 1 32 Removing TegraDoser 1 32 Configuring TegraDoser 1 33 Setting Preparation Parameters 34 Running an Entire Preparation ...

Страница 9: ...t ø11 ø24 1 5 mm 1 Reduction ring with gasket 1 Outlet hose ø32 1 5 m 1 88 bend outlet pipe ø32 2 Hose clamps 1 Set of Instruction Manuals 1 TegraPol 15 1 Splash ring 1 Disposable bowl liner clear plastic 2 Mains cables 1 Inlet hose 3 4 2 m 1 Filter gasket 1 Gasket ø11 ø24 1 5 mm 1 Reduction ring with gasket 1 Outlet hose ø32 1 5 m 1 88 bend outlet pipe ø32 2 Hose clamps 1 Set of Instruction Manua...

Страница 10: ...n Manual 4 Take a moment to familiarise yourself with the location and names of all the TegraPol components A Water tap with sprinkler tube B Turntable C Front panel control s Getting Acquainted with TegraPol Front View of TegraPol 11 A B C ...

Страница 11: ...Water outlet for TegraDoser 5 Water outlet tube Service socket Sample Mover TegraForce socket Doser unit TegraDoser 5 socket Auxiliary socket not currently in use Main switch Fuse Mains connection Communication socket Cooli Control Box Emergency Stop Rear of TegraPol ...

Страница 12: ...uction ring with gasket on the water mains tap if necessary Introduce the gasket and tighten the coupling nut completely Mount the outlet hose onto the water outlet tube Lubricate with grease or soap to facilitate insertion Use a hose clamp for fastening If there is only limited space behind the TegraPol use the pipe bend and attach it directly to the outlet tube on the back of the TegraPol Then a...

Страница 13: ...let tube on the back of the TegraPol Then attach the drain hose to the other end of this bend Lead the other end into the mounting hole in the bracket on top of the static filter unit B Arrange the tube so that it slopes downward towards the drain throughout its length Shorten the hose if necessary Connect the communication cable to the Cooli Control Box and then connect to the socket 1 at the rea...

Страница 14: ... plug supplied on this cable is not approved in your country then the plug must be replaced with an approved plug The leads must be connected as follows Green earth Black line live White line live Both cables are on the other end equipped with an IEC 320 cable connector that has to be connected to the TegraPol Supplying Power DANGER The machine must be earthed IMPORTANT Check that the mains voltag...

Страница 15: ... Manual override push button to apply suspension from the doser bottle Esc Leaves the present menu or aborts functions changes Push button for starting the preparation process or to start Spin function for drying discs and consumables Enables selected parameter values to be activated for editing Saves the edited parameter values Toggles when only 2 parameters available Push button for stopping the...

Страница 16: ...rimarily divided into 2 areas The position of these areas and the information they contain are explained in the illustration below which uses the CONFIGURATION Menu as an example A Heading this is a navigational aid telling you where you are in the software s hierarchy B Information fields these will either be numerical values or text fields providing information associated with the process shown ...

Страница 17: ...screen is displayed the software goes to the MAIN MENU This is the highest level in the menu structure From this menu you can enter the Preparation and Configuration menus Before continuing we recommend that you select the language that best suits you if you have not done so already Use the Arrow buttons to select Configuration Press ENTER to activate the CONFIGURATION Menu Use the Arrow buttons t...

Страница 18: ...contrast setting is OK press Esc to return to the MAIN MENU To change the Display contrast setting continue from here Use the Arrow buttons to select Display contrast Press ENTER to activate the Display contrast pop up menu Use the Arrow buttons to select the setting you prefer Contrast settings are Default 25 Contrast range 0 50 Change increment 1 Press ENTER to accept the setting Esc Press Esc t...

Страница 19: ...g the current value and up down arrows is displayed Note If there are only two options the popup box is not displayed Use ENTER to toggle between the two options and ignore the following steps Use the Arrow buttons to increase or decrease the numeric value Press ENTER to accept the new value Pressing Esc aborts the changes preserving the original value Editing Numeric Values ...

Страница 20: ...x showing all the options available is displayed Note If there are only two options the popup box is not displayed Use ENTER to toggle between the two options and ignore the following steps Use the Arrow buttons to select the correct option Press ENTER to accept the new value Pressing Esc aborts the changes preserving the original value Editing Alphanumeric Values ...

Страница 21: ...truers Metalog Guide offers preparation methods for the most common materials based on a simple analysis of two key properties hardness and ductility Finding the right method is easy including choice of consumables Always consult Struers Metalog Guide on the Struers website for the correct preparation method for the actual specimens Preparation Process Set up Metalog Guide A complete guide to mate...

Страница 22: ...e MAIN MENU appears Use the Arrow buttons to select Manual preparation Press ENTER to activate the PREPARATION Menu Within this menu there are 3 preparation options Options Speed s rpm Water Change Increment rpm Grinding 300 ON Polishing 150 OFF User def for TegraPol 11 for TegraPol 15 50 300 40 600 ON or OFF ON or OFF 10 Use the Arrow buttons to select the desired preparation option Mounting a Di...

Страница 23: ... the machine can be restarted The sample mover will return to its initial position before the process can be re started After a grinding process has been finished the built in Spin function can be used to rotate the preparation disc at high speed to remove water from the surface of the disc This function can be used to remove water from a MD grinding disc or a SiC paper before removing it or to dr...

Страница 24: ...ng 1 Hose nipple 6 Screws M5x15 0 1 Allen key 2 5 mm 1 Allen key 5 mm with handle Handle to unlock TegraForce 1 for moving into upward position D Sub connector for TegraDoser 1 or nozzle block of TegraDoser 5 LED light to illuminate preparation disc Release outlet valve from water oil filter for compressed air Checking the Packing Contents Getting Acquainted with TegraForce 1 ...

Страница 25: ...graPol Then both the distance between disc and specimen mover plate and the position of the specimen mover plate over the disc have to be adjusted To adjust the correct distance mount a preparation disc on TegraPol and a specimen mover disc on the TegraForce 1 Loosen the 2 fastening screws and adjust the space between the disc and specimen mover plate to about 1 1 5 mm Re tighten the 2 fastening s...

Страница 26: ...nding polishing disc This distance should be Diameter of the Holes Disc Margin 40 mm 1 5 mm 1 2 5 mm 1 6 0 mm 30 mm 6 5 mm 25 mm 9 0 mm Mount the two caps on the holes for the fastening screws Disc Margin IMPORTANT Having adjusted the disc margin tighten the two fastening screws firmly Make sure that the distance between disc and specimen mover plate still is correct The column should now remain i...

Страница 27: ...ose and secure it with the hose clamp supplied Connect the air hose to the quick coupling and fit the other end into the compressed air inlet on TegraForce 1 TegraForce is fitted with a water oil filter that removes excessive amounts of these substances from the compressed air supply As a result of this it is necessary to empty the filter periodically Remove the preparation disc from the work area...

Страница 28: ...r position Remove the preparation disc Press the TegraForce down again until the head is locked in position Remove the two caps covering the fastening screws on the left hand side of the TegraPol cabinet by lifting them off with a knife Loosen the two fastening screws while holding the TegraForce in position Lift the TegraForce straight up and place it on a safe and stable support Removing TegraFo...

Страница 29: ... the upright position Remove the three screws securing the specimen mover plate Slide the specimen holder evenly onto the three legs Insert the correct preparation disc and press TegraForce 1 down until the lock engages When a TegraPol which has been fitted with a TegraForce 1 is switched on the software inside the TegraPol is able to detect the TegraForce 1 automatically and informs you of its pr...

Страница 30: ...ing the control panel software If the MAIN MENU is not currently displayed press Esc until the MAIN MENU appears Use the Arrow buttons to select Preparation Setting the Preparation Parameters Note If a TegraDoser 5 is mounted on the TegraForce and connected to the TegraPol then refer to the TegraDoser 5 instruction manual for the correct procedure for setting the preparation parameters ...

Страница 31: ...he required preparation step and make sure that the specimen mover is in the upright position Press Start Press Enter to confirm selection of a manual preparation step Press Start again to start the preparation step Dosing of suspension and lubricant runs automatically according to the pre set parameters and the step is stopped automatically when the set preparation time has expired Manual Prepara...

Страница 32: ...n time The force is reduced in steps of 5 N until the final force of 10 N is reached Thus the surface finish is finer and the preparation time in the following step can be reduced Force Reduction can be set to either On or Off and this setting is valid for all the preparation steps carried out Press ENTER to activate the CONFIGURATION Menu Use the Arrow buttons to select Machine Configuration Pres...

Страница 33: ...vel can be changed from one step to the next without having to restart the machine However it may be desirable to stop the machine e g when using two subsequent steps on SiC with the same grit size Therefore it is possible to set the Pause between steps function to Yes Press ENTER to activate the CONFIGURATION Menu Use the Arrow buttons to select Machine Configuration Press ENTER to activate the M...

Страница 34: ...0 Time 60m 00s 05m 00s 01m 00s 00m 05s 30s 10s 5s Force N Direction 10 50 C W or C C W 5 N Water ON or OFF Please see Recommendations for Grinding on page 29 Use the Arrow buttons to select the desired preparation parameter The TegraPol software is now ready to begin the preparation process Preparation with TegraForce Important The TegraForce must be locked in position before the preparation proce...

Страница 35: ...owing Check that the distance between specimen mover plate and preparation disc is maximum 1 1 5 mm The height of the specimen should be between 8 28mm and not exceed 0 7 x specimen diameter Example a specimen with a diameter of 30 mm should not be higher than 30 x 0 7 21 mm Use a grain size as small as possible Use a mounting resin with a wear resistance similar to the specimens wear resistance U...

Страница 36: ...ht lid which provides easy access when filling the bottle Ensure that no preparation process is active Open the snap lid on the top of the bottle and insert the funnel supplied with the TegraDoser Fill refill the bottle with lubricant suspension and snap the top closed Checking the Packing Contents Getting Acquainted with TegraDoser 1 Filling TegraDoser 1 NB Do not use OP Suspensions in TegraDoser...

Страница 37: ...tle of any remaining suspension or lubricant through the hole in the top Fill the bottle with lukewarm water Mount the TegraDoser on the TegraForce Position a bottle under the outlet point of the TegraDoser Press and hold or until the soapy water has run through the nozzle for approximately 1 min Remove the TegraDoser from the TegraForce and empty out the soapy water remaining in the bottle Now re...

Страница 38: ...g the dosing nozzle on TegraDoser aside to gain access to the connector Insert TegraDoser into the recess on the side of TegraForce Press downwards until TegraDoser clicks into position Swing the dosing nozzle back in to position under the body of TegraDoser Swing the dosing nozzle outwards away from TegraForce until it is clear of the connector Grip the sides of the bottle and pull upwards until ...

Страница 39: ...D selected as the complete set of preparation parameters of one preparation step can be saved together with the bottle ID If the new DiaPro suspensions combining both diamond suspension and lubricant are used only one liquid has to be applied during each preparation step This is the ideal application for TegraDoser 1 By filling several TegraDosers with unique ID s with a different suspension each ...

Страница 40: ...erted Doser No 0 9 Information only indicates ID setting of rotary switch on TegraDoser Level 0 20 1 Use the Arrow buttons to select the desired dosing level and press ENTER to confirm The TegraPol software is now ready to begin the preparation process Setting Preparation Parameters Note The dosing parameters are only displayed when the water parameter is set to OFF Note All preparation parameters...

Страница 41: ...in a grinding step The second step is the fine grinding step here the TegraDoser 1 with the ID 1 is used containing the DiaPro suspension for fine grinding on MD Allegro Largo The third step is the first polishing step here the TegraDoser 1 with the ID 2 is used containing a DiaPro suspension for polishing The last step is the final polishing step here the TegraDoser 1 with the ID 3 is used contai...

Страница 42: ...20 240 V 60 Hz 1 x 100 120 V 50 60 Hz CSA 05766516 05766522 05766523 05766524 05766616 Specification Cat No Specimen mover plates for 3 specimens ø25 mm 1 for 3 specimens ø30 mm for 3 specimens ø1 25 for 3 specimens ø1 5 for 3 specimens ø40 mm Without holes 05226901 05226902 05226904 05226905 05226903 05226906 Specimen holder 120 mm dia for clamping of 3 specimens 15 40 mm dia 05226908 Levelling d...

Страница 43: ... frequency inverter error Turn device off and on and try again If problem persists call a Struers service technician Frequency inverter type mismatch error Fabrication error incorrect motor controller mounted in device Call a Struers service technician Motor temperature too high Stop process and let device cool down for a few minutes Try again If problem persists device call a Struers service tech...

Страница 44: ...d method by going back to method list and select method again Tube cleaning in progress Wait for cleaning process to finish Suspension not applicable The suspension specified in the method has not been configured on the TegraDoser 5 Configure the suspension in one of the pump positions or select another suspension in the method Lubricant not applicable The lubricant specified in the method has not...

Страница 45: ...ng water stops Wrong software setting Check software setting Water tap on mains closed Open for water Built in water tap closed Open for water Built in water tap blocked Clean water tap Filter at the water inlet blocked Clean filter Cooling water drips after stop Defect in the solenoid valve Call a Struers service technician The solenoid valve must be replaced The disc vibrates Dirt on the undersi...

Страница 46: ...the bowl liner Clean and dry or dispose of the liner clean and dry the bowl and remove all dirt from the drain tube Replace the bowl liner splash guard and grinding polishing disc Clean the pressure feet and pistons applying the force on the specimens e From the Main Menu select Configuration and press ENTER e to activate the CONFIGURATION Menu D D s Select Cleaning and press START e to move the p...

Страница 47: ...ar service check be carried out after every 1500 hours of use Information on total operation time and servicing of the machine is displayed on the screen at start up A pop up message will appear after 1 000 hours operation time to remind the user that a service check should be scheduled After the 1 500 hours operation time has been exceeded the pop up message will change to alert the user that the...

Страница 48: ... 128x64 dots with back light Safety Please refer to the Declaration of Conformity Noise level At idle running at a distance 1 0 m 39 4 from the machine 52 dB A 52 dB A During preparation 60 dB A 60 dB A Surrounding temperature 5 40 C 41 104 F Humidity Non condensing 0 95 RH Supply Voltage frequency 200 240 V 50 60 Hz Power inlet 1 phase N L1 PE or 2 phase L1 L2 PE The electrical installation must ...

Страница 49: ...vel At idle running at a distance 1 0 m 39 4 from the machine 52 dB A During preparation 60 dB A Surrounding temperature 5 40 C 41 104 F Humidity Non condensing 0 95 RH Supply Voltage 24 Vdc from TegraPol Current Inom Imax 2 0 A 3 0 A Air inlet ø 5 mm ø 8 mm Air pressure 5 10 bar 72 145 psi Air quality The air supplied must be of the quality 5 6 4 specified in the standard ISO 8573 1 Dimensions an...

Страница 50: ...TegraPol 11 15 TegraForce 1 Handbuch Nr 15517001 Auslieferungsdatum 20 TegraDoser 1 Gebrauchsanweisung ...

Страница 51: ... der Maschine Eventuell benötigen wir auch das Datum und die Artikelnummer der Gebrauchsanweisung beides ist auf dem Deckblatt abgedruckt Beachten Sie bitte die nachstehend genannten Einschränkungen Zuwiderhandlung kann die Haftung der Firma Struers aufheben Gebrauchsanweisungen Eine von der Firma Struers veröffentlichte Gebrauchsanweisung darf nur in Zusammenhang mit Struers Geräten benutzt werde...

Страница 52: ...geschaltet und der Netzstecker gezogen bzw das Kabel abgeklemmt werden 4 Schließen Sie die Maschine nur an eine Kaltwasserversorgung an Prüfen Sie die Dichtheit der Wasseranschlüsse und kontrollieren Sie die Funktionsfähigkeit des Wasserabflusses 5 Struers empfiehlt das der Wasseranschluss nach Arbeitsende geschlossen wird 6 Alkoholhaltige Verbrauchsmaterialien Beachten Sie bitte beim Handhaben Mi...

Страница 53: ...endungszweck und wie in der Gebrauchsanweisung beschrieben verwendet werden Für die Benutzung der Geräte bzw der Maschinen sind die Verbrauchsmaterialien von Struers vorgesehen Falls unzulässiger Gebrauch falsche Installation Veränderung Vernachlässigung unsachgemäße Reparatur oder ein Unfall vorliegt übernimmt Struers weder die Verantwortung für Schäden des Benutzers noch für solche am Gerät Die ...

Страница 54: ...e bitte beim Handhaben Mischen Abfüllen Leeren und Entsorgen von alkoholhaltigen Verbrauchsmaterialien die geltenden Sicherheitsbestimmungen 7 Wenn TegraPol und TegraForce an einen anderen Ort gebracht werden sollen müssen beide Geräte voneinander getrennt werden Siehe Aufstellen des TegraForce Das Gerät darf nur für seinen vorgesehenen Anwendungszweck und wie in der Gebrauchsanweisung beschrieben...

Страница 55: ...g Das WEEE Symbol auf Ihrem Gerät weist darauf hin dass es sich um ein WEEE relevantes Gerät handelt dass entsprechend getrennt entsorgt werden muss Nähere Informationen über das Recycling dieses Produkts erhalten Sie bei der zuständigen Verwaltungsbehörde ...

Страница 56: ...seite 8 2 Grundzüge der Bedienung des TegraPol Bedienfeld 9 Tasten des Bedienfeldes 9 Display ablesen 10 Akustische Signale 10 Software Einstellungen 11 Sprache und Kontrast des Displays ändern 11 Numerische Werte ändern 13 Alphanumerische Werte ändern 14 Einstellungen des Präparationsvorgangs 15 Scheibe einsetzen 15 Präparationsparameter einstellen 16 Vorgang starten 17 Vorgang stoppen 17 Spin Fu...

Страница 57: ...Präparation mit TegraForce 28 Empfehlungen für Schleifen 29 5 TegraPol TegraForce TegraDoser 1 bedienen Packungsinhalt prüfen 30 TegraDoser 1 kennenlernen 30 TegraDoser 1 befüllen 30 TegraDoser 1 reinigen 31 TegraDoser 1 montieren 32 TegraDoser 1 anbringen 32 TegraDoser 1 abnehmen 32 TegraDoser 1 konfigurieren 33 Präparationsparameter einstellen 34 Eine komplette Präparationsmethode durch Auswechs...

Страница 58: ...lussschlauch ø 32 1 5 m 1 Kniebogen des Abflussrohrs mit 88 und 32 mm Rohrdurchmesser 2 Schlauchklemmen 1 Satz Gebrauchsanweisungen 1 TegraPol 15 1 Spritzring 1 Einweg Schutzeinsatz klares Plastik 2 Netzkabel 1 Zuflussschlauch 3 4 2 m 1 Filterdichtung 1 Dichtung ø 11 ø 24 1 5 mm 1 Reduktionsring mit Dichtung 1 Abflussschlauch ø 32 1 5 m 1 Kniebogen des Abflussrohrs mit 88 und 32 mm Rohrdurchmesser...

Страница 59: ...isung 4 Nehmen Sie sich bitte einen Augenblick Zeit um Lage und Namen der Teile des TegraPol kennenzulernen A Wasserhahn mit Sprührohr B Drehteller C Bedienfeld Taste n des Bedienfeldes TegraPol kennenlernen Vorderansicht von TegraPol 11 A B C ...

Страница 60: ...oser 5 Wasserabflussrohr Serviceanschluss Anschluss für Probenbeweger TegraForce Anschluss für Dosiereinheit TegraDoser 5 Zusatzanschluss zur Zeit nicht belegt Hauptschalter Sicherung Netzanschlussbuchse 1 Stecker für Kommunikationskabel für Cooli Steuereinheit Notstopp Rückseite des TegraPol 1 ...

Страница 61: ...sring samt Dichtung am Wasserhahn der Hauptwasserversorgung an Setzen Sie die Dichtung ein und ziehen Sie die Überwurfmutter vollständig an Bringen Sie das Abflussschlauchs am Wasserabflussrohr an Schmieren mit Silikonöl oder Seife erleichtert das Aufschieben Sichern Sie die Verbindung mit einer Schlauchklemme Falls hinter dem TegraPol nur begrenzt Raum vorhanden ist verwenden sie das Winkelrohr d...

Страница 62: ...der Rückseite des TegraPol an Danach bringen Sie den Abflussschlauch am anderen Ende des Winkelrohrs an Führen Sie das andere Ende durch die Montageöffnung der Halteklammer die oben auf der Festfiltereinheit sitzt B Verlegen Sie den Schlauch so dass er über seine ganze Länge zum Abfluss hin Gefälle besitzt Falls erforderlich schneiden Sie den Schlauch auf Länge ab Verbinden Sie das Kommunikationsk...

Страница 63: ... der mit diesem Kabel mitgelieferte Stecker nicht ihren Landesvorschriften entspricht muss dieser durch einen zugelassenen Stecker ersetzt werden Die Adern müssen wie folgt angeschlossen werden grün Erde schwarz Phase weiss Phase Beide Kabel sind am anderen Ende mit einem IEC 320 Kabelstecker ausgestattet der am TegraPol eingesteckt wird Netzanschluss GEFAHR Die Maschine muss geerdet sein WICHTIG ...

Страница 64: ...r Handbetrieb zur vorrangigen Anwendung von Schmiermittel aus der Dosierflasche Esc Verlassen des aktuellen Menüs oder beendet eine Funktion Änderung Taste zum Starten des Präparationsvorgangs oder um die Spin Funktion zum Trocknen von Scheiben oder Verbrauchsmaterialien zu starten Markierter Parameterwert wird zum Edieren aktiviert Speichert den edierten Parameterwert Schaltet bei nur 2 Parameter...

Страница 65: ...ereiche unterteilt Die Lage dieser Bereiche und deren Informationsinhalt sind unten am Beispiel des Menüs KONFIGURATION dargestellt A Die Überschrift bietet Navigationshilfe zur Orientierung in der Software Hierarchie B In den Informationsfeldern stehen entweder numerische Werte oder Textfelder mit Information über Vorgänge die in Zusammenhang mit dem durch die Überschrift beschriebenen Vorgang st...

Страница 66: ...chirm gezeigt und die Software geht zum HAUPTMENÜ Dies stellt die höchste Stufe der Menüstruktur dar Aus diesem Menü heraus gelangen Sie zu den Menüs der Präparation und der Konfiguration Bevor Sie fortfahren empfehlen wir die Ihnen passende Sprache auszuwählen sofern Sie das nicht schon getan haben Mit den Pfeiltasten markieren Sie KONFIGURATION Mit EINGABE wird das Menü KONFIGURATION aufgerufen ...

Страница 67: ... Displays stimmt gelangen Sie mit Esc zum HAUPTMENÜ zurück Wenn Sie den Kontrast ändern wollen fahren Sie fort Mit den Pfeiltasten wählen Sie den Kontrast EINGABE ruft das Einblendmenü für den Kontrast des Displays auf Mit den Pfeiltasten stellen Sie die gewünschte Stärke ein Kontrasteinstellungen sind Grundeinstellung 25 Kontrast Bereich 0 50 Änderungsbetrag 1 Mit EINGABE bestätigen Sie die Einst...

Страница 68: ...ten Wert und Einstellpfeilen auf ab zu dessen Veränderung Hinweis Falls nur zwei Optionen existieren wird das Einblendmenü nicht gezeigt Mit EINGABE schalten Sie zwischen den Optionen hin und her und ignorieren dabei die unten genannten Schritte Mit den Pfeiltasten erhöhen oder verringern Sie den numerischen Wert Mit EINGABE bestätigen Sie den neuen Wert Esc bricht die Änderung ab und kehrt zum al...

Страница 69: ...wahlbox mit den verfügbaren Optionen Hinweis Falls nur zwei Optionen existieren wird die Box nicht gezeigt Mit EINGABE schalten Sie zwischen den Optionen hin und her und ignorieren dabei die unten genannten Schritte Mit den Pfeiltasten wählen Sie die richtige Option aus EINGABE bestätigt den neuen Wert Esc bricht die Änderung ab und kehrt zum alten Wert zurück Alphanumerische Werte ändern ...

Страница 70: ...benso leicht herauszufinden wie die Wahl der Verbrauchsmaterialien Wenn Sie für Ihre vorliegenden Proben die geeignete Präparationsmethode suchen sollten Sie immer den Struers Metalog Guide auf der Struers Website zu Rate ziehen Legen Sie die Scheibe auf den Drehteller und drehen Sie sie so lange bis die drei Führungsstifte in die Löcher des Drehtellers einrasten Einstellungen des Präparationsvorg...

Страница 71: ...ENÜ im Augenblick nicht angezeigt wird drücken Sie Esc bis Sie im HAUPTMENÜ sind Mit den Pfeiltasten wählen Sie Manuelle Präparation aus EINGABE ruft das Menü PRÄPARATION auf In diesem Menü stehen 3 Präparationsoptionen zur Auswahl Optionen Geschwindig keit en U min Wasser Änderung pro Schritt U min Schleifen 300 AN Polieren 150 AUS Benutzerdefiniert für TegraPol 11 für TegraPol 15 50 300 40 600 A...

Страница 72: ...oppen Der Notstopp muss im Uhrzeigersinn gedreht werden um ihn wieder auszulösen bevor die Maschine wieder gestartet werden kann Der Probenbeweger geht in seine Ausgangsposition zurück bevor der Prozess wieder gestartet werden kann Nachdem ein Nassschleifprozess beendet wurde kann die Spin Funktion verwendet werden um die Präparationsscheibe mit hoher Geschwindigkeit zu rotieren und dadurch dass W...

Страница 73: ...pplung 1 Schlauchnippel 6 Schrauben M5x15 1 Inbusschlüssel 2 5 mm 1 Inbusschlüssel 5 mm mit Handgriff Handgriff für die Entriegelung und Aufwärtsbewegung des TegraForce 1 Steckverbindung für TegraDoser 1 oder Düsenblock des TegraDoser 5 LED Lampe zum beleuchten der Präparationsscheibe Ablassventil des Wasser Ölfilters der Druckluft Packungsinhalt prüfen TegraForce 1 kennenlernen ...

Страница 74: ...egraPol ein Sowohl die Distanz zwischen Scheibe und Probenbewegerplatte als auch die Position der Probenbewegerplatte über der Scheibe müssen justiert werden Für die Justierung legen Sie eine Präparationsscheibe auf das TegraPol befestigen Sie eine Probenbewegerplatte auf dem TegraForce 1 Lösen Sie die 2 Befestigungsschrauben und stellen Sie den Abstand zwischen Scheibe und Probenbewegerplatte auf...

Страница 75: ...egraForce besteht eine einzige elektrische Verbindung Darin enthalten ist sowohl die 24 V Stromversorgung als auch eine Datenleitung für die Kommunikation zwischen den beiden Geräten Schalten Sie das TegraPol aus Stecken Sie das einzige am TegraForce befindliche Kabel in den Probenbewegerstecker auf der Rückseite des TegraPol Die Lage dieser Steckverbindung ist im Bild von der Rückseite des TegraP...

Страница 76: ...lfilter ausgestattet der Überschüsse dieser Substanzen aus der Druckluft entfernt Somit ist es erforderlich diesen Filter regelmäßig zu entleeren Entfernen Sie die Präparationsscheibe aus dem Arbeitsbereich Diese Maßnahme soll vermeiden dass die Präparationsscheibe mit Wasser und Öl verschmutzt wird Stellen Sie die Lage des Ablassventils am Boden des Filterglases fest Halten Sie ein Auffanggefäß f...

Страница 77: ...e bewegen Entfernen Sie die Präparationsscheibe Drücken Sie TegraForce wieder so weit nach unten bis der Kopf einrastet Entfernen Sie die Abdeckkappen der beiden Befestigungsschrauben links am Gehäuse des TegraPol mit einem Messerrücken Während Sie TegraForce an seinem Platz festhalten lösen Sie die beiden Befestigungsschrauben Heben Sie TegraForce senkrecht hoch und legen Sie es auf eine stabile ...

Страница 78: ...Gerät in aufrechte Position schwingen Entfernen Sie die drei Befestigungsschrauben der Bewegerplatte Schieben Sie den Probenhalter gleichmäßig auf die drei Beine Legen Sie eine geeignete Präparationsscheibe ein und drücken Sie TegraForce 1 so weit nach unten bis die Verriegelung einrastet Wenn ein mit einem TegraForce 1 ausgestattetes TegraPol eingeschaltet wird registriert die Software des TegraP...

Страница 79: ...s geschieht mit der Steuerungssoftware Falls das HAUPTMENÜ im Augenblick nicht angezeigt wird drücken Sie Esc bis Sie im HAUPTMENÜ sind Mit den Pfeiltasten wählen Sie Präparation aus Präparationsparameter einstellen Hinweis Falls auf dem TegraForce einTegraDoser 5 installiert und an das TegraPol angeschlossen ist finden Sie die Einstellung der Präparationsparameter in der TegraDoser 5 Gebrauchsanw...

Страница 80: ...te Präparationsstufe und stellen Sie sicher dass der Probenbeweger in der oberen Position oder nicht verriegelt ist Drücken Sie Start Drücken Sie Eingabe um die manuelle Präparation zu bestätigen Drücken Sie Start um die Präparationsstufe zu starten Das Dosieren von Suspension und Schmiermittel läuft automatisch nach den voreingestellten Werten und die Stufe stoppt automatisch wenn die eingestellt...

Страница 81: ...lität wird dadurch verbessert und die Präparationszeit der nächsten Stufe kann kürzer gehalten werden Die Reduktion der Andruckkraft kann auf EIN oder AUS gesetzt werden und diese Einstellung gilt für alle Präparationsstufen EINGABE ruft das Menü KONFIGURATION auf Mit den Pfeiltasten wählen Sie Maschinenkonfiguration EINGABE ruft das Menü Maschinenkonfiguration auf Mit den Pfeiltasten wählen Sie K...

Страница 82: ... von einer Stufe zur anderen geändert warden können ohne dass das Gerät jedes Mal neugestartet werden muss Manchmal ist es aber wünschenswert dass das Gerät zwischen solchen Stufen stoppt z B bei zwei aufeinanderfolgenden Stufen mit Schleifpapier der gleichen Korngröße Deshalb ist es möglich die Funktion Pause zwisch Stufen auf Ja zu stellen EINGABE ruft das Menü Konfiguration auf Mit den Pfeiltas...

Страница 83: ...0s 05m 00s 01m 00s 00m 05s 30s 10s 5s Kraft Richtung 10 50 rechts links 5 N Wasser EIN oder AUS Bitte siehe Empfehlungen für Schleifen zum auf Seite 29 q Q Mit den Pfeiltasten mON wählen Sie den gewünschten Präparationsparameter aus D Die TegraPol Software kennt jetzt die für den Präparationsvorgang erforderlichen Einstellungen und ist bereit Präparation mit TegraForce Wichtig TegraForce muss vor ...

Страница 84: ...ionsscheibe darf nicht mehr als 1 1 5 mm betragen Die Höhe der Probe solle zwischen 8 28 mm betragen und darf den Wert von 0 7 x Proben durchmesser nicht überschreiten Beispiel Eine Probe mit einem Durchmesser von 30 mm sollte nicht höher als 30 x 0 7 21 mm sein Verwenden Sie die kleinstmögliche Korngröße Benutzen Sie zum Einbetten ein Einbettmittel das ähnliche Abnutzungseigenschaften wie das Pro...

Страница 85: ...efüllen der Flasche leicht macht Vergewissern Sie sich dass kein Präparationsvorgang aktiviert ist Öffnen Sie den Schnappdeckel oben auf der Flasche und führen Sie dort den mit dem TegraDoser mitgelieferten Trichter ein Füllen Sie die Flasche mit Schmiermittel Suspension nach und schließen Sie den Schnappdeckel Packungsinhalt prüfen TegraDoser 1 kennenlernen TegraDoser 1 befüllen NB Verwenden Sie ...

Страница 86: ...durch das Loch aus Füllen Sie die Flasche mit lauwarmen Wasser Setzen Sie den TegraDoser in seine Halterung am TegraForce Stellen Sie eine Flasche unter den Auslass des TegraDoser Drücken und halten Sie die Taste oder so lange gedrückt bis das Seifenwasser etwa eine Minute lang durch die Düse geflossen ist Nehmen Sie den TegraDoser vom TegraForce ab und gießen Sie das verbliebene Seifenwasser in d...

Страница 87: ...Sie die Dosierdüse am TegraDoser zur Seite Führen Sie TegraDoser in die Aussparung seitlich am TegraForce ein Drücken Sie ihn so lange nach unten bis der TegraDoser einrastet Schieben Sie die Dosierdüse unter dem Gehäuse des TegraDoser wieder in Arbeitsposition Schieben Sie die Dosierdüse so weit vom TegraForce nach außen weg bis die Steckverbindung frei kommt Greifen Sie die Flasche seitlich an u...

Страница 88: ...e Parametersatz einer Präparationsstufe zusammen mit der Flaschen Kennzahl gespeichert wird Falls die neuen DiaPro Suspensionen die Diamantsuspension und Schmiermittel in einem sind verwendet werden ist in jeder Präparationsstufe nur eine einzige Flüssigkeit zu verwenden Dies stellt die ideale Anwendungsmöglichkeit desTegraDoser 1 dar Wenn verschiedene TegraDoser mit unterschiedlichen Suspensionen...

Страница 89: ... 0 9 Nur Information Zeigt die Einstellung des Drehschalters am TegraDoser an Niveau 0 20 1 Mit den Pfeiltasten stellen Sie das gewünschte Dosierniveau ein und Drücken Sie EINGABE zur Bestätigung Die TegraPol Software kann jetzt den Präparationsvorgang beginnen Präparationsparameter einstellen Hinweis Die Dosierparameter werden nur angezeigt wenn der Wasserparameter auf AUS gesetzt ist Hinweis Die...

Страница 90: ...TegraForce entfernt oder der Wasserparameter wird auf EIN gesetzt Damit werden auch Geschwindigkeit Zeit und Andruckkraft auf die Parameterwerte gesetzt die zuvor in einer Schleifstufe benutzt wurden Die zweite Stufe besteht aus einer Feinschleifstufe unter Einsatz des TegraDoser 1 mit der Kennzahl 1 der DiaPro Suspension zum Feinschleifen auf MD Allegro Largo enthält Die dritte Stufe ist die erst...

Страница 91: ... aus der Endpolierstufe unter Verwendung des TegraDoser 1 mit Kennzahl 3 der mit einer DiaPro Suspension zum Endpolieren gefüllt ist Alle Präparationsparameter wurden automatisch durch einfaches Auswechseln der TegraDoser 1 mit individuellen Kennzahlen eingestellt Endpolieren ...

Страница 92: ...20 V 50 60 Hz CSA 05766516 05766522 05766523 05766524 05766616 Spezifikation Kat Nr Probenbewegerplatten für 3 Proben ø 25 mm 1 für 3 Proben ø 30 mm für 3 Proben ø 1 25 für 3 Proben ø 1 5 für 3 Proben ø 40 mm Ohne Öffnungen 05226901 05226902 05226904 05226905 05226903 05226906 Probenhalter zum Einspannen von 3 Proben 15 40 mm Durchm 05226908 Nivelliervorrichtung zum Nivellieren von Proben in Probe...

Страница 93: ...ormers Gerät aus und wieder anschalten noch mal versuchen Bleibt das Problem Struers Service anrufen Frequenzumformer Unverträglichkeitsfehler Herstellungsfehler falsche Motorkontrolle im Gerät installiert Struers Service anrufen Motortemperatur zu hoch Vorgang anhalten und Gerät einige Minuten abkühlen lassen Noch mal probieren Bleibt das Problem Struers Service anrufen Motortemp Fühler unterbroc...

Страница 94: ...ode noch mal lesen und Methode wieder wählen Reinigen der Schläuche im Gange Das Ende des Reinigungsvorgangs abwarten Suspension nicht einsetzbar Die Suspension die in der Methode angegeben ist wurde im TegraDoser 5 nicht konfiguriert Die Suspension in einer der Pumpen Positionen konfigurieren oder eine andere Suspension in der Methode wählen Lubrikant nicht einsetzbar Das Schmiermittel das in der...

Страница 95: ...t Falsche Software Einstellungen Software Einstellungen prüfen Wasserhahn der Wasserversorgung geschlossen Wasserhahn öffnen Eingebauter Wasserhahn geschlossen Wasserhahn öffnen Eingebauter Wasserhahn verstopft Wasserhahn säubern Filter am Wassereintritt verstopft Filter reinigen Kühlwasser tropft nach Maschinenstopp Störung des Magnetventils Den technischen Service von Struers benachrichtigen Das...

Страница 96: ...insatz Reinigen und trocknen oder entsorgen Sie den Schutzeinsatz reinigen und trocknen Sie die Wanne und entfernen Sie den Schmutz aus dem Abflussschlauch Legen Sie den Schutzeinsatz den Spritzschutzring und die Schleif Polierscheibe wieder ein Reinigen der Druckfüße und Kolben welche die Kraft auf die Probe ausüben e Im Hauptmenü Konfiguration wählen und ENTER edrücken um das KONFIGURATIONSMENÜ ...

Страница 97: ...tion über die Gesamtstunden und die Betriebsstunden seit dem letzten Service erscheinen auf der Anzeige wenn die Maschine gestartet wird Nach 1 000 Betriebsstunden scheint eine Nachricht auf um den Benutzer zu erinnern dass ein Termin für die Wartung gemacht werden soll Sind die 1 500 Betriebsstunden überschritten erscheint eine Anzeige um den Benutzer darauf aufmerksam zu machen dass das empfohle...

Страница 98: ... 8 7 ft lbf Kont bei 600 U min 5 7 Nm 4 2 ft lbf Max 10 Nm 7 4 ft lbf 20 Nm 14 8 ft lbf Angeschlossene Geräte TegraForce 1 TegraDoser 5 1 1 Software und Elektronik Steuerung Sensortasten Speicher FLASH ROM RAM nichtflüchtiges RAM LC Display 128x64 Punkte mit Hintergrundbeleuchtung Sicherheit Bitte sehen Sie die Konformitätserklärung Geräuschpegel Im Leerlauf im Abstand von 1 0 m 39 4 zur Maschine ...

Страница 99: ...2 PE Die elektrische Installation muss der Installationskategorie II genügen Nennlast 380 W 440 W Leerlaufleistung 12 W 12 W Stromaufnahme nom 1 9 A 2 2 A Stromaufnahme max 4 5 A 5 0 A Druck des Leitungswassers 1 10 bar 14 5 145 psi Wasserzufuhr 1 2 oder 3 4 Wasserabfluss ø32 mm 1 1 4 Abmessungen und Gewicht Breite 410 mm 16 1 Tiefe 670 mm 26 4 Höhe 315 mm 12 4 Gewicht 23 kg 50 7 lbs 25 kg 55 1 lb...

Страница 100: ...rlauf im Abstand von 1 0 m 39 4 zur Maschine 52 dB A Während der Präparation 60 dB A Umgebungstemperatur 5 40 C 41 104 F Feuchtigkeit nichtkondensierend 0 95 relat Luftfeuchtigkeit Stromversorgung Spannung 24 V Gleichstrom vom TegraPol Stromaufnahme Inom Imax 2 0 A 3 0 A Lufteintritt ø 5 mm ø 8 mm Druckluft 5 10 bar 72 145 psi Luftqualität Die Druckluftversorgung muss die Vorschriften der ISO 8573...

Страница 101: ...TegraPol 11 15 TegraForce 1 Mode d emploi no 15517001 Date de parution 20 TegraDoser 1 Mode d emploi ...

Страница 102: ...ée ci dessous En cas de doute veuillez consulter la plaque signalétique de la machine elle même La date et le n de l article du mode d emploi peuvent également vous être demandés Ces renseignements se trouvent sur la page de garde Les restrictions suivantes doivent être observées Le non respect de ces restrictions pourra entraîner une annulation des obligations légales de Struers Mode d emploi Le ...

Страница 103: ...d alcool 7 S assurer que les disques de prépolissage ou polissage soient correctement montés les tiges d entraînement bien amorcées dans les trous de la plaque tournante 8 Rester à distance du disque rotatif et du porte échantillons motorisé pendant l opération Lors du prépolissage manuel faire attention de ne pas toucher le disque de prépolissage Ne pas tenter de ramasser un échantillon dans le b...

Страница 104: ...ables à base d alcool Respecter les mesures de sécurité en vigueur pour la manipulation le mélange le remplissage le vidage et l élimination des liquides à base d alcool 7 Pour déplacer TegraPol avec TegraForce dans un autre endroit détacher TegraForce de TegraPol Voir la section Installer TegraForce L équipement ne devra servir qu à l usage auquel il est destiné et ainsi que décrit en détails dan...

Страница 105: ...s d un symbole WEEE contiennent des composants électriques et électroniques et ne doivent pas être jetés avec les ordures ménagères Veuillez contacter les autorités locales pour toutes informations sur la procédure correcte d élimination à suivre selon la législation nationale ...

Страница 106: ......

Страница 107: ...8 2 Fonctionnement de base de TegraPol Panneau frontal 9 Touches du panneau frontal 9 Lire l affichage 10 Signaux sonores 10 Réglages du logiciel 11 Changer la langue et le contraste de l affichage 11 Editer les valeurs numériques 13 Editer les valeurs alphanumériques 14 Processus de préparation 15 Monter un disque 16 Régler les paramètres de préparation 16 Commencer le processus 17 Arrêter le pro...

Страница 108: ...avec TegraForce 28 Recommandations pour le prépolissage 29 5 Faire fonctionner TegraPol avec TegraForce et TegraDoser 1 Vérifier le contenu de l emballage 30 Se familiariser avec TegraDoser 1 30 Remplir TegraDoser 1 30 Nettoyer TegraDoser 1 31 Monter TegraDoser 1 32 Installer TegraDoser 1 32 Retirer TegraDoser 1 32 Configurer TegraDoser 1 33 Régler les paramètres de préparation 34 Déroulement d un...

Страница 109: ... de réduction avec joint 1 Tuyau d écoulement ø32 1 5 m 1 Tube d écoulement ø32 plié de 88 2 Colliers de serrage 1 Jeu de Modes d emploi 1 TegraPol 15 1 Bague de protection 1 Réceptacle jetable plastique transparent 2 Câbles électriques 1 Tuyau d arrivée 3 4 2 m 1 Joint de filtre 1 Joint ø11 ø24 1 5 mm 1 Bague de réduction avec joint 1 Tuyau d écoulement ø32 x 1 5 m 1 Tube d écoulement ø32 plié de...

Страница 110: ...i 4 Prendre le temps de se familiariser avec l emplacement et les noms des composants de TegraPol A Robinet d eau avec tuyau de rinçage B Plaque rotative C Touches du panneau frontal Se familiariser avec TegraPol TegraPol 11 vu de face A B C ...

Страница 111: ...écoulement d eau Prise de service Prise pour porte échantillons motorisé TegraForce Prise pour l unité de dosage TegraDoser 5 Prise supplémentaire normalement pas utilisée Interrupteur principal Fusible Branchements électriques Prise de communication Boîte de contrôle Cooli Arrêt d urgence TegraPol vu de dos ...

Страница 112: ...duction avec le joint sur le robinet d eau si nécessaire Introduire le joint et serrer fermement l écrou raccord Monter le tuyau d écoulement sur le tube d écoulement d eau lubrifier avec de la graisse ou du savon pour faciliter l insertion Utiliser un collier de serrage pour serrer Si l espace derrière TegraPol est limité utilisé le coude de tuyau et l attacher directement au tube d écoulement au...

Страница 113: ...au tube d écoulement au dos de TegraPol Puis brancher le tuyau d écoulement à l autre extrémité de ce coude Guider l autre extrémité dans l orifice de montage dans le support au dessus de l unité du filtre statique B Incliner le tube de façon qu il descende vers l écoulement sur toute sa longueur Raccourcir le tube si nécessaire Brancher le câble de communication à la boîte de contrôle de Cooli pu...

Страница 114: ...ur ce câble n est pas autorisée dans le pays d utilisation celle ci devra être remplacée par une prise homologuée Les fils électriques devront être branchés comme suit Vert terre Noir ligne sous courant Blanc ligne sous courant L autre extrémité des deux câbles est équipée d un connecteur de câble IEC 320 à connecter à TegraPol Courant électrique DANGER La machine doit être mise à la terre IMPORTA...

Страница 115: ...teille de dosage Esc Pour quitter le menu actuel ou abandonner les fonctions changements Pousser le bouton pour commencer le processus de préparation ou pour démarrer la fonction de rotation pour faire sécher les disques et consommables Permet d activer les valeurs de paramètre choisies pour l édition Pour garder en mémoire les valeurs de paramètre éditées Fonction d interrupteur lorsque seulement...

Страница 116: ...artagé en 2 zones La position de ces zones et les informations qu elles contiennent sont expliquées dans l illustration ci dessous avec le Menu de CONFIGURATION comme exemple A En tête ceci est une aide de navigation pour savoir où l on se trouve dans la hiérarchie du logiciel B Rubriques informatives celles ci seront soient des valeurs numériques soit des textes donnant des informations associées...

Страница 117: ... le logiciel retourne au MENU PRINCIPAL Celui ci est le niveau le plus élevé dans la structure de menu A partir de ce menu il est possible d entrer dans les menus de Préparation et Configuration Avant de continuer il est recommandé de choisir la langue la plus appropriée si cela n a pas déjà été fait Utiliser les touches fléchées pour choisir Configuration Presser ENTER pour activer le menu de CON...

Страница 118: ...ner au MENU PRINCIPAL Pour changer le réglage du contraste de l affichage continuer à partir d ici Utiliser les touches fléchées pour choisir le contraste de l affichage Presser ENTER pour activer le menu du contraste de l affichage Utiliser les touches fléchées pour choisir un réglage adéquat Les réglages du contraste sont Référence 25 Plage de contraste 0 50 Palier de changement 1 Presser ENTER ...

Страница 119: ...e et des flèches vers le haut bas sont affichées Noter S il n y a que deux options le cadre n est pas affiché Utiliser ENTER pour passer d une option à l autre et ignorer les étapes suivantes Utiliser les touches fléchées pour augmenter ou diminuer la valeur numérique Presser ENTER pour accepter la nouvelle valeur En pressant Esc les changements sont abandonnés préservant la valeur originale Edite...

Страница 120: ...s options disponibles est affiché Noter S il n y a que deux options le cadre n est pas affiché Utiliser ENTER pour passer d une option à l autre et ignorer les étapes suivantes Utiliser les touches fléchées pour choisir l option correcte Presser ENTER pour accepter la nouvelle valeur En pressant Esc les changements sont abandonnés préservant la valeur originale Editer les valeurs alphanumériques ...

Страница 121: ... méthodes de préparation pour la plupart des matériaux ordinaires basées sur la simple analyse de deux propriétés clés la dureté et la ductilité Trouver la bonne méthode est facile y compris le choix des consommables Toujours consulter le Metalog Guide sur le site Internet de Struers pour trouver la méthode de préparation correcte pour les échantillons à préparer Processus de préparation Metalog G...

Страница 122: ...RINCIPAL n est pas affiché presser Esc deux fois Utiliser les touches fléchées pour choisir Préparation Presser ENTER pour activer le Menu PREPARATION Dans ce menu se trouvent 3 options de préparation Options Vitesse s t m Eau Palier de change ment t m Prépolissage 300 ON Polissage 150 OFF Déf par l util pour TegraPol 11 pour TegraPol 15 50 300 40 600 ON ou OFF ON ou OFF 10 Monter un disque Import...

Страница 123: ... de pouvoir remettre la machine en marche Le porte échantillons motorisé retournera à sa position initiale avant de pouvoir redémarrer le processus A la fin d un processus de prépolissage la fonction intégrée de centrifuge peut être utilisée pour faire tourner le disque de préparation à vitesse élevée pour éliminer l eau de la surface du disque Cette fonction peut être utilisée pour faire disparaî...

Страница 124: ... fileté 6 Vis M5x15 0 1 Clé hexagonale 2 5 mm 1 Clé hexagonale 5 mm avec poignée Poignée pour libérer fermer TegraForce 1 pour permettre empêcher un mouvement latéral Connecteur D Sub pour TegraDoser 1 ou bloc de buses de TegraDoser 5 Eclairage LED pour illuminer le disque de préparation Soupape de décharge du filtre à eau huile pour air comprimé Vérifier le contenu de l emballage Se familiariser ...

Страница 125: ...stance entre le disque et la plaque porte échantillons et la position de la plaque porte échantillons au dessus du disque devront être ajustées Pour régler la distance correcte monter un disque de préparation sur TegraPol et un disque porte échantillons sur TegraForce 1 Desserrer les 2 vis de fixation et ajuster l espace entre le disque et la plaque porte échantillons à environ 1 à 1 5 mm Resserre...

Страница 126: ...ssage polissage devra être contrôlée Cette distance devra être Diamètre des orifices Marge du disque 40 mm 1 5 mm 1 2 5 mm 1 6 0 mm 30 mm 6 5 mm 25 mm 9 0 mm Marge du disque IMPORTANT Après avoir réglé la marge du disque serrer fermement les deux vis de fixation S assurer que la distance entre le disque et la plaque porte échantillons est toujours correcte La colonne doit maintenant rester en posi...

Страница 127: ...u collier de serrage prévu à cet effet Brancher le tuyau d air à l accouplement rapide et connecter l autre extrémité à l arrivée d air comprimée sur TegraForce 1 TegraForce est pourvu d un filtre d eau huile éliminant les quantités excessives de ces substances de l alimentation en air comprimé Par conséquent il est nécessaire de vider le filtre régulièrement Retirer le disque de préparation de la...

Страница 128: ... de préparation Presser TegraForce vers le bas jusqu à ce que la tête soit bloquée en position Retirer les deux chapeaux recouvrant les vis de fixation sur le côté gauche du coffret de TegraPol en les soulevant à l aide d un couteau Desserrer les deux vis de fixation tout en maintenant TegraForce en position Soulever TegraForce directement vers le haut et le placer sur un support sûr et stable Dég...

Страница 129: ...re Retirer les trois vis fixant la plaque porte échantillons Faire glisser le porte échantillons uniformément sur ses trois pieds Insérer le disque de préparation correct et presser TegraForce 1 vers le bas jusqu au blocage Lorsqu un TegraPol a été installé avec un TegraForce 1 puis allumé le logiciel dans TegraPol est en mesure de détecter le TegraForce 1 automatiquement et informe l utilisateur ...

Страница 130: ...iais des touches de commande Si le MENU PRINCIPAL n est alors pas affiché presser Esc jusqu à ce que le MENU PRINCIPAL apparaisse Utiliser les touches fléchées pour choisir Préparation Régler les paramètres de préparation Noter Si un TegraDoser 5 est monté sur TegraForce et connecté à TegraPol se référer au Mode d emploi de TegraDoser 5 pour trouver la procédure correcte pour le réglage des paramè...

Страница 131: ...paration requise et s assurer que le porte échantillons motorisé soit en position supérieure Presser Marche Presser Enter pour confirmer le choix d une étape de préparation manuelle Presser Marche de nouveau pour démarrer l étape de préparation Le dosage de la suspension et du lubrifiant a lieu automatiquement selon les paramètres préréglés et l étape est automatiquement interrompue lorsque le tem...

Страница 132: ...échelons de 5 N jusqu à ce que la force finale de 10 N soit atteinte Ainsi le fini de surface est plus fin et le temps de préparation à l étape suivante peut être réduit Réduction force peut être réglé sur On ou Off et ce réglage reste en vigueur pour toutes les étapes de préparation accomplies Presser ENTER pour activer le Menu CONFIGURATION Utiliser les touches fléchées pour choisir Configuratio...

Страница 133: ...angés d une étape à l autre sans avoir à remettre la machine en marche Cependant il peut s avérer nécessaire d arrêter la machine par exemple lors du déroulement de deux étapes subséquentes sur SiC de même granulométrie Il est donc tout à fait possible de régler la fonction Pause entre étapes sur Oui Presser ENTER pour activer le Menu CONFIGURATION Utiliser les touches fléchées pour choisir Config...

Страница 134: ...60m 00s 05m 00s 01m 00s 00m 05s 30s 10s 5s Force Sens 10 50 sens des aiguilles ou sens inverse 5 N Eau ON ou OFF Voir Recommandations pour le prépolissage page 29 q Q Utiliser les touches fléchées mON pour choisir le paramètre de préparation désirée D Le logiciel TegraPol est maintenant prêt pour commencer le processus de préparation Préparation avec TegraForce Important TegraForce doit être bloqu...

Страница 135: ...re la plaque porte échantillons et le disque de préparation soit au maximum 1 1 5 mm La hauteur de l échantillon devra être entre 8 et 28 mm et ne devra pas dépasser 0 7 x le diamètre de l échantillon Par exemple un échantillon d un diamètre de 30 mm ne doit pas être plus haut que 30 x 0 7 21 mm Utiliser la taille de grain la plus fine possible Utiliser une résine d enrobage d une résistance à l u...

Страница 136: ...étique offrant un accès facile lors du remplissage de la bouteille S assurer qu il n y a pas de processus de préparation actif Ouvrir le couvercle sur le haut de la bouteille et insérer l entonnoir livré avec TegraDoser Remplir la bouteille de lubrifiant suspension et enfoncer le couvercle pour le fermer Vérifier le contenu de l emballage Se familiariser avec TegraDoser 1 Remplir TegraDoser 1 NB N...

Страница 137: ...eille de tout reste de suspension ou lubrifiant par le trou du haut Remplir la bouteille d eau tiède Monter TegraDoser sur TegraForce Placer une bouteille sous le point d écoulement de TegraDoser Presser et maintenir la pression sur ou jusqu à ce que l eau savonneuse ait été évacuée par la buse pendant environ 1 min Retirer TegraDoser de TegraForce et vider l eau savonneuse restant dans la bouteil...

Страница 138: ...afin d avoir accès au connecteur Insérer TegraDoser dans l échancrure sur le côté de TegraForce Presser vers le bas jusqu à ce que TegraDoser clique en bonne position Refaire basculer la buse de dosage dans sa position sous le corps de TegraDoser Faire basculer la buse de dosage vers l extérieur à distance de TegraForce jusqu à ce qu elle ne fasse plus obstruction au connecteur Saisir les côtés de...

Страница 139: ...res de préparation d une étape de préparation peut être sauvegardé avec l ID de la bouteille Si les nouvelles suspensions DiaPro combinant la suspension diamantée et le lubrifiant sont utilisées seul un liquide devra être appliqué à chaque étape de préparation Ceci est l application idéale pour TegraDoser 1 En remplissant plusieurs TegraDoser avec des ID s uniques de différentes suspensions chacun...

Страница 140: ... seulement indique le réglage ID de l interrupteur rotatif sur TegraDoser Niveau 0 à 20 1 Utiliser les touches fléchées pour choisir le niveau de dosage désiré et presser ENTER pour confirmer Le logiciel de TegraPol est maintenant prêt à commencer le processus de préparation Régler les paramètres de préparation Noter Les paramètres de dosage ne sont affichés que lorsque que le paramètre de l eau e...

Страница 141: ...aDoser 1 de TegraForce soit régler le paramètre de l eau sur ON Ceci change également les paramètres de Vitesse Temps et Force aux paramètres utilisés précédemment dans une étape de prépolissage La seconde étape est l étape de prépolissage fin Ici TegraDoser 1 avec l ID 1 est utilisé contenant la suspension DiaPro pour le prépolissage fin sur MD Allegro Largo La troisième étape est la première éta...

Страница 142: ...e polissage final Ici TegraDoser 1 avec l ID 3 est utilisé contenant une suspension DiaPro pour le polissage final En passant tout simplement d un TegraDoser 1 à l autre avec un réglage ID unique tous les paramètres de préparation ont été changés automatiquement Polissage final ...

Страница 143: ...66516 05766522 05766523 05766524 05766616 Spécification No de cat Plaques porte échantillons pour 3 échantillons ø25 mm 1 pour 3 échantillons ø30 mm pour 3 échantillons ø1 25 pour 3 échantillons ø1 5 pour 3 échantillons ø40 mm Sans orifices 05226901 05226902 05226904 05226905 05226903 05226906 Porte échantillons pour le serrage de 3 échantillons de 15 à 40 mm dia 05226908 Dispositif de mise à nive...

Страница 144: ...e appeler le SAV Struers Inverseur fréquence temp interne trop élelvée Eteindre le dispositif et le laisser refroidir pendant quelques minutes Le rallumer et réessayer Si le problème persiste appeler le SAV Struers Inverseur fréquence erreur inconnue 1 Erreur inverseur fréquence interne Eteindre et rallumer le dispositif et réessayer Si le problème persiste appeler le SAV Struers Type inverseur fr...

Страница 145: ... eau huile TegraPol avec TegraForce et TegraDoser 5 Bloc buses TegraDoser 5 manque Le bloc de buses manque ou n est pas correctement installé S assurer que le bloc de buses est correctement monté Méthode plus valable La méthode a été éditée sur TegraDoser 5 Relire la méthode en retournant à la liste des méthodes et rechoisir la méthode Nettoyage tubes en cours Attendre que le processus de nettoyag...

Страница 146: ... arrête Mauvaise programmation du logiciel Vérifier le réglage du logiciel L eau du robinet ne coule pas Ouvrir l eau Robinet d eau intégré fermé Ouvrir l eau Robinet d eau intégré obstrué Nettoyer le robinet d eau Filtre à l arrivée d eau bloqué Nettoyer le filtre L eau de refroidissement s écoule après l arrêt Soupape magnétique défectueuse Appeler le SAV Struers Il faut remplacer la soupape mag...

Страница 147: ...et sécher ou jeter le réceptacle nettoyer et sécher la cuvette et éliminer toutes les salissures du tube d écoulement Remettre en place le réceptacle la bague de protection et le disque de prépolissage polissage Nettoyer les sabots de pression et les pistons en appliquant la force sur les échantillons e A partir du menu principal choisir Configuration et presser ENTER e pour activer le menu CONFIG...

Страница 148: ... 1500 heures d utilisation Les informations sur le temps d opération total et le service technique de la machine sont affichées sur l écran à la mise en marche Un message apparaîtra après 1000 heures d opération pour rappeler à l utilisateur qu il va falloir planifier une visite de service technique Une fois que les 1500 heures d opération sont dépassées le message changera pour alerter l utilisat...

Страница 149: ...bf 11 8 Nm 8 7 ft lbf Cont à 600 t m 5 7 Nm 4 2 ft lbf Max 10 Nm 7 4 ft lbf 20 Nm 14 8 ft lbf Equipement connecté TegraForce 1 TegraDoser 5 1 1 Logiciels et composants électroniques Commande Touches de contrôle Mémoire FLASH ROM RAM NV RAM Affichage LC 128x64 points avec rétroéclairage Sécurité se référer à la Déclaration de conformité Niveau de bruit En marche à vide à une distance de 1 0 m de la...

Страница 150: ...tion électrique doit être en conformité avec Installation Category II Puissance charge nominale 380 W 440 W Puissance marche à vide 12 W 12 W Courant nom 1 9 A 2 2 A Courant max 4 5 A 5 0 A Pression de l eau du robinet 1 10 bar 14 5 145 psi Arrivée d eau 1 2 or 3 4 Ecoulement de l eau ø32 mm 1 1 4 Dimensions et poids Largeur 410 mm 16 1 Profondeur 670 mm 26 4 Hauteur 315 mm 12 4 Poids 23 kg 50 7 l...

Страница 151: ...é Niveau de bruit En marche à vide à une distance de 1 0 m de la machine 52 dB A Pendant la préparation 60 dB A Température ambiante 5 40 C 41 104 F Humidité Sans condensation 0 95 RH Alimentation en courant Tension 24 Vdc de TegraPol Courant Inom Imax 2 0 A 3 0 A Arrivée d air ø 5 mm ø 8 mm Pression d air 5 10 bar 72 145 psi Qualité de l air L air utilisé doit être de la qualité spécifiée dans le...

Страница 152: ...TegraPol 11 15 TegraForce 1 TegraDoser 1 Spare Parts and Diagrams Manual No 15517001 Date of Release 1 20 ...

Страница 153: ...used by a trained technician authorised by Struers The Service Manual may only be used in connection with Struers equipment covered by the Service Manual Struers assumes no responsibility for errors in the manual text illustrations The information in this manual is subject to change without notice The manual may mention accessories or parts not included in the present version of the equipment The ...

Страница 154: ...ed with QUAD rings 15190044B Water cock assembled 15200050B Diagrams Circuit Diagram 15513100G TegraDoser 1 Drawing TegraDoser 1 complete 15610001D Cover bottle complete without print 15610030H Diagram Circuit Diagram 15613100A TegraForce 1 Drawings TegraForce 1 complete 15570001L Chassis complete 15570005 Head complete 15570010C Piston complete 15570030B Pressure control valve complete 15580030G ...

Страница 155: ...el spiral ø10 16 2NU21216 200 Hose connection 510 mm with coupling 14960022 210 Connector print assembled for TegraPol 15513020 240 Net noise filter 6ESK1 2MO90030 290 5 00A T Fuse glass tube 2FU14250 440 Poly V belt 41 5 PJ4 L 1059 2JD31059 500 Lense frequency converter 1x230V 370W 2PU82371 510 CAN module for lense frequency converter 2PU82000 550 Power supply 85 264Vin 24V 4A 2PA90100 15510020 M...

Страница 156: ... 60 Cock pipe 70 Hose connection 80 O RING 4 48 1 78 NBR70 90 Hose Nylon 5mm NFM5 3 black Gaskets for water tap 14910071 20 O Ring 10 82 1 78 72 NBR 872 40 O Ring 6 10 1 60 72 NBR 872 50 Valve gasket 80 O Ring 4 48 1 78 NBR70 Various parts Pressure water hose no 880 white compl 2NU93020 1 2 TO 3 4 adapter for water hose 2NG30013 Gasket Ø11 Ø24X1 5 13590359 Filter gaskets 3 4 2IX20410 Elbow 87 with...

Страница 157: ...arts list for TegraDoser 1 Drawing Pos Cat no 15610001 TegraDoser 1 complete 0030 Print complete for TegraDoser 1 15613010 15610030 Cover bottle complete without print 0010 Touchpad TegraDoser 1 15610200 0020 Motor soldered 15610035 0030 Pump 24V SR10 30 2YP01030 ...

Страница 158: ...cover painted 15599003 0390 Timing belt GT 3MR 420 09 2JT20420 15570010 Head complete 0020 Distance tie rod 15570236 0030 O Ring Ø8 0x2 00 VITON 3 pcs 2IO20012 0040 O Ring Ø6 0x3 00 VITON 3 pcs 2IO30003 0050 O Ring Ø79x2 70 NBR 2IO37902 0080 Rubber bellow 2IB00006 0090 Pressure foot 14200091 0100 Bushing for sample mover 15590207 0110 Clamping ring for foot 13750351 15570030 Piston complete 0010 K...

Страница 159: ......

Страница 160: ......

Страница 161: ...k n e m m e r å s n e d j ø h e v i k s m e r m m 0 2 e v i k s m e r r o t s å p t d i m n o i s i v e R e t a d a e r C n o i t p i r c s e d n o i s i v e R A H 1 1 6 0 4 0 0 2 0 2 1 1 9 0 0 2 g i r d l a v n a t e n r e j f 0 8 s o P G P F 0 2 1 1 9 0 0 2 E P S t i n I r p p A t i n I w a r D e t a d r p p A D E F C 1 2 3 4 B A 3 2 1 5 C D 4 6 7 8 A B e d æ l s e d e r e t n o m å p r o t o M ...

Страница 162: ......

Страница 163: ......

Страница 164: ......

Страница 165: ......

Страница 166: ......

Страница 167: ...te BK1 BK2 BK7 BK8 YE GN BK7 BK8 YE GN Bottom Plate Bottom Plate Front Plate Bottom Plate Mounting screws Bottom Plate Solenoid valve for cooling on disc Chassis Frame BK BN RD OG PE L N YE GN or Shield Shield Shield Ver B FTH 06 03 2002 Mains inlet changed to IEC320 plug YE GN YE GN GN GREEN VT VIOLETT OG ORANGE GY GREY RD RED YE YELLOW BU BLUE BK BLACK BN BROWN PK PINK WH WHITE COLOR CODES IEC75...

Страница 168: ...1 A Z 2 0 7 2 r o f g a t S 4 6 2 0 7 5 5 1 0 8 1 r o f g a t S 1 6 2 0 7 5 5 1 0 9 3 r k s C M 0 1 4 0 5 R T 2 0 1 1 2 k s S L U 0 1 3 0 8 R T 2 5 1 1 2 w e l k n i r C 2 0 3 0 2 I Z 2 0 2 1 2 k s C N U 8 0 3 0 9 X T 2 0 3 1 1 o f e d a l p 8 3 2 0 7 5 5 1 0 4 1 1 G N I R V 0 3 0 0 0 V I 2 0 5 1 1 a c t s u D 0 1 0 0 9 M X 2 0 6 1 1 a p m a L 3 5 0 0 7 5 5 1 n o i s i v e R e t a d a e r C n o i ...

Страница 169: ... 8 3 0 1 2 0 1 0 9 1 0 3 3 N I T U O 0 7 K 2 S X 5 4 0 2 0 5 0 2 1 0 5 1 0 6 1 0 3 1 0 8 0 9 0 1 1 0 4 1 0 3 0 4 0 1 7 g n i l l i t s l a r t u e n i g a t d n å h 0 2 7 0 6 2 0 1 2 0 5 6 7 F F G G H H n o i s i v e R e t a d a e r C n o i t p i r c s e d n o i s i v e R t i n I w a r D e t a d r p p A t i n I r p p A A A A V T J 8 0 3 0 5 2 4 0 0 1 0 1 0 2 4 0 0 1 0 1 0 2 V T J e t i t c o L t i...

Страница 170: ... e t a d r p p A t i n I w a r D n o i t p i r c s e d n o i s i v e R e t a d a e r C v e R 8 0 0 2 8 0 4 1 E P S 8 0 0 2 8 0 4 1 f l i t 3 0 3 7 9 5 5 1 F P g o e b u l o r c i M d e m g n i r ø m S 1 0 0 2 2 1 0 2 2 3 1 4 F E D A B C e d e v o h e d n e r e t o R 0 1 0 0 7 5 5 1 4 8 j e v p u r t s r e d e P p u r e l l a B 0 5 7 2 K D n e g a h n e p o C k r a m n e D 0 0 8 0 0 6 4 4 5 4 e n o...

Страница 171: ... 1 n o i t p i r c s e d n o i s i v e R e t a d r p p A t i n I r p p A e l a c S D I l a i r e t a M t a m r o F C t a e r t e c a f r u S 2 3 1 4 f l i t 0 3 g o 0 2 s o p r o f t s k e T 1 0 0 2 2 1 0 2 n o i t p i r c s e D v e R 4 A R O S J M B e t a d a e r C 8 6 7 2 O S I S D e c n a r e l o T l e p m e t S 0 3 0 0 7 5 5 1 B 6 7 1 é l l a s j ø h l a V e r v o d ø R 0 1 6 2 K D n e g a h n...

Страница 172: ...S D e c n a r e l o T 2 3 1 4 F E D A B C v e R t a m r o F D I e l a c S l a i r e t a M n o i t p i r c s e D e n o N K m J M B G A t i n I r p p A e t a d r p p A t i n I w a r D n o i t p i r c s e d n o i s i v e R e t a d a e r C v e R Y R B 8 0 1 0 0 1 t n e v n g a m f l i t 2 Y 1 Y r e k r æ m f e R 8 0 1 0 0 1 4 A 1 1 G 4 8 j e v p u r t s r e d e P p u r e l l a B 0 5 7 2 K D n e g a h ...

Страница 173: ...5 Head in correct possition X4 6 GY WH BN BK BK BU WH GN RD BK BK RD BK RD 4xAWG18 shield 9 poles D sub male Shield CAN H CAN L X1 24 V W1 GND 9 pol D Sub Female 3xAWG20 Shield W3 X5 9 BK BN RD Shield BK BN RD OG Shield TegraForce 1 35W TegraForce 3 5 118W RD BK BN BROWN BU BLUE GN GREEN YE YELLOW COLOR CODES IEC757 PK PINK BK BLACK VT VIOLETT OG ORANGE WH WHITE GY GREY RD RED Ver C FTH 04 07 2002...

Страница 174: ... Copenhagen Denmark Phone 45 3670 3500 Fax 45 38272704 A B C Tolerance DS ISO 2768 Surface treat SOR 30 11 2001 27 01 2003 JTV SOR BMJ 24 01 2003 07 03 2002 Opdateret pos nr Pos 35 og 50 samt tekst for pos 30 og kugleskrue tilf Description D 20 06 2003 Pos 60 tilføjet 20 06 2003 JTV JTV 50 4 45 41 40 20 30 Kugleskrue skrues i bund og omdrejning tilbage Låses derefter med Omnifit 50 udefra 60 35 30...

Страница 175: ... O I 2 0 6 1 E Z 2 0 9 1 A B 2 0 0 1 1 6 5 1 0 1 1 2 R T 2 0 3 1 1 O I 2 0 4 1 1 6 5 1 0 6 1 1 K Z 2 0 5 1 6 5 1 0 7 1 S Z 2 0 8 1 N 2 5 8 1 F I 2 0 5 0 7 0 4 1 0 3 n o i s i v e R e t a d a e r C n o i t p i r c s e d n o i s i v e R t i n I w a r D e t a d r p p A t i n I r p p A A H I L J 1 0 1 1 0 3 8 0 6 0 6 1 I L J I L J 8 0 6 0 6 1 d e d d a 5 8 s o p d e g n a h c 0 8 s o P 6 D C B A E F G...

Страница 176: ... VT VIOLETT OG ORANGE GY GREY RD RED YE YELLOW BU BLUE BK BLACK BN BROWN PK PINK WH WHITE COLOR CODES IEC757 GN GREEN RD BK 45 3670 3500 STRUERS A S 15613100 Thursday May 30 2002 1 1 A3 Valhøjs Allé 176 DK 2610 Rødovre Denmark TegraDoser 1 Circuit Diagram Cage Code A Size Scale CAGE Code DWG NO Rev Sheet of 5 9 4 8 3 7 2 6 1 ...

Страница 177: ...g og Produktion Struers A S English Declaration of Conformity S Manufacturer Struers A S Pederstrupvej 84 DK 2750 Ballerup Denmark Telephone 45 44 600 800 Herewith declares that Product Name TegraPol 11 15 21 25 31 35 Type No 551 552 553 554 555 556 Machine Type Grinding and polishing machines is in conformity with the provisions of the following directives Safety of Machinery 2006 42 EC according...

Страница 178: ...stian Skjold Heyde Stellvertretender Geschäftsführer Entwicklung und Produktion Struers A S Français Déclaration de conformité S Fabricant Struers A S Pederstrupvej 84 DK 2750 Ballerup Denmark Téléphone 45 44 600 800 Déclare ci après que Nom du produit TegraPol 11 15 21 25 31 35 Type no 551 552 553 554 555 556 Type de machine Machine de prépolissage polissage est conforme aux dispositions des Dire...

Страница 179: ...Udvikling og Produktion Struers A S English Declaration of Conformity S Manufacturer Struers A S Pederstrupvej 84 DK 2750 Ballerup Denmark Telephone 45 44 600 800 Herewith declares that Product Name TegraForce 1 3 5 and TegraDoser 1 Type No 557 558 559 and 561 Machine Type Specimen mover and Dosing unit is in conformity with the provisions of the following directives Safety of Machinery 2006 42 EC...

Страница 180: ...1 2011 Christian Skjold Heyde Stellvertretender Geschäftsführer Entwicklung und Produktion Struers A S Français Déclaration de conformité S Fabricant Struers A S Pederstrupvej 84 DK 2750 Ballerup Denmark Téléphone 45 44 600 800 Déclare ci après que Nom du produit TegraForce 1 3 5 et TegraDoser 1 Type no 557 558 559 et 561 Type de machine Porte échantillons et unité de dosage est conforme aux dispo...

Отзывы: