


Page 4 of 17
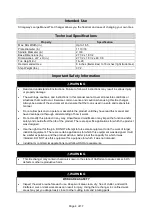
Intended Use
Strongw
ay’s Large Manual Tire Changer allows you the freedom and ease of changing your own tires.
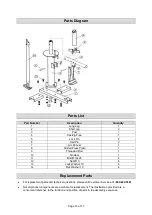
Technical Specifications
Property
Specification
Max. Rim Width (in.)
Up to 16.5
Plate Diameter (in.)
11 13/16
Spindle Diameter (in.)
2 3/8
Base Dimensions (in.)
27 1/2 x 18 1/2
Dimensions L x W x H (in.)
27 1/2 x 18 1/2 x 40 1/8
Tire Height (in.)
16
–20
Recommended Use
8 inches (trailer tires) to 16 inches (light truck tires)
Ship Weight (lbs.)
37.2
Important Safety Information
⚠
WARNING
Read and understand all instructions. Failure to follow all instructions may result in serious injury
or property damage.
The warnings, cautions, and instructions in this manual cannot cover all possible conditions or
situations that could occur. Exercise common sense and caution when using this tire changer.
Always be aware of the environment and ensure that the tool is used in a safe and responsible
manner.
Do not allow persons to operate or assemble the product until they have read this manual and
have developed a thorough understanding of how it works.
Do not modify this product in any way. Unauthorized modification may impair the function and/or
safety and could affect the life of the product. There are specific applications for which the product
was designed.
Use the right tool for the job. DO NOT attempt to force small equipment to do the work of larger
industrial equipment. There are certain applications for which this equipment was designed. It will
be a safer experience and the product will do a better job at the capacity for which it was
intended. DO NOT use this equipment for a purpose for which it was not intended.
Industrial or commercial applications must follow OSHA requirements.
⚠
WARNING
This tire changer may contain chemicals known to the state of California to cause cancer, birth
defects or other reproductive harm.
⚠
WARNING
WORK AREA SAFETY
Inspect the work area before each use. Keep work area clean, dry, free of clutter, and well lit.
Cluttered, wet, or dark work areas can result in injury. Using the tire changer in confined work
areas may put you dangerously close to other cutting tools and rotating parts.


