


17
16
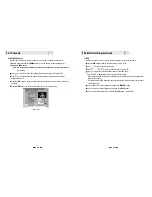
You can use
/
to navigate between channels until you find the channel you want.
If you know the channel number, you can enter it with the
NUMERIC
buttons and wait 2
seconds until the channel is changed.
If you know the channel name or transponder or CAS, you can press
to display the
channel list <Figure 6-9>
CH
CH
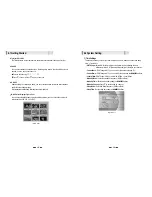
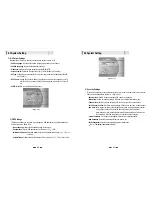
4) Channel Selection
<Figure 6-9>
In the right side of screen, detailed information about the selected channel will be
displayed. (Satellite Name, Frequency(Polar) and Channel Name)
You can use the following buttons to navigate between channels:
-
/
:
Moves one channel up/ down.
-
/
:
Moves one page up / one page down.
- RED :
Shows all channels in the current group.
- GREEN :
Shows all channels sorted alphabetically.
- YELLOW :
Shows all channels sorted by Transponder.
- BLUE :
Shows all channels sorted by CAS system.
Press
when the selection bar is positioned on the desired channel.
VOL
VOL
CH
CH
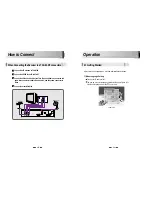
6.1 Getting Started
Channel Information
You can press the
INFO
button to display the information banner for a few seconds.
If you then press the
INFO
button again, a detailed banner will be displayed.
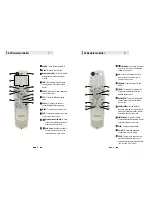
5) Other Functions of the Remote Control
Volume Control
While watching a program, press or to control the volume.
You can press the
MUTE
button to remove the sound of the program: the mute icon will
be displayed. Press the
MUTE
button again to turn the sound back on.
VOL
VOL
TV/ SAT switching
You can press TV/SAT to select the source of the signal to receive:
- TV Mode :
Signal from TV ANT INPUT will be out. (Front will display ‘TV’)
- SAT Mode :
Signal from Satellite will be out. (Front will display the channel number)
TV/ RADIO switching
You can press this key to change from a TV channel to a Radio channel or vice versa.
RECALL(RED)
Press to return to the previous channel.
Subtitle / Audio (GREEN)
Press to adjust the subtitle and/or audio status of the current channel:
- Audio Mode :
Select between, Stereo Mono-Left Mono-Right
- Audio Track :
Select between tracks available in this program
Note : These subtitle and audio parameters are workable only when the desired
channel supports these functions.
6.1 Getting Started


