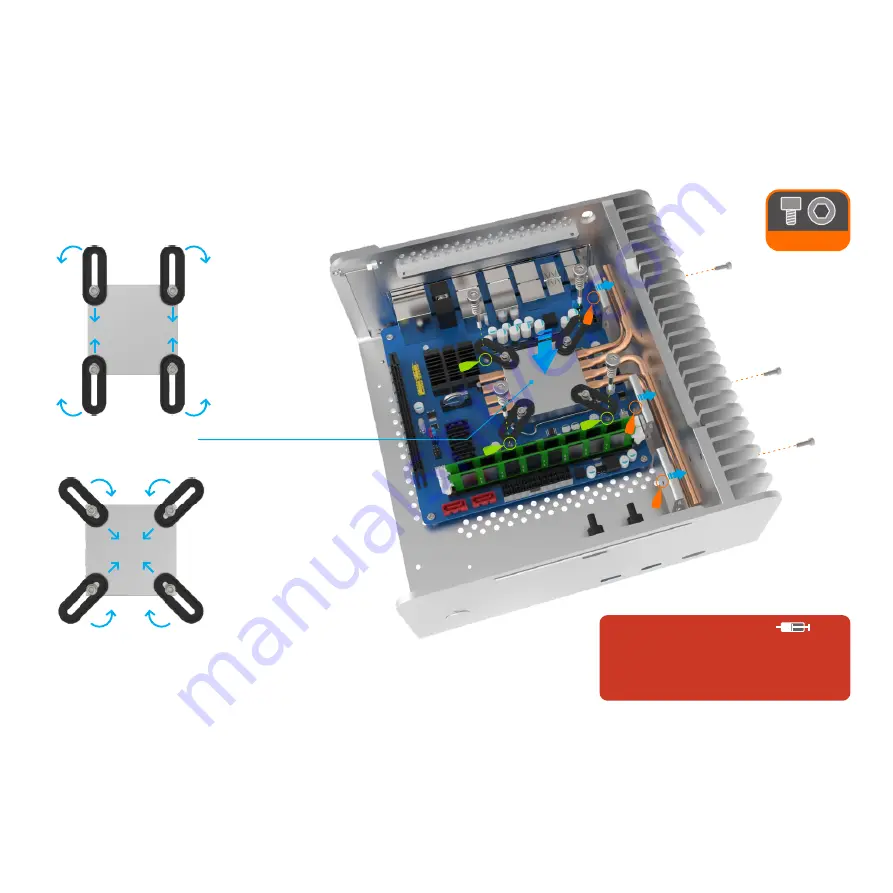
Secure the heat pipes to the heat sink using the 3 heat sink mounts as hex screws that pass from the outside of the case (between the fins). There are a number of
holes along the heat sink to allow for different heat pipes and CPU locations, so ensure you select the appropriate location to evenly apply pressure on the heat
pipes. Before fully tightening the heat sink mount screws, ensure once again the CPU mount is centrally located over the CPU.
Once you are satisfied with the alignment, fully tighten all the remaining screws. Begin with the CPU mount arms screws then finally the spring loaded screws. The
spring loaded screws should not be over tightened, and only require 4-5 turns from the point the spring start to compress.
HCH-M3x10
Fit the Cooler Assembly to the Heat Sink & CPU
Carefully lower the CPU mount + heat pipe assembly into the case and place it onto the CPU, ensuring the heat pipes (the area with thermal paste applied) only
make contact with the heat sink once the assembly is resting centrally on the CPU. Adjust the CPU mount arms so that they align with the 4 nuts (already fitted to
the underside of the motherboard). Fit the 4 spring loaded screws to the motherboard (into the CPU mounting nuts), but do not fully tighten yet.
®
Adjust the arms for AMD
®
or Intel CPU Sockets
IMPORTANT NOTICE
Do not forget to apply thermal paste to all the
locations shown in the cooler assembly overview.
Failing to do so will result in poor heat transfer, high
temperatures and potential damage to the CPU.
7
Содержание FC8
Страница 1: ......
Страница 16: ...Designed in Europe Printed in China Copyright 2018 All Rights Reserved ...


