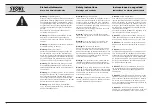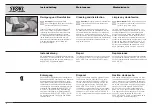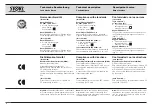
Ist der Akku vollgeladen, dann ändert die
Statusanzeige
b
die Farbe auf grün.
Das Ladegerät vom Stromnetz trennen.
Den metallenen Rändelring am Stecker
c
entge-
gen dem Uhrzeigersinn drehen und dadurch die
Steckerverrriegelung lösen und den Stecker
c
abziehen.
Aufstellen und
Bedienungshinweise
Ladegerät 094129
3
Warnung:
Netzstecker nur außerhalb
explosionsgefährdeter Bereiche mit der
Stromversorgung verbinden.
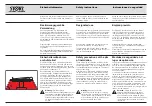
Das Ladegerät mit dem Stromnetz verbinden.
Die Statusanzeige
b
leuchtet orange, solan-
ge der Akku aufgeladen wird. Ein kompletter
Aufladevorgang dauert etwa eine Stunde.
14
3
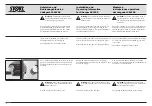
Warnung:
Nach jeder Funktionsprüfung
sicherstellen, dass die Batterielichtquelle
ausgeschaltet ist.
Die LED-Leuchte auf Funktion prüfen.
Installation and
Operating Information
for Charger 094129
3
Warning:
Connect mains plug to the power
supply outside of areas subject to explosion
hazards only.
Connecting the charger to the power supply. The
status display
b
is lit in orange as long as the
battery is being charged. A complete charging pro-
cess takes about one hour.
Once the battery has been completely charged, the
color of the status indicator
b
changes to green.
Disconnecting the charger from the power supply.
Rotate the metallic knurled ring on the plug
c
counterclockwise, thus releasing the plug lock, and
pull off the plug
c
.
3
Warning:
After each functional test, make
sure that the battery light source is switched
off.
Check the function of the LED light.
Montaje e
instrucciones operativas
del cargador 094129
3
Cuidado:
Conecte el enchufe de la red a
la alimentación de corriente únicamente
fuera de las zonas expuestas a peligro de
explosión.
Enchufe el cargador a la corriente. El indicador de
estado
b
se enciende de color naranja mientras
se esté cargando la pila. El proceso completo de
carga tarda aproximadamente una hora.
Cuando el acumulador está completamente carga-
do, entonces el indicador de estado
b
cambia a
color verde.
Desconecte el cargador de la corriente.
Gire el anillo moleteado metálico
c
en sentido
contrario a las agujas del reloj para desbloquear el
enchufe
c
y poder extraerlo.
3
Cuidado:
Después de cada verificación
funcional, asegúrese de que la fuente de luz
a pila esté desconectada.
Compruebe el funcionamiento de la lámpara.


