46
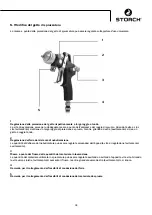
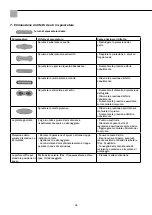
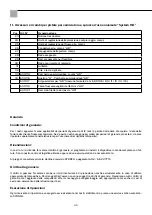
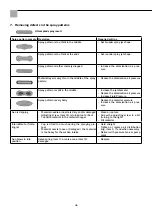
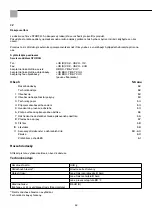
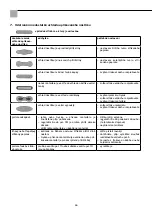
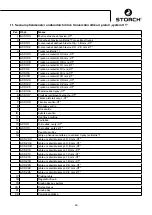
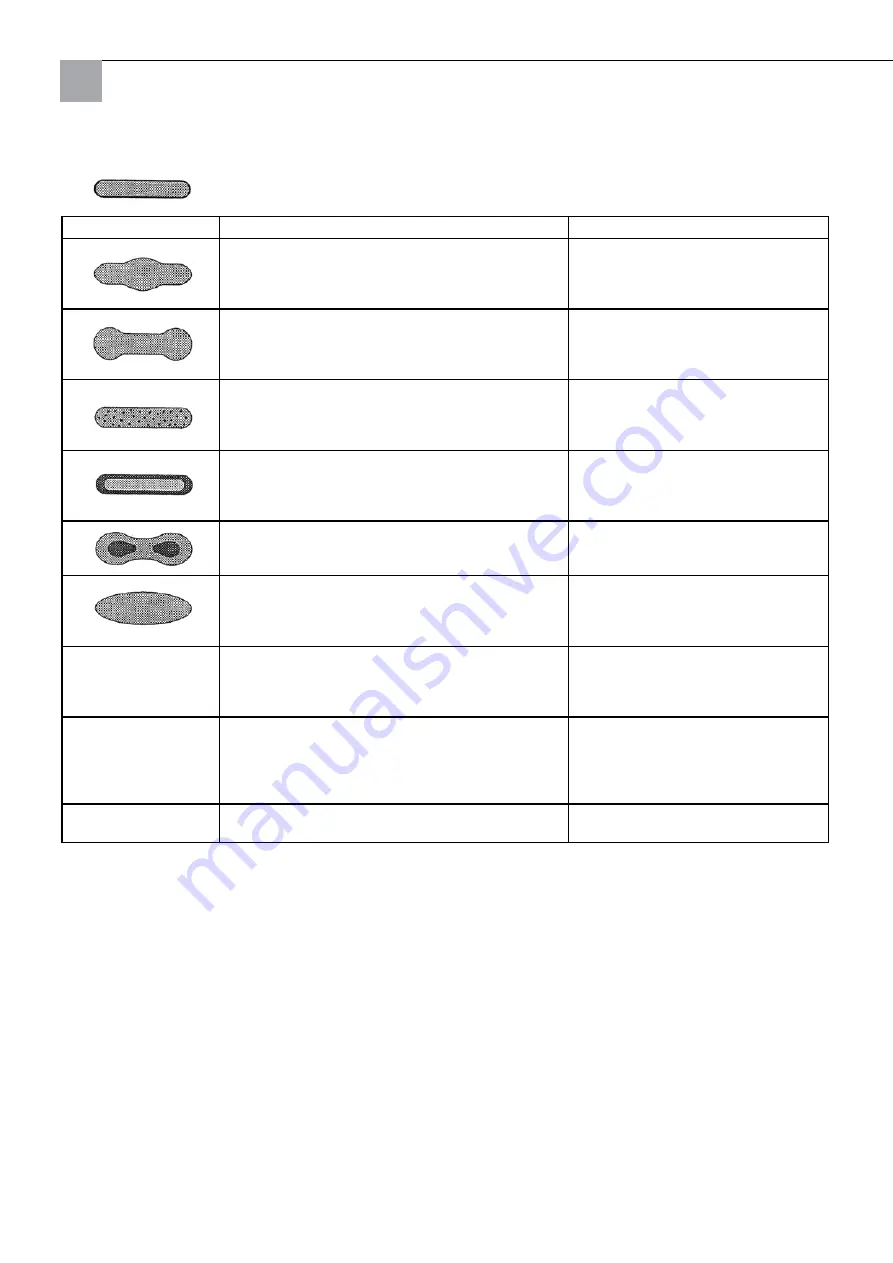
7. Removing defects in the spray patterns
Attempted spray result
Spray pattern sample Deviation
Required setting
Spray pattern is too thick in the middle
–
Set broader spray jet shape
Spray pattern is too thick at the ends
–
Set rounder spray jet shape
Spray pattern is rather coarsely dropped
–
Increase the atomisation air pres-
sure
Material layer is very thin in the middle of the spray
pattern
–
Reduce the atomisation air pressure
Spray pattern is split in the middle
–
Increase the jet diameter
–
Reduce the atomisation air pressure
–
Increase Fluid Pressure
Spray pattern is very bally
–
Reduce the material pressure
–
Increase the atomisation air pres-
sure
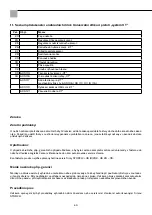
Gun is dripping
–
Material needle or nozzle is dirty and/or damaged
–
Adjusting screw, item 18, is turned too far back
–
Too little material in the material hopper
–
Clean or replace
–
Screw the adjusting screw in a bit
(turning to the right)
–
Fill material
Intermittent or flutte-
ring jet
–
Cup is tilted too much during the spraying pro-
cess
–
Material nozzle loose or damaged / the material
is too heavy for the suction intake
–
Hold straight
–
Tighten or replace air distribution
ring, item 5, if and when necessary
–
Deliver with pressure tank or pump
plant
Gun blows in idle
position
Valve spring, item 11, or valve cone, item 10,
damaged
–
Replace

