IMPORTANT
:
To avoid assembly problems follow these instructions exactly. Work Safely -
This assembly is done
with the Stockmaster standing upright.
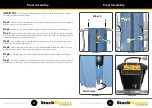
Step 1
-
Stand the Ladder upright.
Position the Control Handle in the Step Frame between the 2nd and 3rd steps.
(See illustration No. 1)
Step 2
-
Fix the Control Handle to the Frame. Pass an “E” Pin through the centre hole in the Control Handle and the
Lower hole in the Mounting Angle of the Step Frame and secure with an “E” Clip fitted to the outside ring of the “E” Pin.
(See illustration No. 2)
Step 3
-
Fix the Restraining Cable to the Frame using a M6 x 16 bolt and 2 Washers. Fit a washer to the bolt, pass it
through the loop in the Restraining Cable and fit the second washer. Fit the bolt in the Upper hole of the Mounting Angle
of the Step Frame and secure with a nut. Tighten the bolt using the Double Ended Spanner and Hex Key
(See illustration
No. 3)
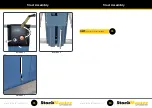
Step 4
-
Fix the Restraining Cable to the Control Handle. Use an “E” Pin and pass it through the Upper hole in the
Control Handle. Fit a washer and pass it through the Free Loop in the Restraining Cable and secure with an “E” Clip on the
inside ring of the ”E” Pin.
(See illustration No. 4)
Control Handle Assembly
Illustration 1
Illustration 2
Illustration 3
Illustration 4
Lower Mounting
Angle Hole
Centre Hole
M6 x 16
15
16
NEXT:
For sizes with 4 to 5 steps incl. platform:
Proceed to Mobilisation Assembly Instructions
19
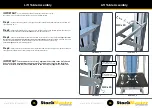
NEXT:
For sizes with 6 to 14 steps incl platform:
Proceed to Handrail Assembly Instructions
17


