


Document #
Revision Date
82070-275, Revision A
6 of 22
1/16/2009
Step 4: Connecting the Power Cord
Plug the appropriate end of the power cord into the 3-pronged interface on the back of the monitor. Plug the
opposite end of the cord into an outlet. The Vacation Switch on the back of the monitor must be turned on.
The Vacation Switch is a true on/off switch. If this switch is in the “Off” position, the monitor cannot be
turned on using the front button. Turn on the computer. Auto Adjust automatically adjusts the monitor to
optimal settings upon initial setup. For further adjustments, refer to the OSD section of this Operation
document.
Step 5: Raising and Lowering the Monitor
The monitor may be raised or lowered in either Portrait or Landscape mode. To raise or lower, place hands
on each side of the monitor and lift or lower to the desired height.
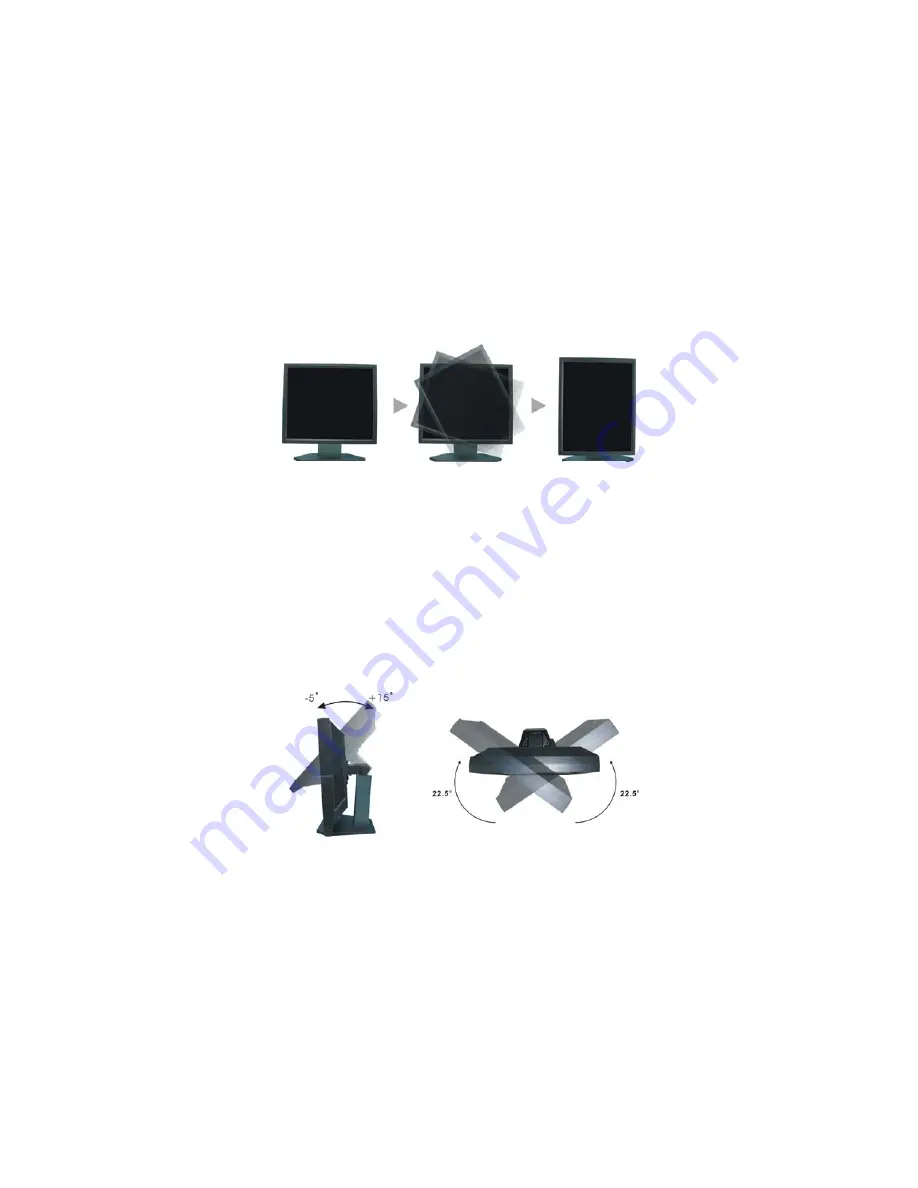
Figure 2: Screen Rotation
Before rotating, the monitor must be raised to the highest level. To raise the monitor, place hands on each
side and lift up to the highest position, see Figure 2.
To rotate the monitor, place hands on each side and turn clockwise from Landscape to Portrait or
counterclockwise from Portrait to Landscape.
To rotate the On Screen Display (OSD) menu between landscape and portrait, refer to the “OSD Controls”
section of this document under “OSD Rotation.”
Step 6: Tilting and Swiveling the Monitor
Figure 3: Tilt and Swivel
Tilt –
Grasp top and bottom sides of the monitor and adjust the tilt as desired. (If the screen is rotated
counterclockwise, the tilt function is not available.)
Swivel – Grasp right and left sides of the monitor and adjust the swivel as desired.
Portrait
Landscape


