background image


Controller Modification


If you purchased the wireless remote board as an upgrade to an existing controller (or 
controller/tethered remote board pair)


you will need to modify the controller to install the wireless 

board and antenna.


Step 1:

 Disconnect the controller from any power source. Then disconnect the antenna control 

cable.


Step 2:

 Remove the cover from the controller by unscrewing the four screws (two on each side).


Step 3:

 Unplug the display board from the driver board by disconnecting the 20 pin IDC cable that 

connects them.


Step 4:

 Unscrew the screws holding the driver board to the controller and remove the driver 

board. There will be two or three philips head screws holding the board to the bottom of the 
controller and two or more hex screws on the back.


Step 5:

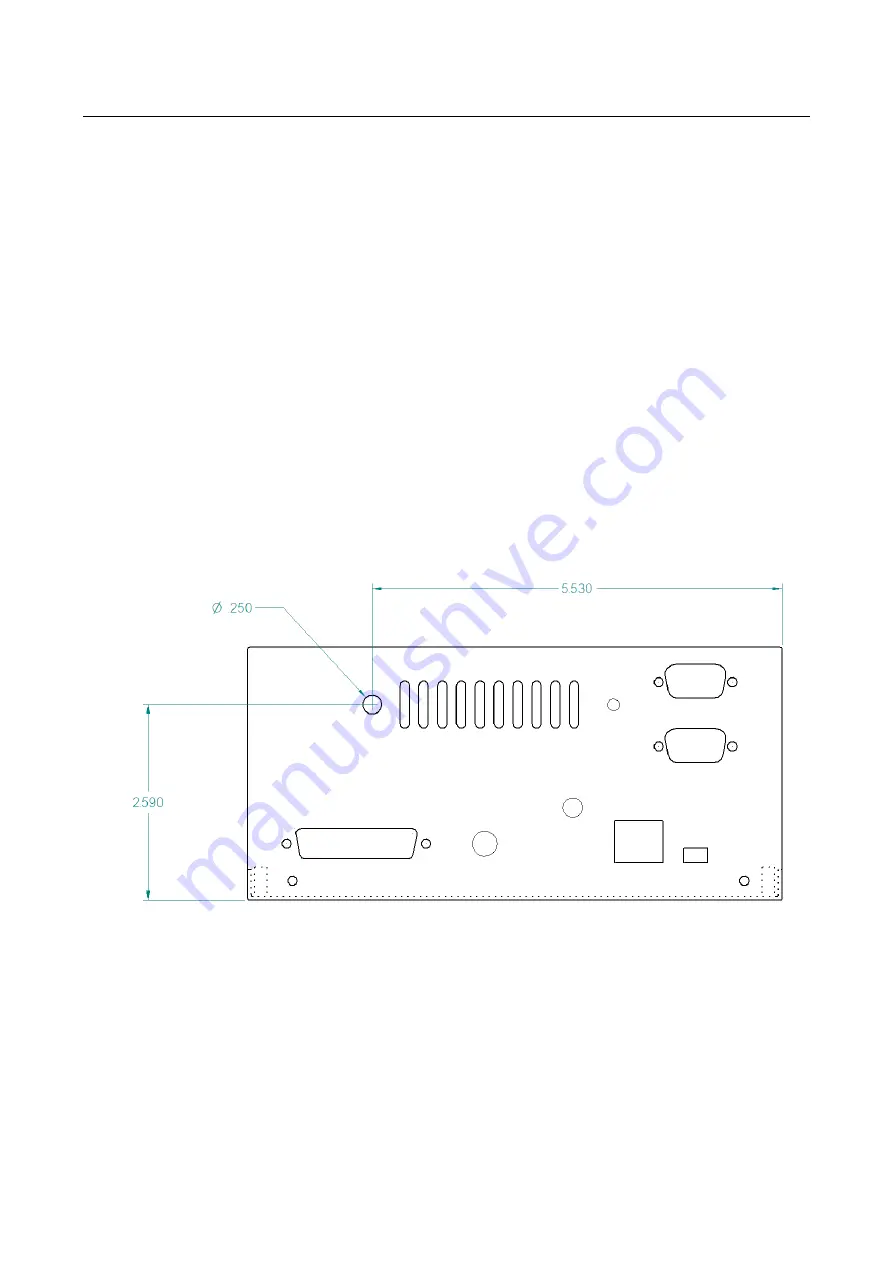
 Using the following diagram as a guide, drill a ¼ inch hole in the back of the controller 

chassis. The exact placement of the hole is not important.


Fig. 2

 Antenna hole location.


Содержание WIRELESS

Страница 1: ...1 WIRELESS REMOTE BOARD SETUP INSTRUCTIONS ...

Страница 2: ...he same channel However if you plan on using more than one controller with a radio link they will need to be on different channels Also if you are using XBee radios for other controls they must be on different channels The following instructions walk you through the setup process for the XBee radios Fig 1 XBee radio and USB adapter You will need 2 XBee radios the USB adapter and XCTU configuration...

Страница 3: ...r by unscrewing the four screws two on each side Step 3 Unplug the display board from the driver board by disconnecting the 20 pin IDC cable that connects them Step 4 Unscrew the screws holding the driver board to the controller and remove the driver board There will be two or three philips head screws holding the board to the bottom of the controller and two or more hex screws on the back Step 5 ...

Страница 4: ...t on one end and the other end will need to have the wires 1 2 6 7 and 8 separated stripped and tinned to prepare for soldering Note The ribbon cable has a red wire on one side That red wire is wire 1 the one next to it is 2 and so on Fig 3 Ribbon cable Step 7 Locate the area shown inside the red box in Figure 4 Fig 4 Driver Board Pad Locations ...

Страница 5: ...e schematics below The specific connections are shown in Figure 5 and Figure 6 Note If you have an ALP driver board refer to Figure 5 Refer to Figure 6 if you have a standard driver board Fig 5 ALP driver board pad locations Fig 6 Standard driver board pad locations ...

Страница 6: ...e driver board has a relay board installed omit the washer Fig 7 Jack screw installed in hex standoff Step 10 Place the driver board back into the controller chassis Step 11 Place the mounting bracket on the driver board aligning with the jack screw and mounting holes Fig 8 Mounting bracket with GHE remote board and Wi Fi module installed ...

Страница 7: ...mounting bracket and driver board to the controller chassis and the other will fix the mounting bracket to the standoffs installed in step 9 Fig 9 Install the indicated screws Step 13 Screw the countersunk Phillips head screw you removed in step 4 back into the chassis fixing the driver board in place Fig 10 Install the indicated screw ...

Страница 8: ...Step 15 Plug the 8 pin ribbon cable into 8 pin TTL connector as shown in Figure 11 Make sure the wire is oriented the correct direction Fig 11 Proper orientation of ribbon cable Step 16 Mount the antenna extension in the 1 4 hole you previously drilled into the metal frame Fig 12 Antenna installed in chassis ...

Страница 9: ... Board Modification If you own a tethered remote board and purchased the wireless remote board as an upgrade you will need to modify your tethered remote board Step 1 Unscrew the pan head screws from the aluminum mounting bracket If a relay board is installed remove the pan head screws holding the relay board as well Fig 14 Tethered remote board Remove the indicated screws ...

Страница 10: ...installed omit the washer Fig 15 Jack screw installed with fiber washer Step 3 Place the mounting bracket on the driver board aligning with the standoff and mounting holes Step 4 Screw the mounting bracket to the driver board using a pan head screw as shown in Figure 16 Fig 16 Wi Fi board installed on remote driver board ...

Страница 11: ...e Wi Fi board Make sure the wire is oriented the correct direction Fig 17 Ribbon cable installed Step 6 Replace the pan head screws holding the driver board onto the aluminum mounting plate with the 2 inch hex standoffs Place washers between the hex standoffs indicated by the arrows and the driver board as shown in Figure 18 Fig 18 Hex standoffs installed ...

Страница 12: ...12 Step 7 Install the Wi Fi antenna in the hole on the acrylic panel Fig 19 Wi Fi antenna installed on acrylic panel Step 8 Connect the Wi Fi antenna to the Wi Fi board ...

Страница 13: ... remote board both GHE radio boards should have all their LEDs lit Check the Setup Software Version menu to make sure the firmware version 117 for the remote board is being displayed 5 The GHE radio LEDs inside the SDA can be viewed through the rear center air vents 6 There will be a driver problem message on the SDA controller display if the remote driver is not attached to the antenna You should...

Страница 14: ... more Installation The radio link uses frequencies that operate via line of sight 2 4Ghz they do not go around corners well Some windows can be quite lossy because the same technology that limits IR radiation can limit 2 4 GHz RF as well Mounting a base antenna just outside the window can have a dramatic effect on range In general mount your units with as close to LOS line of sight conditions as y...

Страница 15: ...15 is dropping out The antenna will still work fine this way so you can choose to live with it To solve the problem boost signal strength by removing obstructions 4 Verify the antenna tunes correctly ...

Отзывы: