1. Make sure the switch is
and disconnect power
cord from power source.
2. Open motor cover and verify on the motor tag that
motor is dual voltage.
3. If motor tag states that it is dual voltage remove
junction box cover (A) on motor (B).
4. Using wiring diagram on inside of junction box cover,
reconnect motor leads for 240-volt or refer to page 13
of wiring diagram.
5. Replace junction box cover and close motor cover.
6. Replace the 120-volt plug with a plug rated for
240-volt operation.
7. The ON / OFF switch is 4-pole and does not need
Modified.
"OFF"
SEE FIG 30.
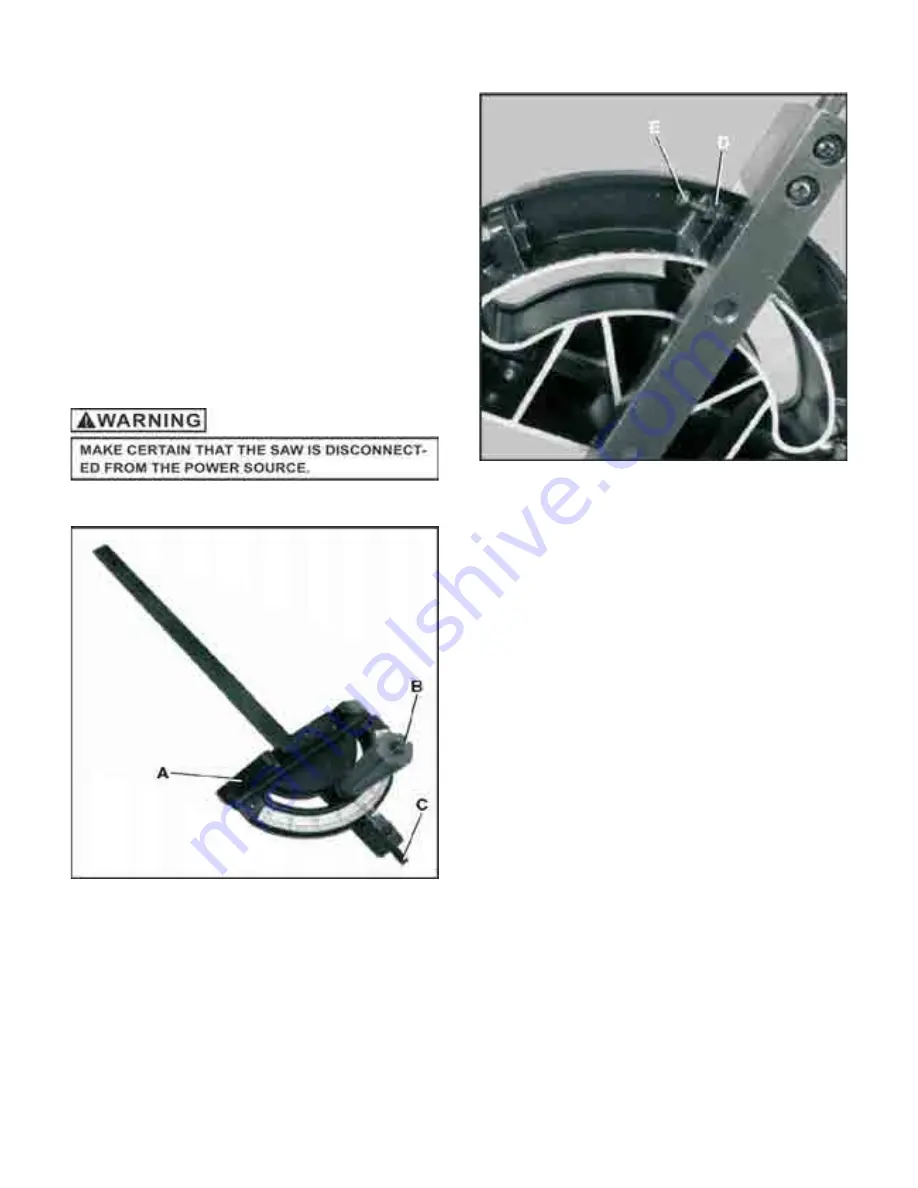
MITER GAUGE ADJUSTMENT
Fig. 31
1. The miter gauge has adjustable positive stops at 0-
degree and 45-degrees or it can be manually set at
any angle between 60-degrees.
2. To rotate miter gauge body (A), loosen knob (B) and
pull out plunger (C) and rotate miter gauge body to
desired angle and tighten knob.
3. To rotate to the next positive stop, pull plunger (C) out,
rotate miter gauge body then push plunger back in and
continue rotating miter gauge body until it stops
Against next positive stop.
SEE FIG 31
ADJUSTING POSITIVE STOPS
Fig. 32
1. To adjust 0-degree positive stops, loosen knob (B), pull
out on plunger (C) and turn miter gauge over.
2. Loosen the lock nut (D) 3 or 4 turns.
3. Place a square against the guide bar and front of the
miter gauge body. Square the miter gauge body to the
guide bar and tighten knob.
4. Push in plunger and make adjustments to stop screw
(E) so that it touches the plunger and tighten lock nut.
5. Recheck the positive stop angle to the saw blade.
insert the guide bar into the miter slot and slide the
miter gauge up to the saw blade.
6. To check, place a square against the saw blade and
miter gauge body. If any more adjustments are needed
repeat steps above.
7. To set both 45-degree positive stops, repeat steps 1
Thru 6 above at the 45-degree settings.
SEE FIG 32.
Arbor gib assembly adjustment
A dovetail gib is provided on the arbor height assembly to
insure a good sliding fit between the arbor assembly and
the trunnion bracket when raising and lowering the blade.
This gib has been adjusted at the factory and should not
need any further adjustment. If adjustment is necessary,
perform the following steps.
26
Содержание 35920
Страница 23: ...4 4 5 5 27...
Страница 24: ...5 28...
Страница 25: ...36 36 37 37 38 38 29...
Страница 26: ...39 39 40 40 30...
Страница 27: ...41 41 31...
Страница 28: ...42 42 32...
Страница 31: ...35...
Страница 33: ...37...
Страница 38: ...42...


