3
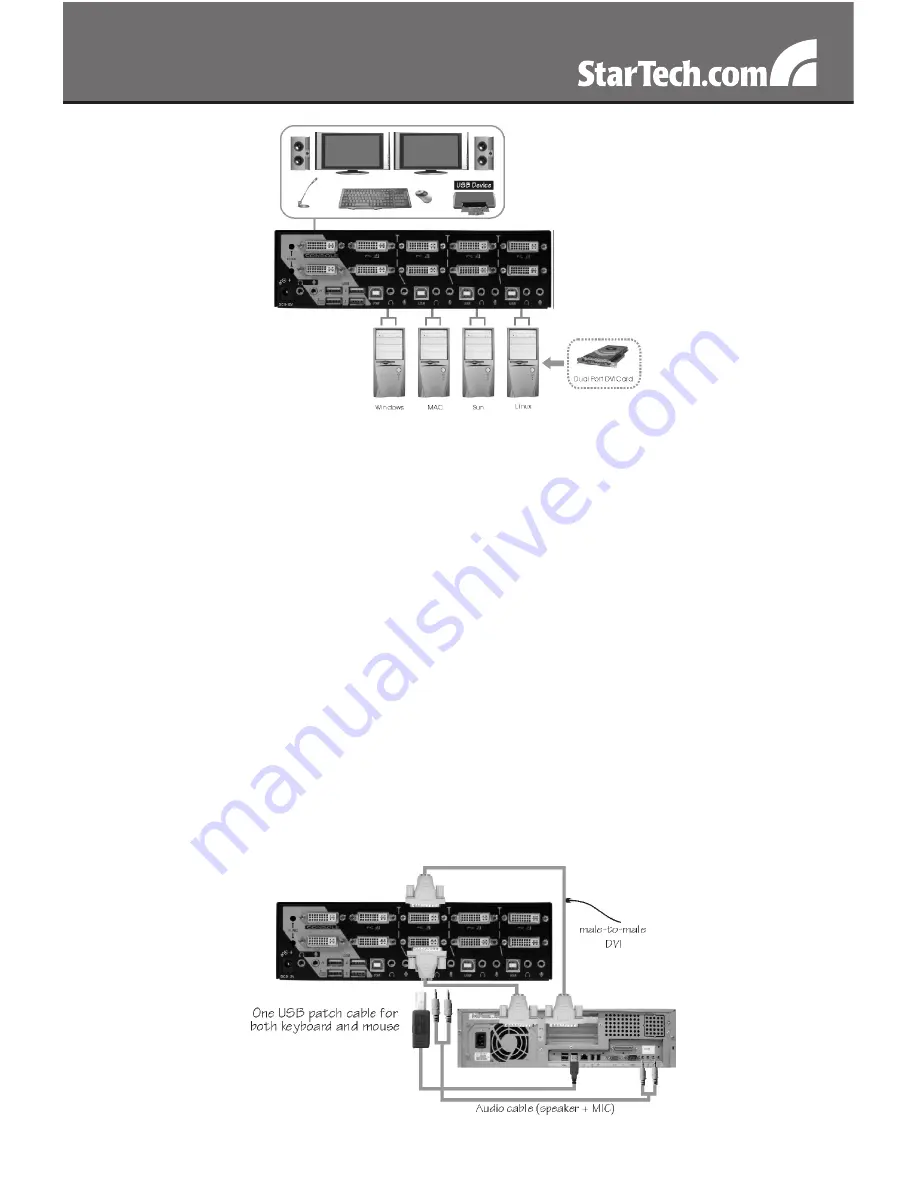
* installation pictures are representation only
1. Plug 1 or 2 monitor(s) into the Console side DVI connector(s); plug a
USB keyboard and a USB mouse into the dedicated USB keyboard
and mouse ports on the KVM switch.
2. Use a male-to-male DVI video cable to connect the DVI connector(s)
on the computer’s video card, to one of the KVM’s PC ports
(ie. PC1). A dedicated DVI, USB and audio 4-in-1 KVM cable can be
used (ie. StarTech.com ID: USBDVI4N1A6).
3. Use a USB type A-B Cable to connect the KVM’s USB port (type B,
square connector) for the PC port used in Step 2, and the USB port
on the computer (type A, flat connector).
4. Repeat for Steps 2 and 3 for each PC port on the KVM switch, or
each computer you wish to use on the KVM.
NOTE:
Make sure that you have connected monitor(s) into the
Console’s DVI port(s) before plugging/unplugging the PC’s video
connector(s).


