Ultrastar C handbook Issue 1, August 2015
down, as appropriate. The LED at the back of the Ultrastar C should change colour when the buttons
are pressed. If all is well, move onto the next step below:
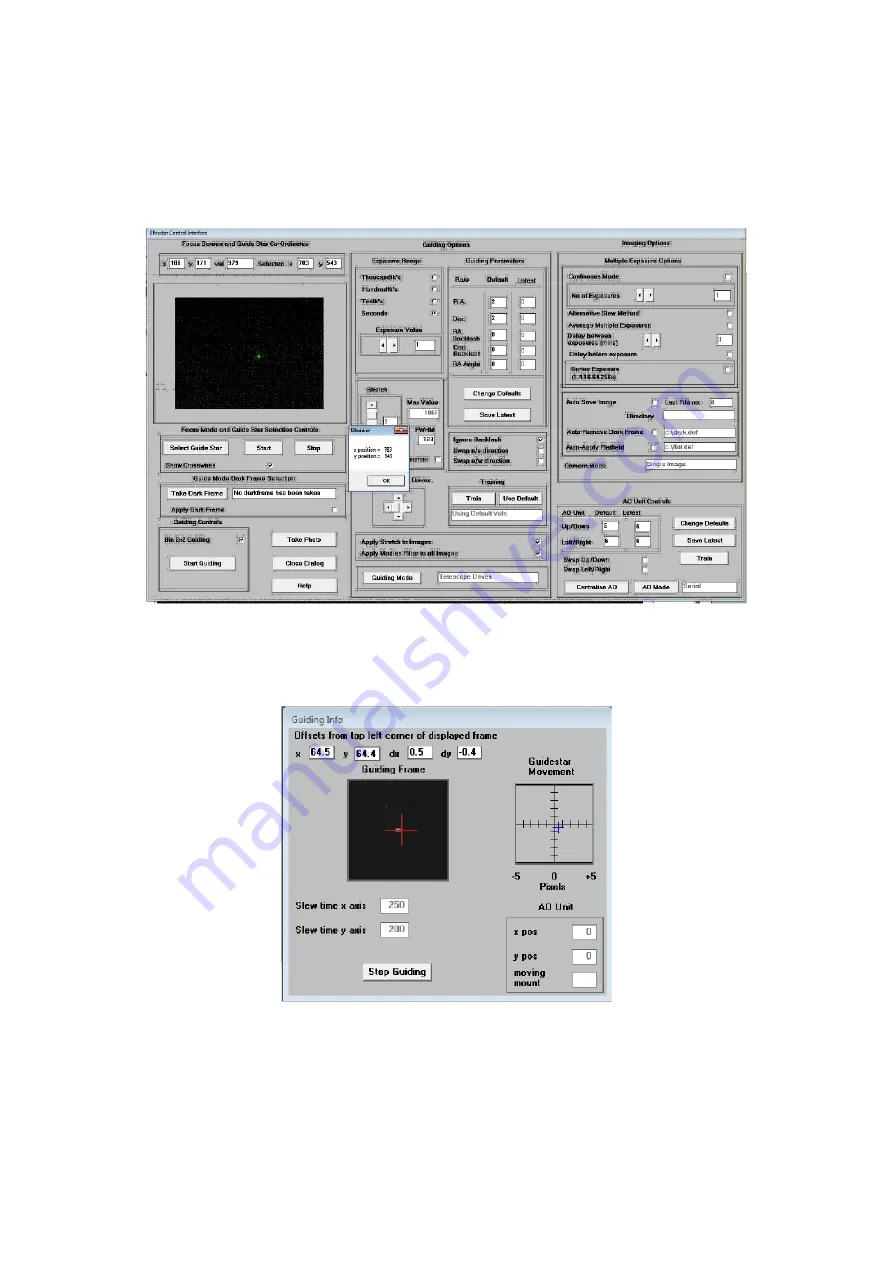
Once a good guide star has been found, press the ‘Stop’ button and then the ‘Select guide star’ button.
You can now click the mouse arrow on the guide star and a green cross will appear, centred on the star
(see above). Don’t select a very bright guide star, as this will result in poor guiding due to saturation of
the core pixels in the star image.
Once the guide star is selected, a small box appears with the star coordinates. If they look good, just
click on OK.
Now click on ‘Start Guiding’:
After a brief delay, the Guiding Info window will open, as above, and you will see the guide star, along
with error values and a reticule showing the guide star location with respect to the reference position. If
all is well, you should see the guide star location being forced towards the centre position with each
successive guide image. However, it is quite likely that it will be pushed away from the correct
position, due to an error in the guiding default settings. If this is the case, note the direction of travel,
and then reverse the appropriate direction setting in the guiding defaults menu. For example, if the star
moves away to the left or right, try reversing the ‘Swap e/w direction’ setting. If guiding works, but is


