background image

Starbridge Networks 
Lynx L-525 4 Port and Wireless Modem 

Page 41 of 56 


Wireless 


This section allows you to configure wireless settings on your Lynx L-525.   


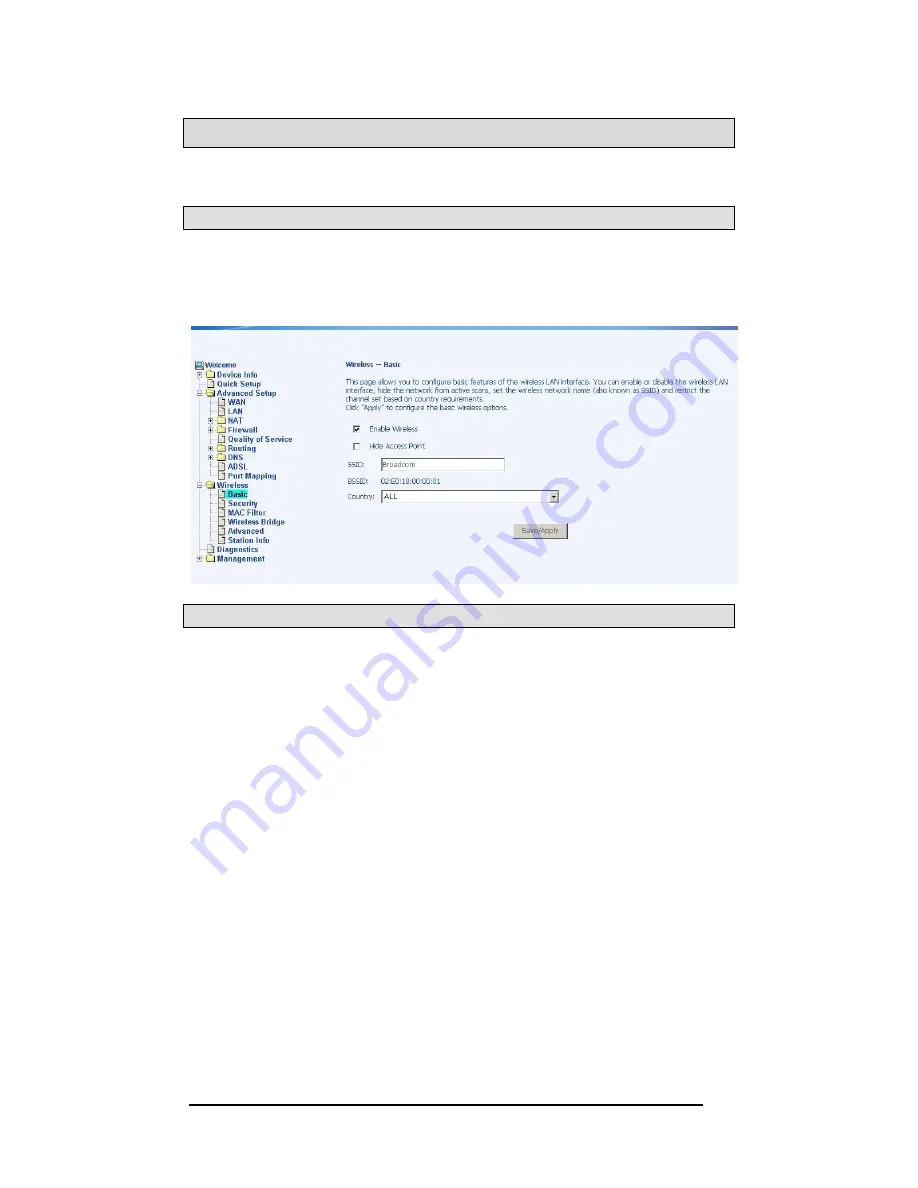
Basic 


The 

Wireless – Basic 

screen lets you enable or disable wireless.  The default 

setting for wireless is enabled.  You can also hide the access point so others 
cannot see your ID on the network. 


Security 


The next screen is the 

Wireless – Security 

screen which allows you to select 

the network authentication method and to enable or disable WEP encryption.  
Note that depending on the network authentication that is selected, the screen 
will change accordingly so additional fields can be configured for the specific 
authentication method. 
 
Network authentication methods include the following— 


Open

—Anyone can access the network.  The default is a disabled 

WEP encryption setting. 


Shared

—WEP encryption is enabled and encryption key strength of 

64-bit or 128-bit needs to be selected.  Click on 

Set Encryption Keys 

to manually set the network encryption keys.  Up to 4 different keys 
can be set and you can come back to select which one to use at 
anytime.


802.1X—

Requires mutual authentication between a client station and 

the Lynx L-525 by including a RADIUS-based authentication server.  
Information about the RADIUS


server such as its IP address, port and 

key must be entered.  WEP encryption is also enabled and the 
encryption strength must also be selected

Содержание Lynx L-525

Страница 1: ...rks Lynx L 525 4 Port and Wireless Modem User Manual VERSION 2 0 Product warranty does not apply to damage caused by lightning power surges or wrong voltage usage This product is for use only with UL...

Страница 2: ...L 525 3 CONFIGURING YOUR COMPUTER 3 Windows 2000 3 Windows XP 3 LOGGING INTO THE LYNX L 525 3 DEVICE INFO 3 Summary 3 WAN 3 Statistics 3 LAN Statistics 3 WAN Statistics 3 ATM Statistics 3 ADSL Statis...

Страница 3: ...ing 3 WIRELESS 3 Basic 3 Security 3 MAC Filter 3 Wireless Bridge 3 Advanced 3 Station Info 3 TROUBLESHOOTING DIAGNOSTICS 3 MANAGEMENT 3 Settings 3 Backup Settings 3 Restore User Settings 3 Restore Def...

Страница 4: ...tion with sufficient ventilation To prevent overheating do not obstruct the ventilation openings of this equipment Plug this equipment into a surge protector to reduce the risk of damage from power su...

Страница 5: ...s has been obtained dynamically from the broadband network No light No IP address was obtained For static IP this will not light Internet Quick blinking Traffic is passing Solid Lynx L 525 is connecte...

Страница 6: ...C power adapter Reset Restart press the button for less than 4 seconds Default settings press the button for 4 seconds or longer LAN1 LAN4 RJ 45 connects the unit to an Ethernet device such as a PC or...

Страница 7: ...PC to the Lynx L 525 Use the Ethernet cable to connect your computer directly to the Lynx L 525 Connect one end of the Ethernet cable to one of the ports labeled LAN on the rear panel of the Lynx L 5...

Страница 8: ...Starbridge Networks Lynx L 525 4 Port and Wireless Modem Page 8 of 56 Installation Diagram...

Страница 9: ...on the wall Mounting can be done on wall material including concrete wood or drywall Select an appropriate location free from obstructions or any possible interference Make sure the cables can be easi...

Страница 10: ...ed in the window are the installed network components If the list includes Internet Protocol TCP IP then the protocol has already been enabled and you can skip to Step 10 4 If Internet Protocol TCP IP...

Страница 11: ...he Network Connections window right click on the Local Area Connection icon and click on Properties 3 Listed in the Local Area Connection window are the installed network components Make sure the box...

Страница 12: ...d click on Enter A login screen like the one below will be displayed after you connect to the user interface 3 Enter your user name and password and then click on OK to display the user interface NOTE...

Страница 13: ...that can be accessed using the menu items under Device Info Summary Access the general status report from the Lynx L 525 by clicking on Summary under Device Info It shows information about the Lynx L...

Страница 14: ...nd Wireless Modem Page 14 of 56 WAN Access the WAN status report from the Lynx L 525 by clicking on WAN under Device Info Statistics LAN Statistics Access the LAN statistics from the Lynx L 525 by cli...

Страница 15: ...f 56 WAN Statistics Access the WAN statistics from the Lynx L 525 by clicking on the WAN item under Statistics The screen below shows a PPPoA WAN connection example ATM Statistics Access ATM statistic...

Страница 16: ...ort and Wireless Modem Page 16 of 56 ADSL Statistics You can view ADSL statistics by clicking on the ADSL item under Statistics Information contained in this screen is useful for troubleshooting and d...

Страница 17: ...atio of error bits to the total number transmitted If you click on the ADSL BER Test button at the bottom of the ADSL Statistics page the following pop up screen will appear allowing you to set the te...

Страница 18: ...and Wireless Modem Page 18 of 56 Route Access the routing status report from the Lynx L 525 by clicking on the Route item under Device Info ARP Access the ARP status report from the Lynx L 525 by clic...

Страница 19: ...the auto connect process click on the box labeled DSL Auto connect a process that will automatically detect the first usable PVC and automatically detect PPPoE PPPoA and Bridge Protocol with DHCP Serv...

Страница 20: ...rt and Wireless Modem Page 20 of 56 The next screen to appear will depend on the connection type that was selected in the previous screen The next screen lets you decide if you want to enable NAT fire...

Страница 21: ...vice Setup screen where you enter the IP address subnet mask as well as enable or disable DHCP server The last screen under the Quick Start section allows you to set up the wireless feature of the Lyn...

Страница 22: ...as provided by your ISP Click on the Add button if you want to add a new rule for the WAN interface The ATM PVC Configuration screen appears The ATM PVC Configuration screen allows you to configure an...

Страница 23: ...en below shows the types of network protocols and encapsulation modes PPP over ATM PPPoA PPP over Ethernet PPPoE MAC Encapsulation Routing MER IP over ATM IPoA Bridging Select the mode that your ISP h...

Страница 24: ...n the Save button when the settings are correct The screen below will appear showing the WAN settings that you made When satisfied with the settings and no changes are necessary click on the Finish bu...

Страница 25: ...Starbridge Networks Lynx L 525 4 Port and Wireless Modem Page 25 of 56...

Страница 26: ...e to correspond to your LAN s IP Subnet The Save button only saves the LAN configuration data but does not apply the configurations Select the Save Reboot button to save the LAN configuration data and...

Страница 27: ...address on the LAN side Select the virtual server from the drop down list and complete the server IP address then click on the Save Apply button The following screen appears after you save your selec...

Страница 28: ...Port Triggering Click on the Add button to add Port Triggering to your Internet application The screen below appears when you click on Add allowing you to select the application which requires port s...

Страница 29: ...56 The screen below appears after you save your selections You will be able to add or remove selections made by clicking on the Add and Remove buttons DMZ Host You can define the IP address of the DM...

Страница 30: ...us application processes to allow open information exchange To use the Application Layer Gateway ALG the appropriate Application Layer Gateway definition was selected in the service configuration item...

Страница 31: ...ters the WAN traffic to the LAN side Click on the Add button to add incoming filter settings Enter a filter name information about the source address from the WAN side and information about the destin...

Страница 32: ...ur change If you want to add a setting to the MAC filtering table enter the Source and Destination MAC address and select protocol type frame direction and WAN interface Then click on Save Apply to sa...

Страница 33: ...strict the day of the week certain computers can access the Lynx L 525 Click on Add to set up the restrictions After you click on Add you will see the screen below You will be able to enter the MAC ad...

Страница 34: ...x L 525 4 Port and Wireless Modem Page 34 of 56 Quality of Service QoS You can configure the Quality of Service to apply different priorities to traffic on the Lynx L 525 On this screen you can view a...

Страница 35: ...ing Default Gateway screen As default the box is checked for automatic assigned default gateway to be enabled Click the Save Apply button to enable or disable this feature Static Route Use the Routing...

Страница 36: ...d Wireless Modem Page 36 of 56 RIP If RIP is enabled the Lynx L 525 operation can be configured as active or passive DNS DNS Server Use the DNS Server screen to request automatic assignment of a DNS o...

Страница 37: ...address To configure a dynamic DNS click on Add If you have already created a dynamic DNS that you want to delete click on Remove The screen below allows you to set up the Dynamic DNS provider Note th...

Страница 38: ...nly as directed by your ISP Phone Line Pair The Lynx L 525 supports phone lines on pins 2 and 3 or pins 1 and 4 to connect your ADSL line If your phone system uses pins 2 and 3 attach a normal RJ11 ca...

Страница 39: ...gs The frequency band of ADSL is split up into 256 separate tones each spaced 4 3125 kHz apart With each tone carrying separate data the technique operates as if 256 separate modems were running in pa...

Страница 40: ...ternet applications on the WAN side to pass through the firewall and enter your LAN To use this feature mapping groups need to be created To do this follow the instructions below 1 Click on the Add bu...

Страница 41: ...cordingly so additional fields can be configured for the specific authentication method Network authentication methods include the following Open Anyone can access the network The default is a disable...

Страница 42: ...nd generation of WPA which uses AES Advanced Encryption Standard instead of TKIP as its encryption method Network re auth interval is the time in which another key needs to be dynamically issued WPA2...

Страница 43: ...ers Add the MAC addresses that you want to manage and then select the mode that you want to use to manage them You can disable this feature or you can allow or deny access to the MAC addresses that yo...

Страница 44: ...bridge Networks Lynx L 525 4 Port and Wireless Modem Page 44 of 56 Wireless Bridge In this next screen you can select the mode which you want the Lynx L 525 to be in either access point or wireless br...

Страница 45: ...less medium Fragmentation Threshold used to fragment packets which help improve performance in the presence of radio frequency RF interference RTS Threshold Request to Send Threshold determines the pa...

Страница 46: ...e same time Do not disable 54g Protection if there is a possibility that an 802 11b device may need to use your wireless network In Auto Mode the wireless device will use RTS CTS Request to Send Clear...

Страница 47: ...tarbridge Networks Lynx L 525 4 Port and Wireless Modem Page 47 of 56 Station Info The Station Info page shows stations that have been authorized access to the Lynx L 525 through its wireless function...

Страница 48: ...525 4 Port and Wireless Modem Page 48 of 56 Troubleshooting Diagnostics The diagnostics screen allows you to run diagnostic tests to check your DSL connection In addition you can test the connection t...

Страница 49: ...intaining the system including backing up the configurations viewing system log maintaining access control updating software etc Settings Backup Settings To save a copy of the configurations that you...

Страница 50: ...you want to restore and click on Update Settings The Lynx L 525 will restore settings and automatically reboot to activate the restored settings Restore Default Restore Default will erase all current...

Страница 51: ...525 will restore the default settings and automatically reboot System Log The System Log dialog allows you to view the System Log and configure the System Log options To view the System Log click on t...

Страница 52: ...is Remote or Both events will be sent to the specified IP address and UDP port of a remote system log server If the selected mode is Local or Both events will be recorded in the local memory Select th...

Страница 53: ...hronize your time with a timeserver on the Internet If you choose to automatically synchronize with Internet time servers then click on the box and the fields below appear Select from the list of NTP...

Страница 54: ...e configured Services Services that can be enabled disabled on the LAN WAN are FTP HTTP ICMP SNMP SSH Telnet and TFTP IP Addresses Web access to the Lynx L 525 can be limited when Access Control Mode...

Страница 55: ...sswords screen under the Access Control section Select an account and enter the current password and the new password and then click on the Save Apply button Update Software If your ISP releases new s...

Страница 56: ...Port and Wireless Modem Page 56 of 56 Reboot Lynx L 525 Select Management Reboot Router to reboot the Lynx L 525 using the web interface The Lynx L 525 will save the current configuration and reboot i...

Отзывы: