background image

4

POWER SUPPLY

Models 530TD and 530TED are wired at the factory for operation on a single phase power supply.  

For specific wiring, check the wiring diagram.

OPERATING INSTRUCTIONS

PLACE THE LAMINATED WARNING SIGN SUPPLIED WITH THE FRYER IN AN 
AREA VISIBLE TO THE FRYER OPERATOR.

CLEAN KETTLE BEFORE USING

Take out baskets, push and hold element catch, lift up on element lift handle until elements lock 

in a vertical position, and remove kettle.  The kettle can be cleaned in a sink like any other pot or 

container.

ADDING FAT

Replace kettle and swing the element down, making fryer ready for use.  Add fat.  Each kettle 

has a 5 lb. fat capacity.  A fat level line on the rear of the kettle will guide you in determining the 

minimum cold fat level.  A higher fat level can be used when frying bulky foods, such as chicken 

or fish cakes.  The fat level should be chosen carefully so that the foaming action of the fat does 

not spill out of the kettle.  If solid shortening is used, pack carefully around the elements.

CONTROLS

1.  ON/OFF TWO-POLE SWITCH - Located on the front panel is a two-pole switch which turns 

power on or off.  An indicator light (Power On) is located on the control housing.

2.  THERMOSTAT CONTROL - Located on the Control Housing, this control allows you to select 

the desired frying temperature. A signal light "Heating" indicates when the element is on.  When 

the light goes off, the desired temperature has been reached.

3.  HI-LIMIT THERMOSTAT - Should fat temperatures reach 450° F (230° C), this control will 

shut off the power to the heating elements.  The unit will still have power.  The fat temperature  

must cool to 400° F (202.4° C) and the manual reset button located on the back panel of the 

control housing must be pressed to restore operation.  Should the hi-limit control activate 

twice in succession, the primary thermostat should be checked for malfunction by a qualified 

service technician.  Each pot is equipped with its own HI-LIMIT THERMOSTAT.

FRYING

After fat has been added, turn the switch on and set the thermostat at 200° F (92.4° C).  After 

the fat has melted, turn the thermostat to the desired setting.  Included in this instruction booklet 

is a frying chart and some helpful hints on fat use.  After the selected fat temperature has been 

reached, slowly lower half filled baskets into the fat.  Do not overload baskets as this causes 

foods to be improperly fried.

NOTE:  Baskets should be allowed to drain after frying cycle.  The kettle handles serve 
as basket hangers.

IDLING

During idle periods turn thermostat control to approximately 200° F (92.4° C).  The fast recovery 

fryers can be brought up to frying temperature in a matter of minutes.  Lowering the temperature 

during idle periods saves energy costs and prolongs fat life.

DRAINING KETTLE

Turn switch to "OFF".  Raise element to the first stop and allow to drain.  Raise the element to the 

vertical position and siphon the oil out of the kettle.  

DO NOT ATTEMPT TO REMOVE THE KETTLE FILLED WITH HOT OIL.  CONTACTING 
HOT OIL CAN RESULT IN SEVERE INJURIES OR DEATH.  

If you do not have a siphon, order one from your dealer or dip the oil out and strain into a 

container.  After oil has been removed, remove the kettle and clean.  


CLEANING THE EXTERIOR

The exterior surfaces can be cleaned by regularly wiping with a soft cloth.   

Any discoloration can be removed with a non-abrasive cleaner.

CAUTION

CAUTION

CAUTION

Содержание 530TD Series

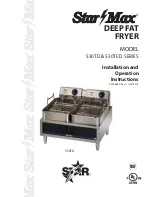
Страница 1: ... DEEP FAT FRYER MODEL 530TD 530TED SERIES Installation and Operation Instructions 2M Z6600 Rev C 1 26 2010 530TD ...

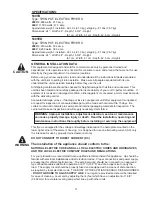
Страница 2: ...n information provided or conclusions reached as a result of using the specifications By using the information provided the user assumes all risks in connection with such use MAINTENANCE AND REPAIRS Contact your local authorized service agent for service or required maintenance Please record the model number serial number voltage and purchase date in the area below and have it ready when you call t...

Страница 3: ...ounted on the lower right corner of the element housing It is designed for use on alternating current AC only It is intended for use by properly trained personnel only DO NOT CONNECT TO DIRECT CURRENT DC The installation of the appliance should conform to the NATIONAL ELECTRIC CODE AND ALL LOCAL ELECTRIC CODES AND ORDINANCES AND THE LOCAL ELECTRIC COMPANY RULES AND REGULATIONS For your protection ...

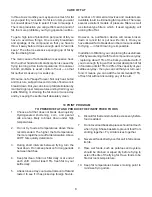
Страница 4: ...er The fat temperature must cool to 400 F 202 4 C and the manual reset button located on the back panel of the control housing must be pressed to restore operation Should the hi limit control activate twice in succession the primary thermostat should be checked for malfunction by a qualified service technician Each pot is equipped with its own HI LIMIT THERMOSTAT FRYING After fat has been added tu...

Страница 5: ...ontacts the skin Hot oil is flammable Keep open flames away from hot oil and its vapors Never allow water or ice to get in hot oil IT CAN EXPLODE WARNING ENVIRONMENT Keep your floors clean and free of grease and all other substances so no one slips accidentally and contacts the hot fryer Keep areas and filters clean above your fryers Oil soiled lint or dust can ignite easily and flames will spread rapi...

Страница 6: ...s caused by frying too long at too low temperatures One answer to both problems is exact control of heat so that fat neither smokes up nor soaks up Of course no fat keeps forever Not only heat but air andmoisture saltparticlesandcrumbsoffoodworkto break it down But you can slow up fat deterioration by maintainingpropertemperaturesandbydrainingyour kettle filtering or straining the fat once or twic...

Страница 7: ...ops Breading 350 4 Shrimp Batter Some prefer soaking 1 2 hour in cold seasoned milk 350 3 Smelts Breading Cut spinal cord several 350 4 places to prevent curling MEATS Chicken Fried Steak Breading Sever all connecting membranes at one inch intervals to prevent curling 360 3 4 Cutlets Breading 350 3 4 Chops Breading 340 3 4 Meat Balls Breading or rolled in flour 340 4 6 Brains Breading 340 3 5 VEGE...

Страница 8: ...r any other non food object tha comes in continuous contact with the roller coating This warranty does not apply to the non stick properties of such materials This warranty does not apply to Special Products but to regular catalog items only Star s warranty on Special Products is six 6 months on parts and ninety 90 days on labor This warranty does not apply to any item that is disassembled or tamp...

Страница 9: ...LY BLOCK E E MODEL 530TE TED MODEL 530T TD 208V 1 PH 240V 1 PH 208V 1 PH 240V 1 PH 6910 33 2 8 9200 38 3 8 8638 41 5 8 11500 47 9 6 WATTS AMPS SUPPLY MIN AWG FOR SUPPLY CONNECTION USE COPPER WIRE RATED AT LEAST 90 C MODEL GR CG10I 230 240V GR CG14I 230 240V THIS DRAWING CONTAINS INFORMATION CONFIDENTIAL TO STAR MFG INT L INC NO REPRODUCTION OR DISCLOSURE OF ITS CONTENTS IS PERMITTED STAR MANUFACTU...

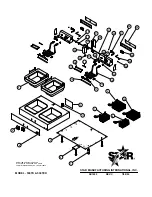
Страница 10: ...EL 530TD 530TED CERTAIN INSTANCES MAY NOT BE AVAILABLE SK1602 REV C 7 08 05 ILLUSTRATIVE PURPOSES ONLY AND IN SOME ITEMS ARE INCLUDED FOR 1 2 4 8 7 9 10 14 24 25 17 18 21 22 27 29 3 20 5 15 23 28 32 31 30 33 38 34 37 19 12 11 13 16 6 36 35 39 26 ...

Страница 11: ... TUBE 16 2N Y5168 2 ELEMENT 240V 5750W 530TD 2N Y5169 2 ELEMENT 240V 4600W 530TED 17 E1 Y1889 2 BRACE ELEMENT LONG 18 E1 Y1890 2 BRACE ELEMENT SHORT 19 E1 7363 2 CLAMP THERMOSTAT BULB 20 2I 5659 4 GROMMET CAPILLARY TUBE 21 2R Z1298 2 KNOB THERMOSTAT 22 E1 116314 2 SIGNAL LIGHT POWER ON WHITE 23 E1 116313 2 SIGNAL LIGHT HEATING AMBER 24 2A 5401 2 PIN COTTER 3 4 25 E1 Y5108 2 ROD CATCH RELEASE 26 2T...

Страница 12: ...STAR INTERNATIONAL HOLDINGS INC COMPANY Star Holman Lang Wells Bloomfield Toastmaster 10 Sunnen Drive St Louis MO 63143 U S A 800 807 9054 314 781 2777 Parts Service 800 807 9054 www star mfg com ...

Отзывы: