


GPS chartplotters
Page 15
2. GETTING STARTED
2.0
MOUNTING THE GPS CHARTPLOTTER
The GPS chartplotter is supplied with hardware for bracket or flush mounting. Below are
pictures showing actual examples of the two types of installation.
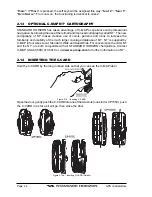
2.1
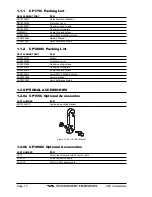
BRACKET MOUNTING
The GPS chartplotter can be mounted using the supplied bracket. Before installing ensure
the area the plotters bracket is mounted to is strong enough to support the weight of the
chartplotter especially while under way.
After the location is found, attach the mounting base to the area using the supplied hardware.
Figure 2.1 - Installing/removing chartplotter (Bracket)
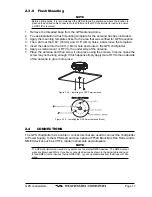
2.2
FLUSH MOUNTING
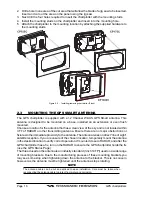
The GPS chartplotter is supplied with a flush mount template for the cutout hole and screw
holes required to install the chartplotter.
NOTE
Before drilling holes ensure there are no obstructions behind the location that could interfere with
the mounting and there is physically enough room to mount the chartplotter.
1. After a location is found, peal the template label from the backing and apply the label
to the mounting area.
Содержание CP1000C
Страница 1: ...CP155C CP175C CP1000C GPS Chartplotter Owner s Manual ...
Страница 8: ...Page 10 GPS chartplotters ...
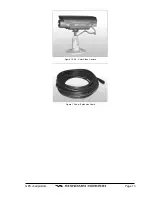
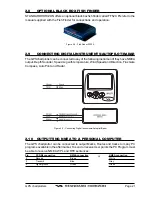
Страница 11: ...GPS chartplotters Page 13 Figure 1 2 0b Color Video Camera Figure 1 2 0ba Extension Cable ...
Страница 12: ...Page 14 GPS chartplotters ...
Страница 34: ...Page 36 GPS chartplotters ...
Страница 40: ...Page 42 GPS chartplotters ...
Страница 42: ...Page 44 GPS chartplotters ...
Страница 46: ...Page 48 GPS chartplotters ...
Страница 50: ...Page 52 GPS chartplotters ...
Страница 64: ...Page 66 GPS chartplotters ...
Страница 68: ...Page 70 GPS chartplotters ...
Страница 70: ...Page 72 GPS chartplotters ...


