background image

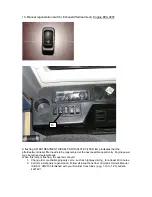
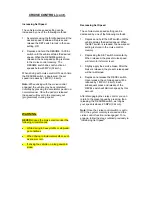
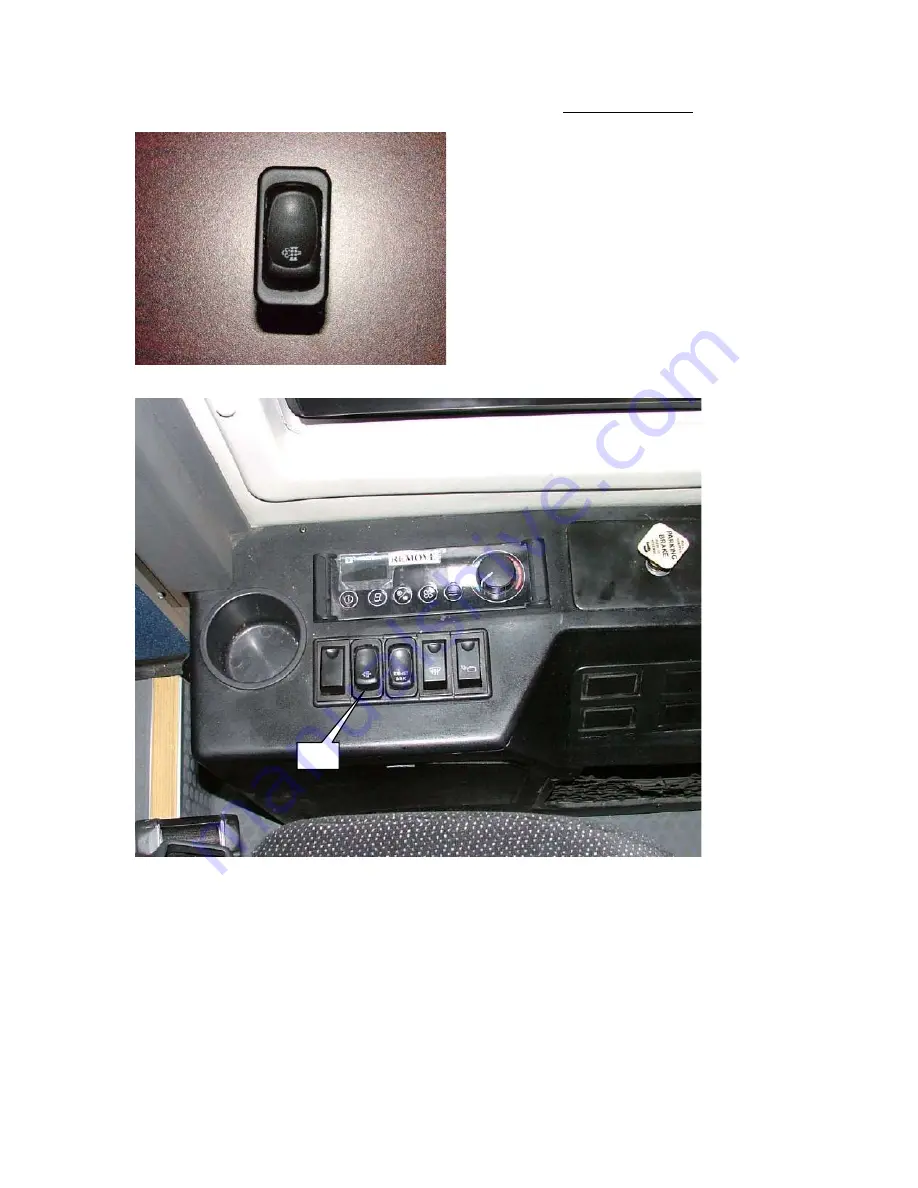
13- Manual regeneration switch ( Exhaust Aftertreatment)  Engine EPA 2007


13


A flashing AFTERTREATMENT DIESEL PARTICULATE FILTER lamp indicates that the 
aftertreatment diesel filter needs to be regenerated at the next possible opportunity. Engine power 
may be reduced automatically. 
When this lamp is flashing, the operator should: 

1-  Change to more challenging duty cycle , such as highway driving , for at least 20 minutes. 
2-  Perform a stationary regeneration. Follow all instructions from Cummins Owners Manual 

ISB 6.7L CM2150 furbished with your Sunliner Coach Bus ( pag, 1-19 to 1-25) bulletin 
4021601. 

Содержание SLC938

Страница 1: ...Model SLC938 Sunliner Coach Corona California U S A ...

Страница 2: ...maintain all systems and components in serviceable and working condition Always maintain and operate this coach with parts and information provided by Sunliner Coach for many years of trouble free driving and a safe and comfortable travel experience PLEASE READ BEFORE OPERATING THIS VEHICLE THIS OPERATOR MANUAL MUST REMAIN WITH THE VEHICLE THROUGHOUT ITS SERVICE LIFE AND MUST BE TRANSFERRED TO ANY...

Страница 3: ...GENERAL INFORMATION EXTERIOR COMPONENTS INTERIOR COMPONENTS CONTROLS MECHANICAL TRANSMISSION ELECTRICAL ACCESSORIES OPTIONS ...

Страница 4: ...1 GENERAL INFORMATION Sunliner Coach Corona California U S A ...

Страница 5: ...hicle complies with all Federal Motor Vehicle Safety Standards for operation of a vehicle on public roadways in effect at the time of manufacture This plate is located on the first step on the aisle side of the driver s seat Information such as manufacturer s name and address date of manufacture gross vehicle weight tire type and pressures and are also on this plate Refer to the VIN whenever reque...

Страница 6: ...ide of coach for any fluid leaks or damage Check undercarriage for obstructions and debris Make sure that windshield exterior mirrors headlights and windows are clean Check all lights interior exterior and instruments for function Adjust exterior and interior mirrors for best view from the driver s position Walk down the aisle and check for loose items on the seats stanchions and overhead storage ...

Страница 7: ...__ __________________________ 2 MIRRORS _______________________ __________________________ 3 HEADLIGHTS ____________________ __________________________ 4 TAIL LIGHTS _____________________ __________________________ 5 BODY DAMAGE ___________________ __________________________ 6 WINDSHIELD WIPERS _____________ __________________________ 7 DOORS WINDOWS _______________ __________________________ SAFE...

Страница 8: ...the event of fire get the vehicle out of traffic IMMEDIATELY Park in an open area away from underpasses or bridges if possible Shut down the vehicle Open the doors and make sure that all passengers exit the vehicle in an orderly and safe manner Direct all passengers away from the vehicle and a safe distance from the roadway Call for assistance from firefighters and emergency personnel DO NOT ATTEM...

Страница 9: ...torque checking is to follow always be sure to check bus frame to chassis rail anchorage at front and back of pass through luggage compartment Torque Specifications Table 5 for ASME Thread Fasteners with dry plain threads Flanged Grade 8 Bolt Grade G nut 5 8 11 190 lbf ft 258 N m Torque Specifications Table 6 for Metric Thread Fasteners with plated threads Class 10 9 Bolt Class 10 Nut M 16 2 0 148...

Страница 10: ...cloth to prevent stain rings from excess solvent Warning Use solvents in a well ventilated area away from ignition sources and open flame Keep all windows and doors of the vehicle being cleaned open use appropriate breathing apparatus or fume masks Method Two 1 Wet the stain with a solution of household detergent and lukewarm water Do not flood or over soak the stain 2 Wipe the stain with a damp c...

Страница 11: ...inless steel cleaner and follow the manufacturer s directions AVOID using abrasive pads or steel wool to clean stainless steel surfaces FORMICA Formica surfaces may be cleaned with a solution of warm water and household detergent methylated spirits or mineral turps Clean with a mild abrasive and water solution scouring powder if needed CARPET Vacuum carpeting regularly to prolong carpet life Clean...

Страница 12: ...ash soap and water Dry then wax with quality automotive protectant wax Insect Residue Bird Droppings Remove insect stains and bird droppings immediately to prevent etching of painted surfaces and discoloration of plastics Use lukewarm water and mild car wash soap or commercial bug tar remover for insect residue Follow with a quality wax to protect cleaned areas Tree Sap Wash off immediately with l...

Страница 13: ...aining is required clean main tank by repeating the draining and filling operations with the drain valves open Once done close the valves and drop in a packet of commercial toilet deodorant into the toilet before starting the final filling of the main tank Warning The toilet deodorant package contains chemicals that will irritate the skin Use rubber gloves when handling Caution When cold weather i...

Страница 14: ...rain valve assure it is functioning correctly after the system has reached full pressure See your maintenance manual Fuel Water Separator Open the drain valve on the bottom of the water separator daily Close valve after service Coolant Level Check coolant level Level is correct when visible at the level window of the surge tank If coolant level is low fill surge tank with a 50 50 mix of ethylene g...

Страница 15: ...2 EXTERIOR COMPONENTS Sunliner Coach Corona California U S A ...

Страница 16: ...ector marker lamp Yellow 3 Fog Lights 11 Luggage Compartments 3 Streetside 4 High Beam Headlights 12 Radiator Access Door 5 LED Parking Lamps 13 Side reflector marker lamp rear Red 6 Low Beam Headlights 14 Side Marker Lamp Rear Red 7 Front Park Turn Lamps 15 Side Marker Lamp Center Yellow 8 Main Electrical Compartment 16 Side marker Lamp Front Yellow 17 Front Clearence lamp Front Yellow ...

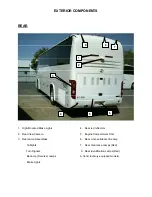
Страница 17: ...ts 4 Rear red reflectors 2 Rear View Camera 5 Engine Compartment Door 3 Rear Lamp Assemblies 6 Rear License Bracket Lamp Taillights 7 Rear Clearance Lamps Red Turn Signals 8 Rear Identification Lamps Red Back Up Reverse Lamps 9 Vent lavatory equipped models Brake Lights ...

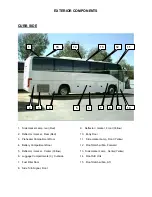
Страница 18: ...tor marker Rear Red 10 Entry Door 3 Preheater Compartment Door 11 Side marker Lamp Front Yellow 4 Battery Compartment Door 12 Roof Hatch w Fan Forward 5 Reflector marker Center Yellow 13 Side marker Lamp Center Yellow 6 Luggage Compartments 3 Curbside 14 Roof A C Unit 7 Fuel Filler Door 15 Roof Hatch w Fan Aft 8 Side Turn Signal Front ...

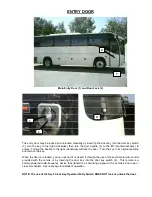
Страница 19: ...the door Turn the key to its original position and remove the key When the door is unlocked you can opened it or closed it through the use of the keychain remote control provided with the vehicle or by inserting the door key into the door key switch 4 This remote is a battery powered radio frequency device that transmits a short range signal to the vehicle s door open close mechanism See next page...

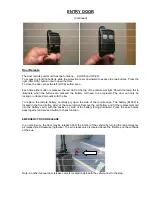
Страница 20: ...ed manually with the key To replace the remote battery carefully pry open the side of the remote case The battery 2032 is located in the front button side of the case interior Remove the old battery and fit the replacement cell into the battery cavity with the positive side of the battery facing downward Press the case halves back together and press a button to check function EMERGENCY DOOR RELEAS...

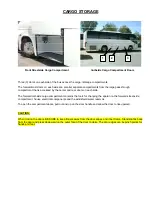
Страница 21: ...ide The forward curbside cargo compartment contains the tools for changing the spare tire the forward street side compartment house electrical components and the windshield water reservoir To open the compartment doors pull out and up on the door handle and allow the door to rise upward CAUTION When closing the doors BE SURE to keep fingers away from the door edges and inner frame Stand slightly b...

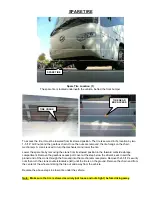
Страница 22: ...ower the spare tire by removing the crank from its stowed position in the forward curbside storage compartment Remove the gearbox access port cover at the step below the driver s seat Insert the pinned end of the crank through the hole and into the mechanism receptacle Remove the1 5 16 security nuts then turn the crank counterclockwise left until the tire is on the ground Remove the chain end from...

Страница 23: ...3 INTERIOR COMPONENTS Sunliner Coach Corona California U S A ...

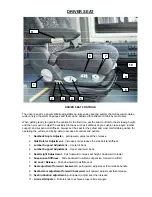
Страница 24: ...ehicle and being able to access all controls and pedals 1 Seatback Angle Adjuster pull upward adjust seat then release 2 Side Bolster Adjustment Increases or decreases the side bolster stiffness 3 Lumbar Support Adjustment Center of back 4 Lumbar Support Adjustment Upper and lower back 5 Seat Height Adjustment Push upward to raise seat height downward to lower 6 Suspension Stiffness Slide backward...

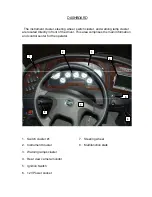
Страница 25: ...ated directly in front of the driver This area comprises the main information and control center for the operator 2 3 1 4 5 8 7 6 1 Switch cluster 1 7 Steering wheel 2 Instrument Cluster 8 Multifunction stalk 3 Warning lamps cluster 4 Rear view camera monitor 5 Ignition Switch 6 12V Power socket ...

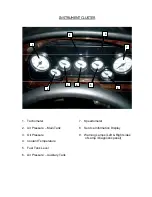
Страница 26: ... 5 2 6 1 Tachometer 7 Speedometer 2 Air Pressure Main Tank 8 Service Information Display 3 Oil Pressure 9 Warning Lamps Left Right sides of Lamp Diagnostic panel 4 Coolant Temperature 5 Fuel Tank Level 6 Air Pressure Auxiliary Tank ...

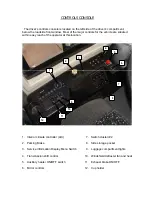
Страница 27: ...ithin easy reach of the operator at this location 4 5 3 2 6 1 7 8 9 11 10 12 1 Interior climate controller A C 7 Switch clusterl 2 2 Parking Brake 8 Side storage pocket 3 Service Information Display Menu Switch 9 Luggage compartment lights 4 Transmission shift control 10 Windshield defroster fan and heat 5 Auxiliary heater ON OFF switch 11 Exhaust brake ON OFF 6 Mirror controls 12 Cup holder ...

Страница 28: ...enerated at the next possible opportunity Engine power may be reduced automatically When this lamp is flashing the operator should 1 Change to more challenging duty cycle such as highway driving for at least 20 minutes 2 Perform a stationary regeneration Follow all instructions from Cummins Owners Manual ISB 6 7L CM2150 furbished with your Sunliner Coach Bus pag 1 19 to 1 25 bulletin 4021601 ...

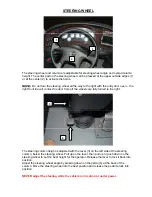
Страница 29: ...f the wheels are fully turned to the right 3 4 The steering column height is adjusted with the lever 3 on the left side of the steering column below the steering wheel Pull up on the lever then pull up or push down on the steering wheel to set the best height for the operator Release the lever to lock it back into position Adjust the steering wheel angle by pressing down on the pedal 4 at the base...

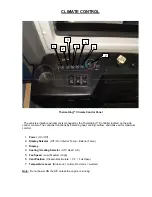
Страница 30: ...er functions by balancing heat cooling airflow and intake air for maximum comfort 1 Power On Off 2 Display Selector Off On Interior Temp Exterior Temp 3 Display 4 Cooling Heating Selector Off Heat A C 5 Fan Speed Low Medium High 6 Vent Position Closed Recirculate 1 2 Full Open 7 Temperature Level Blue zone colder Red zone warmer Note Do not power ON the A C unless the engine is running ...

Страница 31: ...4 CONTROLS Sunliner Coach Corona California U S A ...

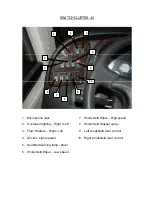
Страница 32: ... Windshield Wiper High speed 2 Overhead lighting Right Left 8 Windshield Washer spray 3 Floor Heaters Right Left 9 Left windshield visor control 4 Driver s Lights power 10 Right windshield visor control 5 Seat Belt warning lamp driver 6 Windshield Wiper Low speed ...

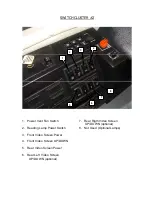
Страница 33: ...er Vent Fan Switch 7 Rear Rigth Video Screen UP DOWN optional 2 Reading Lamp Power Switch 8 Not Used Optional Lamps 3 Front Video Screen Power 4 Front Video Screen UP DOWN 5 Rear Video Screen Power 6 Rear Left Video Screen UP DOWN optional ...

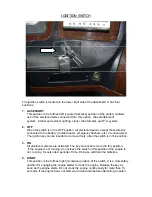
Страница 34: ...lashers etc are unpowered The ignition key can be inserted or removed only when the switch is in this position 3 ON All electrical systems are activated The key cannot be removed in this position If the engine is not running do not leave the switch in this position if the engine is not running for extended periods of time Doing so will drain the batteries 4 START This position is the furthest righ...

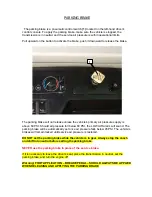
Страница 35: ...hould air pressure fall below 60 PSI the LOW AIR alarm will sound The parking brake will be automatically set once air pressure falls below 45 PSI The vehicle s brakes will remain locked until service air pressure is restored DO NOT set the parking brake while the vehicle is in gear Always stop the coach and shift into neutral before setting the parking brake NEVER use the parking brake in place o...

Страница 36: ...osition The first position to the right Parking lights will turn on the exterior clearance parking and side marker lamps The second position Headlights activates the low beam headlamps and parking lamps To activate fog lamps pull upward on the switch Note Fog lights will be turned off anytime the high beam headlights are activated Instrument lighting is controlled by the roller switch to the right...

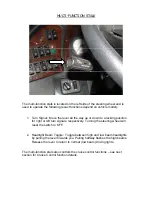
Страница 37: ...ing position for right or left turn signals respectively Turning the steering wheel will reset the switch to OFF 2 Headlight Beam Toggle Toggle between high and low beam headlights by pulling the lever towards you Pulling halfway flashes the high beams Release the lever to return to normal low beam driving lights The multi function stalk also controls the cruise control functions see next section ...

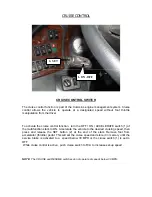
Страница 38: ...E switch 1 of the multifunction stalk to ON Accelerate the vehicle to the desired cruising speed then press and release the SET button 2 at the end of the stalk Remove foot from accelerator throttle pedal This will set the cruise speed and store it in memory until the service brake is activated to a speed below 30 MPH or the cruise switch 1 is set to OFF While cruise control is active push cruise ...

Страница 39: ...c or stop and go conditions When driving in inclement weather such as snow or rain If driving the vehicle on a long downhill slope Decreasing Set Speed The vehicle cruise speed setting can be decreased by one of the following methods 1 Depress and hold the SET switch until the vehicle attains the desired speed When the SET switch is released the new speed setting is stored in the cruise control me...

Страница 40: ...5 MECHANICAL Sunliner Coach Corona California U S A ...

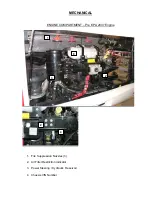
Страница 41: ...MECHANICAL ENGINE COMPARTMENT Pre EPA 2007 Engine 1 8 2 3 2 4 1 Fire Suppression Nozzles 3 2 Air Filter Restriction Indicator 3 Power Steering Hydraulic Reservoir 4 Chassis VIN Number ...

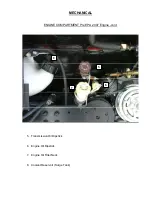
Страница 42: ...MECHANICAL ENGINE COMPARTMENT Pre EPA 2007 Engine cont 8 5 6 7 5 Transmission Oil Dipstick 6 Engine Oil Dipstick 7 Engine Oil Filler Neck 8 Coolant Reservoir Surge Tank ...

Страница 43: ... 3 Belt ref BX 68 QTY 2 Adjust belt tension with item C ENGINE TRANSMISSION FLUIDS Pre EPA 2007 Engines Steering SAE 15w40 C1 4 motor oil Engine Oil meet or exceed CES 20078 SAE 15w40 heavy duty engine oil Consult your Cummins Engine Manual Transmission TranSynd full synthetic transmission fluid Diesel ASTM number 2D diesel Consult your Cummins Engine Manual Coolant Heavy duty coolant 50 50 ASTM D...

Страница 44: ...MECHANICAL ENGINE COMPARTMENT EPA 2007 Engine 1 8 3 2 1 3 5 7 6 4 2 ...

Страница 45: ... Engine cont 1 Fire Suppression Nozzles 3 2 Air Filter Restriction Indicator 3 Power Steering Hydraulic Reservoir 4 Chassis VIN Number 5 Transmission Oil Dipstick 6 Engine Oil Dipstick 7 Engine Oil Filler Neck 8 Coolant Reservoir Surge Tank ...

Страница 46: ... belt tension with item C ENGINE TRANSMISSION FLUIDS EPA 2007 Engines Steering Automatic Transmission Fluid DEXRON III Engine Oil meet or exceed CES 20078 or CES 20081 SAE 15w40 heavy duty engine oil Consult your Cummins Engine Manual Transmission TranSynd full synthetic transmission fluid Diesel Ultra low sulfur diesel ASTM S 15 number 2D diesel Consult your Cummins Engine Manual Coolant Heavy du...

Страница 47: ...ool down before attempting a restart Note Do not press the accelerator pedal when starting the engine This is a fuel injected engine and does not require throttle fuel pedal action Doing so may cause an electronic control unit fault that will prevent the vehicle from starting If the accelerator pedal is pressed before starting wait 30 seconds before attempting to restart Caution Special precaution...

Страница 48: ......

Страница 49: ......

Страница 50: ......

Страница 51: ......

Страница 52: ......

Страница 53: ......

Страница 54: ......

Страница 55: ...6 TRANSMISSION Sunliner Coach Corona California U S A ...

Страница 56: ...TRANSMISSION USED WITH PERMISSION Jan 2008 ...

Страница 57: ...TRANSMISSION ...

Страница 58: ...TRANSMISSION ...

Страница 59: ...TRANSMISSION ...

Страница 60: ...TRANSMISSION ...

Страница 61: ...TRANSMISSION Refer to the Allison Transmission section of your Stallion Bus Maintenance Manual for diagnostic code details ...

Страница 62: ...TRANSMISSION ...

Страница 63: ...TRANSMISSION ...

Страница 64: ...TRANSMISSION ...

Страница 65: ...TRANSMISSION ...

Страница 66: ...TRANSMISSION ...

Страница 67: ...TRANSMISSION ...

Страница 68: ...TRANSMISSION ...

Страница 69: ...TRANSMISSION ...

Страница 70: ...TRANSMISSION ...

Страница 71: ...TRANSMISSION ...

Страница 72: ...TRANSMISSION NOTE CUMMINS ENGINE COMES EQUIPED WITH AN EXHAUST BRAKE IN LIEU OF TRANSMISSION RETARDER ...

Страница 73: ...TRANSMISSION ...

Страница 74: ...TRANSMISSION ...

Страница 75: ...TRANSMISSION ...

Страница 76: ...TRANSMISSION ...

Страница 77: ...TRANSMISSION ...

Страница 78: ...TRANSMISSION ...

Страница 79: ...TRANSMISSION ...

Страница 80: ...TRANSMISSION ...

Страница 81: ...TRANSMISSION ...

Страница 82: ...TRANSMISSION ...

Страница 83: ...TRANSMISSION ...

Страница 84: ...TRANSMISSION ...

Страница 85: ...TRANSMISSION ...

Страница 86: ...TRANSMISSION ...

Страница 87: ...TRANSMISSION ...

Страница 88: ...TRANSMISSION ...

Страница 89: ...TRANSMISSION ...

Страница 90: ...TRANSMISSION ...

Страница 91: ...7 ELECTRICAL Sunliner Coach Corona California U S A ...

Страница 92: ...sconnects It is physically separated from the main engine compartment The following items are located in the electrical compartment vehicle configuration dependent Engine pre EPA 2007 12 Volt batteries Chassis fuse relay center 355 1 Chassis fuse relay center 296 2 Body main power relay 3 Floor heaters fuses 4 To access the compartment release the safety catches and open the door 3 2 1 4 2 ...

Страница 93: ...ies Chassis fuse relay center 355 1 Chassis Parker Hydraulic fan control 2 Chassis fuse relay center 3 Body main power relay 4 Floor heaters fuses 5 Main Electrical Disconnect 6 To access the compartment release the safety catches and open the door 1 2 3 5 4 6 ...

Страница 94: ...RICAL COMPARTMENT JUNCTION BOX 1 4 2 6 5 3 1 Body main relay and fuse panel 2 Chassis fuse relay center 335 3 Windshield Washer Fluid Reservoir 4 Dash harness connectors 5 Lighting control module 6 Entry door pneumatic valve ...

Страница 95: ...wer Supply 2 Fuses 24V DC is supply to TV Monitors Air Conditioner controller unit and Air conditioner alternator excitation Current When 24Vdc excitation alternator is in place Note 24 Volt power supply unit optional location is in first luggage compartment roadside ...

Страница 96: ...ELECTRICAL 1 Main Electrical Disconnect Turn knob to OFF 0 to disconnect batteries from electrical system 2 1 Engine Pre EPA 2007 2 Engine Diagnostic Connector 1 Engine EPA 2007 ...

Страница 97: ...Lamp A7 12v 5W BRAKE LAMP LED BACK UP LAMP Miniature Lamp A7 12v 21W FRONT IDENTIFICATION LED LAMP YELLOW GROTE ref 45583 FRONT SIDE CLEARENCE AND MARKER LED LAMP YELLOW GROTE ref 45583 SIDE MARKER LAMP REAR RED LED GROTE ref 45582 REAR IDENTIFICATION CLEARENCE LED LAMP RED GROTE ref G5052 FRONT SIDE TURN SINGNAL LED LAMP GROTE ref 52323 SIDE REFLECTOR MARKER LED LAMP RED GROTE ref 47732 SIDE REFL...

Страница 98: ... BrW ELECTRIC HORN 14 G LOW HEADLIGHT CONTROL 15 LB RIGHT HIGHT HEADLIGHT 16 RL POWER SUPPLY WIDTH AND SWITCH CONTROL 17 Y CLEARENCE LIGHTS 18 LR POWER SUPPLY BACKUP LIGHT 19 V POWER SUPPLY RADIO 20 GrR POWER SUPPLY WINDSHIELD WIPER 22 ANTENA FOR RADIO 23 WR SWITCH FOR EMPTY GEAR 24 Y POWER SUPPLY OVERHEAD LIGHT L 25 FRONT FOG LIGHTS 26 GBr CONTROL FOR HIGH HEADLIGHT 27 BL CONTROL FOR FOGLIGHTS 28...

Страница 99: ...PEAKER 55 FRONT LEFT SPEAKER 56 FRONT LEFT SPEAKER 57 REAR LEFT SPEAKER 58 REAR LEFT SPEAKER 59 CONTROL FOR MAIN SWITCH OF POWER SUPPLY 60 STARTER 61 BRAKE AIR PRESSURE WARNING 1 62 WATER TEMPERATURE METER 63 FUEL METER 64 ODOMETER SENSOR 1 65 ODOMETER SENSOR 2 66 OVERHEAD LIGHT 2 L 67 LEFT LOW HEADLIGHT 68 BUTTON OF ELECTRIC HORN 69 BACKUP LIGHT 74 EXHAUST BRAKE SWITCH 75 OVERHEAD LIGHT 2 R 76 RI...

Страница 100: ...128 ABS SITUATION CONTROL 129 SPARE 130 ELECTRIC HORN 132 WARM UP CONTROL AND POWER SUPPLY FOR VENTILATOR 133 LOW SPEED CONTROL OF WIPER SWITCH 134 HIGH SPEED CONTROL OF WIPER SWITCH 135 SPARE 136 LEFT READING LIGTH 137 RIGHT READING LIGHT 138 READING LIGHT CONTROL 139 POWER FOR READING LIGHT 140 POWER SUPPLY ECAS CONTROL 141 POWER SUPPLY ECAS CONTROL 142 CONNECTOR OF WIPER RELAY 146 ABS INDICATOR...

Страница 101: ...505 12V POWER OUTPUT 506 12V POWER OUTPUT 507 SPARE 508 RELAY CONTROL 509 CAPACITOR GROUND 510 EXHAUST FAN DRIVER ...

Страница 102: ......

Страница 103: ......

Страница 104: ......

Страница 105: ......

Страница 106: ......

Страница 107: ......

Страница 108: ......

Страница 109: ......

Страница 110: ......

Страница 111: ......

Страница 112: ......

Страница 113: ......

Страница 114: ......

Страница 115: ......

Страница 116: ......

Страница 117: ......

Страница 118: ......

Страница 119: ......

Страница 120: ......

Страница 121: ......

Страница 122: ......

Страница 123: ......

Страница 124: ......

Страница 125: ......

Страница 126: ......

Страница 127: ......

Страница 128: ......

Страница 129: ......

Страница 130: ......

Страница 131: ......

Страница 132: ......

Страница 133: ......

Страница 134: ......

Страница 135: ......

Страница 136: ......

Страница 137: ......

Страница 138: ......

Страница 139: ...8 ACCESSORIES Sunliner Coach Corona California U S A ...

Страница 140: ... fresh air intake fluorescent lighting mirror toilet tissue dispenser and trash receptacle In the event of emergency the occupant may press the emergency button that will alert the driver via a light and buzzer on the driver s console The buzzer button and instructions for use are located on the inside wall of the lavatory 3 2 4 1 5 1 Commode 2 Flush Button 3 Toilet Tissue Dispenser 4 Emergency Ca...

Страница 141: ...y pressing the auxiliary heater switch located on the side switch console inside the bus The unit remains in operation until the power switch is turned OFF Always turn off the fuel supply valve when the unit is not needed Turn off the coolant line valves 6 7 when the unit requires service to isolate it from the cooling system 1 Preheater Compartment 2 Fuel Shutoff 3 Fuel Filter 4 Coolant Pump 5 Pr...

Страница 142: ...Corona California New York New York ...

Отзывы: