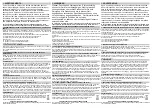
8. SMALTIMENTO
Al termine del ciclo di vita del prodotto, smaltirlo secondo quanto previsto dai
regolamenti locali. Questo prodotto contiene sostanze inquinanti per l'ambiente
e pericolose per la salute, è vietato smaltire il prodotto gettandolo nei rifiuti
domestici. E’ possibile riciclare gusci e cornice (vedi fig.B).
6. SOSTITUZIONE DELLA BATTERIA
Svitare le viti (6) e rimuovere la parte posteriore. Sfilare la batteria esausta (
fig. A
) e
sostituirla con una batteria carica dello
stesso tipo
, rispettando le polarità. Riposizionare
la parte posteriore (
fig. B
) e bloccarla con le viti (6). Smaltire la batteria esausta negli
appositi contenitori.
4. POSIZIONE PREFERITA (terzo finecorsa) SOLO CON MOTORI RX-E
Porta il motore nella posizione desiderata. Premi brevemente 6 volte STOP, poi GIU
per 5 sec. Il motore segnala con 2 movimenti. Memorizzato!
Per richiamare il terzo finecorsa:
Premi brevemente 3 volte STOP e attendi 2 sec..
3. FUNZIONE SOLE – DISCESA AUTOMATICA
Se LED (4) lampeggia durante la trasmissione, la “funzione sole” è inattiva. Se LED (4)
rimane acceso fisso durante la trasmissione, la “funzione sole” è attiva.
Per abilitare/disabilitare la “funzione sole” premi assieme STOP e SALITA per 3 secondi.
1. AVVERTENZE
Acqua, umidità, fonti di calore, cadute accidentali possono
danneggiare il dispositivo. Non utilizzare solventi o prodotti
abrasivi per la pulizia del prodotto. Tutti i prodotti e le
specifiche tecniche citati in questo documento sono soggetti
a variazioni senza preavviso. Il dispositivo deve essere
utilizzato esclusivamente con dispositivi riceventi della
stessa casa costruttrice. Il costruttore non può essere
considerato responsabile per eventuali danni derivanti da
usi impropri, erronei o irragionevoli.
593.T.X1.00
433,42 MHz
versione 1.0
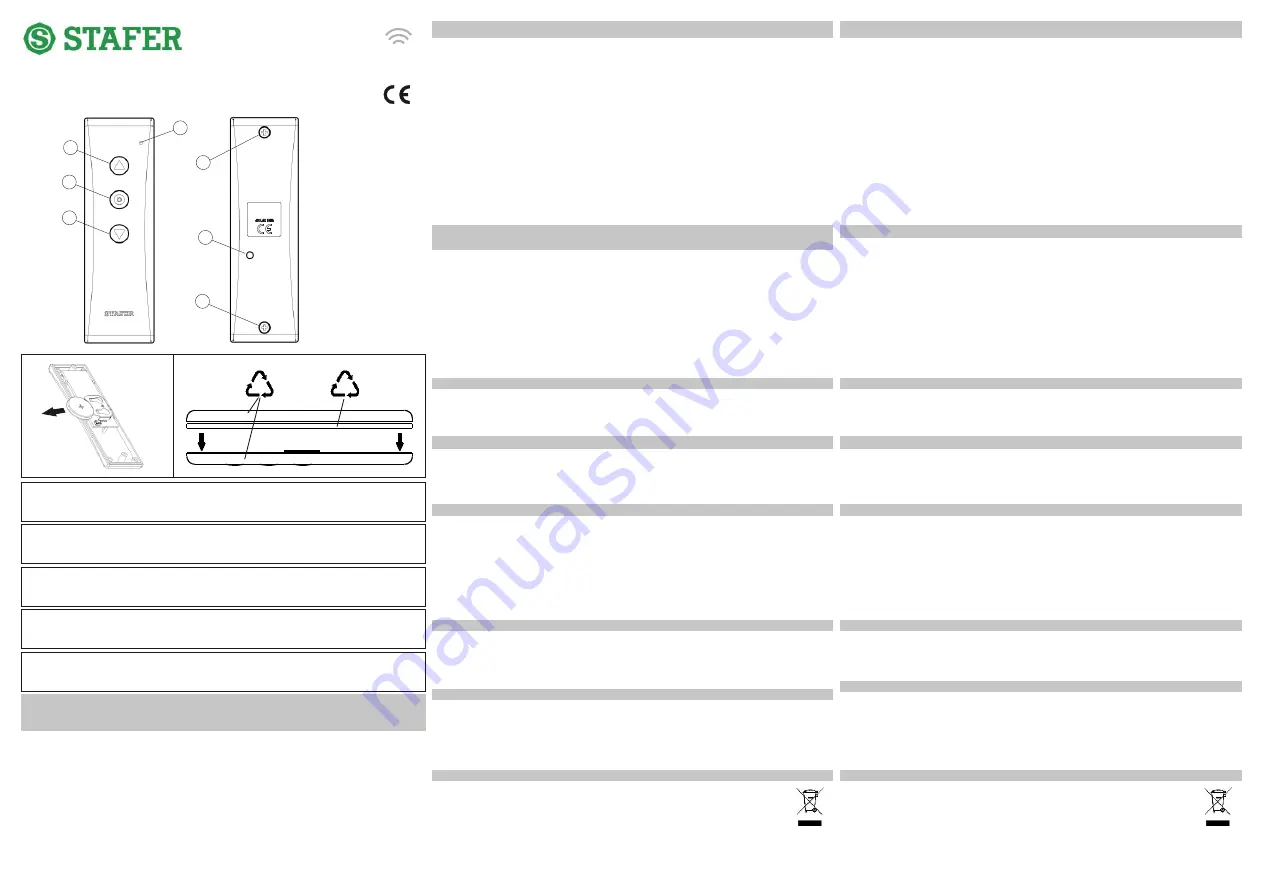
1 - tasto SALITA
2 - tasto STOP
3 - tasto DISCESA
4 - LED
5 - tasto PROG
6 - Viti di chiusura
1 - UP button
2 - STOP button
3 - DOWN button
4 - LED
5 - PROG button
6 - Closing screw
A
B
Descrizione
delle parti
Description
of parts
1
2
4
3
5
6
6
carta riciclata
MANUALE D’USO
www.stafer.com
DICHIARAZIONE DI CONFORMITA’ SEMPLIFICATA
Il fabbricante STAFER s.p.a. dichiara che il tipo di apparecchiatura radio è conforme alla
direttiva 2014/53/UE.
2. MEMORIZZARE/CANCELLARE UN ALTRO RADIOCOMANDO O DISPOSITIVO
RADIO
Porta il motore in posizione intermedia. Premi PROG di un trasmettitore già in memoria
per 5 secondi. Il motore effettua due movimenti in salita. Entro 15 secondi, per
memorizzare/cancellare:
un radiocomando: premi STOP del radiocomando da memorizzare/cancellare.
un sensore sole/vento: premi P1 del sensore da memorizzare/cancellare
un sensore pioggia: premi P2 del sensore da memorizzare/cancellare
Il motore eseguirà:
1 movimento su: dispositivo memorizzato!
1 movimento giù: dispositivo cancellato!
2 movimenti giù: errore!
7. RIPRISTINO DELLE CONDIZIONI DI FABBRICA (reset)
Porta il motore in posizione intermedia. Mantenendo premuto STOP premi anche PROG
per circa 1 sec., finchè il led si accende. Premi 2 volte SU e 9 volte GIU. Premi STOP. Il led
lampeggia, il motore effettua 8 movimenti. Premi SU e GIU contemporaneamente per
circa 2 sec., finchè il motore segnala che il reset è stato effettuato (2 movimenti su/giù).
Installa nuovamente il motore seguendo le istruzioni contenute nella confezione motore.
Di seguito l’elenco di alcune funzioni del radiocomando. Per visionare
tutte le funzioni complete vedere le istruzioni motore.
1 - bouton UP
2 - bouton STOP
3 - bouton DOWN
4 - LED
5 - bouton PROG
6 - Vis de fermeture
Description
des pièces
1 - aufwarts
2 - stop
3 - abwarts
4 - LED
5 - prog
6 - schraube
Beschreibungen
der Teile
1 - UP (Arriba)
2 - STOP (Paro)
3 - DOWN (Abajo)
4 - LED
5 - PROG (Programaciòn)
6 - Tornillo de cierre
Descripciones
de las partes
CARATTERISTICHE TECNICHE / TECHNICAL SPECIFICATIONS /
CARACTERISTIQUES TECHNIQUES / TECHNISCHE EIGENSCHAFTEN /
CARATERISTICAS TECNICAS
Alimentazione / Power supply / Alimentation / Stromversorgung / Alimentacion
:
n°1 batteria/battery/pile/batterie/bateria Cr2032
Temperatura di esercizio / Working temperature / Température de travail /
Betriebstemperatur / Temperatura ejercicio
:
0°C / +55 °C
Dimensioni / Dimensions / Dimensions / Abmessungen / Dimensiones
:
30x100x15 mm
Canali radio / Channels / Canaux radio / Funkkanäle / Canales
:
01
Frequenza radio / Frequency / Fréquence radio / Funkfrequenz / Frecuencia radio
:
433.42 MHz
5. ORIENTAMENTO
Permette di muovere a brevi scatti il motore. Utile con stecche orientabili. E’ possibile
regolare la durata degli scatti impostando un valore che va da 1 (non attivo) a 5.
Portare il motore in posizione intermedia. Mantenendo premuto STOP premi anche
PROG per circa 1 sec., finchè il led si accende. Premi una volta SU e 2 volte GIU.
Premi STOP. Il motore segnala il valore corrente (da 1 a 5). Premi GIU il numero di
volte pari all’impostazione desiderata (da 1 a 5). Premi STOP. Il motore segnala la
nuova impostazione (da 1 a 5 movimenti).
Per orientare premi brevemente 2 volte STOP e poi mantieni premuto SU o GIU.
GUSCI
CORNICE
8. DISPOSAL
At the end of the product life cycle, dispose materials complying with the law in
force in your locality. This product may have substances that are polluting for the
environment and dangerous for the health. It is strictly forbidden to dispose the
product on the domestic waste. Shells and frame can be recycled (see fig. B).
6. REPLACING THE BATTERY
Unscrew the screws (6) and remove the back. Remove the old battery (
fig. A
) and replace
it with a new battery of the
same type
, observing the polarity. Replace the back (
fig. B
)
and block with screws (6). Dispose of the old battery in the specific containers.
4. INTERMEDIATE LIMIT SWITCH (third limit switch) ONLY FOR RX-E MOTOR
Bring the motor to the preferred position. Press briefly 6 times STOP, then DOWN for
5 seconds. The motor makes 2 movements. Memorized!
To recall the preferred position:
Press briefly 3 times STOP and wait 2 seconds.
3. SUN FUNCTION – AUTOMATIC LOWERING FUNCTION
If the LED (4) flashes during transmission, the "sun function" is inactive. If the LED (4)
stays ON during transmission, the "sun function" is active.
To enable/disable the "sun function" press STOP and UP together for 3 seconds.
1. WARNING
Water, moisture, heat, accidental falls can damage the
device. Do not use solvents or abrasives to clean the
product. All products and technical characteristics on this
document are subjects to variations without any notice. The
device must be used only with receiving devices of the
same manufacturer. The manufacturer cannot be consider
responsible for damage caused by improper, incorrect or
unreasonable uses.
SIMPLIFIED DECLARATION OF CONFORMITY
The manufacturer, STAFER S.p.A., hereby declares that the type of radio device
complies with the provisions of Directive 2014/53/EU.
2. MEMORIZATION/DELETION OF ANOTHER TRANSMITTER OR RADIO DEVICE
Bring the motor to the intermediate position. Press PROG for a transmitter already saved
for 5 seconds. The motor will drive two ascent movements. Within 15 seconds, either to
save or delete:
a remote control: press STOP of the remote control you want to save or delete;
a sun/wind sensor: press P1 of the sensor you want to save or delete;
a rain sensor: Press P2 of the sensor you want to save or delete.
The motor will drive:
1 step up: Device saved!
1 step down: Device deleted!
2 steps down: Error!
7. RESET
Bring the motor to the intermediate position. While press STOP also press PROG for
about 1 sec., until the LED lights up. Press twice UP and 9 times DOWN. Press STOP.
The LED flashes, the motor performs 8 movements. Press UP and DOWN
simultaneously for about 2 sec., until the motor indicates that the reset has been carried
out (2 movements up/down). Reinstall the motor following the instructions contained in
the motor box.
Find below the list of some remote control functions. For the full list
of functions consult the motor instructions.
5. ORIENTATION
This function allows you to move the motor with small steps. Function useful for roller
blind composed of orientable elements. You can adjust the duration of the steps by
setting a value ranging from 1 (not active) to 5. Bring the motor to the intermediate
position. While press STOP also press PROG for about 1 sec., until the LED lights up.
Press once on UP and twice on DOWN. Press STOP. The motor shows the current
value (from 1 to 5). Press DOWN as many times as the setting you want (from 1 to 5).
Press STOP. The motor shows the new setting (from 1 to 5 movements).
For orientation press briefly twice STOP than press UP or DOWN.
ABS
MABS
STAFER


