All images are for illustration purposes only. Actual products may vary.
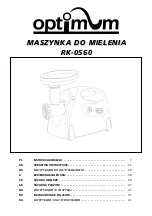
Meat Grinder
Operation Manual
5
Care and cleaning
1
Carefully wash and dry all parts which come
into contact with food – food pusher, feed
tray, grinder head, securing ring, grinding
plates, cutter, feed screw and sausage at-
tachment in warm, soapy water. Wipe the
main body with a damp cloth.
2
Coat the cutter and grinding plates in cook-
ing oil after washing and drying to protect
them from tarnishing.
Operating your appliance
1
Cut the food into pieces that will fit easily
into the feed head and place it onto the
feed tray. Make sure that meat does not
contain any bones.
2
Place a suitable container under the grin-
der to catch the minced food.
3
Switch on the meat grinder by turning the
“O/I” to “I” position. To start mincing the
meat turn the “ON/O/ R” switch to “ON” po-
sition.
3
Push the food into the feed tube with the
food pusher.
Reverse function
If the motor slows or stops, this may be due to
jammed food.
1
Switch the grinder off mmediately and wait
until grinder has come to a complete stop.
2
Set the switch to the reverse position to
push the food in the opposite direction.
3
If this does not solve the problem, switch
the grinder off and disconnect it from the
mains supply. Disassemble the grinding
head and clean the internal parts.
Making sausages
1
Insert the shaft of the feed screw into the
grinding head.
2
Attach the cutter to the feed screw.
3
Position the coarse grinding plate onto
the feed screw spindle. Locate the lugs on
either side of the cutting plate into the two
slots of the grinding head.
4
Insert the sausage nozzle through the
securing ring and screw the securing ring
onto the grinding head.
5
Loosen the locking knob and insert the
grinding head into the motor unit opening.
You may need to rotate it slightly until it is
seated fully in the motor unit. Tighten the
locking knob securely.
6
Slot the feed tray into the grinding head.
7
Insert the food pusher into the opening of
the grinding head.