background image

13


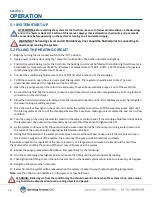
Filling and Emptying the Tank


To fill the tank, simply depressurize the tank, open the tank lid and fill to desired level. Make sure fluid source is +/

-


15°F of the process temperature. 


To empty the tank, either open the 3

-

way valve at the tank outlet to the draining port or use the spray controller to 

flush the tank contents through the spray nozzles or header. 


Heating the System


Set temperature on the heater via the heat controller on the front panel. Once the system is filled and the condition-
ing fluid is circulating properly, turn on the heater. Wait until the system reaches the desired setpoint. At this point 
the fluid has expanded to its full capacity, and any excess will escape the relief port on the return reservoir.


System Operation


To operate system, follow all startup procedures above. Set the tank pressure to the desired setpoint using the man-
ual pressure regulator on the tank. Make sure 2

-

way ball valve is open. Set the Atomizing Air pressure to the desired 

pressure using the regulator on the Air Control Panel. System is now ready to spray.


Содержание AutoJet AccuCoat MV10

Страница 1: ...1 ML00MV10HTSYS spray com AccuCoat MV10 Heated System OWNER S MANUAL...

Страница 2: ...ew 5 3 1 Product Feature 5 3 2 System Specifications 6 3 3 Optional Add Ons 7 3 4 Spray Control Panel Options 8 4 System Hook Up 9 4 1 Connections 9 4 2 Watlow Controller 11 5 Operation 12 5 1 System...

Страница 3: ...orrectly ATTENTION Supplementary information for the user draws attention to possible problems SECTION 2 SAFETY 2 1 GENERAL SAFETY INFORMATION READ AND FOLLOW INSTRUCTIONS All safety related and opera...

Страница 4: ...NG Fluids under pressure can penetrate skin and cause severe injury ATTENTION Always remember to carefully read the chemical manufacturer s labels follow SDS and all directions WARNING OF SHOCK HAZARD...

Страница 5: ...ration An immersion heater maintains the temperature set point of the heated fluid and by extension the process fluid A pressure gauge high limit switch turns the heater off at 650 F for fail safe pro...

Страница 6: ...Humidity Range 5 to 95 non condensing Enclosures NEMA 4 Weight Control Panel tank skid 360lb empty Dimensions 58 H x 45 L x 35 D Level Switches TDR Time Domain Reflectometry Level Sensor 4 F to 302 F...

Страница 7: ...Supply Unit and requires a level sensor connection to attach to the control panel The level sensor displays the current tank level as a percent to full The refill setpoint can be adjusted for user pr...

Страница 8: ...nel 1000 is only capable with electric actuated spray nozzles and air nozzles can only work with a single channel Features AutoJet 1000 AutoJet 1750 AutoJet 2150 HMI Touch Screen 4 3 4 3 7 Power Input...

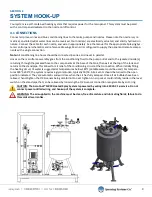
Страница 9: ...keted hose to the components at the base of the tank then exit at the top of the tank and returns to the standpipe This allows for air relief of the conditioning circuit at that connection When initia...

Страница 10: ...10...

Страница 11: ...to Refill on indicator when indicator is on Auto Refill is filling the tank Low Level indicator when indicator is on indicates the level in the tank is below the low level setpoint Heater controller u...

Страница 12: ...begin building pressure 9 Once the small yellow light on the sensor is lit allow the system to continue to fill for several minutes Wait until the inlet regulator at the top of the standpipe levels of...

Страница 13: ...ller on the front panel Once the system is filled and the condition ing fluid is circulating properly turn on the heater Wait until the system reaches the desired setpoint At this point the fluid has...

Страница 14: ...the tank has been initially filled and given the values in the above table as the system is being used the level in the tank will decrease Once the fluid reaches 250 mm from the bottom of the probe 63...

Страница 15: ...the PulsaJet gun s 6 Verify Trigger signal 7 Fluid may have solidified in supply lines reconfigure heating supply or increase temperature 8 Check nozzle for clogging 3 Conditioning Fluid pressure low...

Страница 16: ...ure if necessary Every 6 Months Tighten all screw terminal connections to insure proper bonding Every 12 Months Check component calibration and re calibrate if required See individual control componen...

Страница 17: ...gle phase 3450rpm 56C 60hz CP12290 7 SS Strainer Screen 200 Mesh SS TE00TM4341 Sensor temperature RTD 1 2 NPT 150mm tip length 40 302F range 316 stainless steel 4 pin micro DC connector HT00BEN314S6C2...

Страница 18: ...one 1 year on non wear parts from ship date Wear items are covered for manufacturing defect only for a period of one 1 year Wear items include but may not be limited to Liquid pump and Liquid regulat...

Отзывы: